– Welcome, everyone, to Wednesday Nite @ the Lab. I’m Tom Zinnen, I work here at the UW-Madison Biotechnology Center. I also work for UW-Extension Cooperative Extension, and on behalf of those folks and our other co-organizers, Wisconsin Public Television, the Wisconsin Alumni Association, and the UW-Madison Science Alliance, thanks again for coming to Wednesday Nite @ the Lab. We do this every Wednesday night, 50 times a year. Tonight it’s my pleasure to introduce to you both Catherine Jackson and Tracy Drier. Tracy is a glassblower with the Chemistry Glass Lab here on campus. He was born in Port Huron, Michigan, and went to school, high school, at Holland, Michigan. He got his undergraduate in pulp and paper engineering at Western Michigan University, and then he went to Salem Community College in New Jersey to go through their glassblowing program. And he came here to UW-Madison in the year 2000, which is where he is now as the master glassblower for the chemistry department.
Catherine Jackson was born in Liverpool, which means I get to say the word Liverpudlian. She went to the equivalent of high school at Liverpool and then did her undergraduate work at Cambridge University, got her PhD at Cambridge University in organic chemistry, and then, after several years, went to the University of London to get a PhD in the history of science. And then she came to UW-Madison in 2015, where she’s an assistant professor in the Department of History. Tonight they get to talk with us about how glass-blown apparatus accelerated chemistry. Please join me in welcoming both Tracy Drier and Catherine Jackson to Wednesday Nite @ the Lab. [applause]
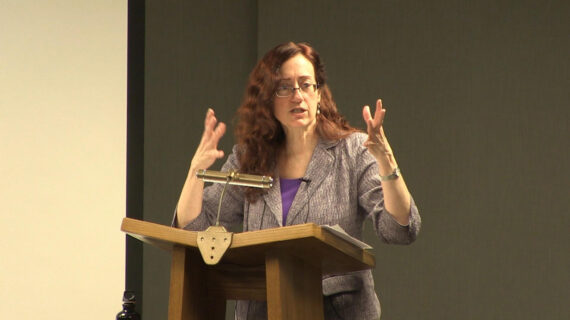
– I should be good to go. Thanks so much, Tom, and thanks to all of you for coming out this evening. I know there is a massive amount going on, on campus right now, so it’s really great to see so many of you here. In the next 50 minutes or so, Tracy and I are going to show you why glass is the medium of modern chemistry. It’s a story that begins in the early 19th century when chemists turned to glassblowing to bend nature to their will, to build the science of chemistry, and to produce the view of molecules we now believe. Glass and glassblowing are fundamental to everything chemists do and, until the mid-20th century, all that they knew. That’s a pretty radical claim, especially from the present where we all sit. Chemists today see molecules in three dimensions through the agency of machines. Here’s an NMR spectrometer, a powerful tool of modern structure determination. And here’s the structure of the sugar glucose. Atoms of carbon, hydrogen, and oxygen bonded together in chains and rings. That’s how modern chemists know nature, through a black box process that produces three-dimensional molecules from complex machinery. Here’s the modern chemist at work. The board is covered with formula, reaction mechanisms, spectra, equations. This man’s wearing a lab coat but it’s virgin white, and what’s in his hand isn’t apparatus, it’s a plastic rendition of atoms and electrons. On this showing, the chemist can make and manipulate molecules as easily as he can take apart and rebuild that model.
This view from now is a big problem in the history of chemistry. It’s as hard for historians as it may be for some of us to see beyond the idea that atoms and structure have always been what makes chemistry work. The foundation of or perhaps the hidden hand guiding chemists’ ability to interpret and shape the natural world. I want to tell you differently. I’ll use just one example. Does anyone here know, and not you, [inaudible], does anyone here know when chemists first learned glucose was a three-dimensional molecule? That its structure was what I showed on the previous slide? Ten years ago? Twenty? Fifty? A hundred? Well, the answer is about 125 years ago, around 1890, well before any of those machines I’ve talked about were built. In fact, glucose was the very first organic substance to have a three-dimensional molecular structure. And before I go on, just to say by organic chemistry I mean the chemistry of living nature, of plants and animals, today the chemistry of carbon. Well, how was that work done? It was done by a man called Emil Fischer, a great German chemist of the late 19th and early 20th century. Fischer proved sugar molecules must be three-dimensional by measuring melting points using apparatus like this.
Those melting points were how Fischer knew what his reactions made, and ultimately it was by reasoning from those melting points that Fischer knew glucose must be three-dimensional, a result he represented using these kind of diagrams that are called Fischer projections because they project three dimensions onto paper. Now, if you go home, as I’m sure you will– [laughter] And read almost any account of this work, it will tell you Fischer new this three-dimensional structure by applying theory, the theory chemists call stereochemistry, and that this theoretical knowledge showed Fischer how to make sugars like glucose in the laboratory. My historical work shows the opposite. Fischer learned sugar molecules are three-dimensional structures, which was a major theoretical advance, by doing wet chemistry in glass apparatus. Making that step took almost 20 years, and he was helped by hundreds of chemists who trained and worked with him. Fischer learned how to synthesize sugars from vast laboratory knowledge and not theory. No machines, no models, the chemist, body and mind, and his glassware. Not theory driving experiment but exactly the other way around. I want to focus on this black box that links experiment and theory. And tonight’s fundamental question: how did chemists use glass and glassblowing to build one of the world’s most important sciences, organic chemistry? By the early 20th century, organic chemistry was the science of dyes and drugs, of agriculture and physiology, foundation of great industries, and about to spawn the molecular life sciences.
I want to introduce you to another 19th century German organic chemist: Justus Liebig. And he’s a couple of generations before Fischer, so early/mid-19th century. Here’s Liebig writing a fabulous piece of science outreach. Liebig thought it was important to build support for his science from way beyond his professional community. And Tracy and I, and I’m sure you, agree that he is absolutely right in that mission. Let’s look at what Liebig says here. You can see our title for this evening. This is also a manifesto for the significance of glass and glassblowing in chemistry. Liebig highlights the material qualities that make glass so useful as a chemical medium. Glass and glassblowing freed chemists from reliance on instrument makers because, as Liebig says, they could make their own apparatus.
But as we’ll see, chemists use of glass ultimately led to a new profession: scientific glassblowing. That’s what brought Tracy and me together in a project that explains glass and glassblowing as crucial components of that black box connecting experiment and theory. Before we get into that story, I want to share with you a bit about what happened almost three years ago when I met Tracy. What happens when a historian of chemistry meets a master scientific glassblower? When I arrived in Madison in 2015, I’d been researching and writing on the 19th century development of organic chemistry for well over a decade. One of the big moments in that history concerned analysis, which is how chemists assign formulae. How they know what atoms are present in a molecule. Just like H2O for water, H for hydrogen, O for oxygen, but a little bit more complicated because organic compounds also contain carbon and sometimes nitrogen. Now today that’s a completely routine process, but around 1830, analyzing organic compounds was an especially new and important plant derived drugs like morphine– I know you’ve been hearing a lot about opiates this week– was cutting-edge chemistry. And morphine was the problem Liebig took on as a young man. It was his career problem, if you like.
Career-making problem. And he tackled it using a new piece of glassware. This small, triangular device that he called the kaliapparat. Now, and kaliapparat, I should tell you kaliapparat translates as kali, potash, potassium hydroxide today, apparat, apparatus. I’m not going to go into, today, the technicalities of exactly why Liebig introduced this apparatus, but I do want to explain how his experiment worked because it’s central to what we’re going to talk about for the remainder of this evening. So in this apparatus, this is Liebig’s analytical apparatus, as he illustrated it. Here is a furnace. And when you analyze and organic compound, you basically burn it. So the sample goes in here where it’s burned and the hydrogen is converted into water vapor and the water vapor is trapped here and the carbon dioxide, sorry, the carbon is converted into carbon dioxide. That carbon dioxide will flow then through this kaliapparat device.
And as carbon dioxide meets potassium hydroxide, those substances react so the carbon dioxide is absorbed within that kaliapparat device so the increase in mass of the device gives you a measure of how much carbon is in the sample. So this kaliapparat is basically a device for measuring carbon. Liebig’s device became very popular because it was a lot easier to use than the previous method. Chemists across Europe wanted to use it, but to do so, they had to be able to make it because you couldn’t buy a kaliapparat anywhere until about 1840. So there’s about a decade when chemists, to use the kaliapparat, chemists had to learn to blow glass in order to make this apparatus for themselves. That’s how the kaliapparat got chemists working in glass, a change so important I’ve called it the glassware revolution. And now you can see why Liebig felt so strongly about glass. Now, all that historical work was done using documentary sources, which is just as well because almost no glassware from the 19th century survives because it breaks. It’s very fragile, and that’s quite a problem for a historian like me who is interested in glass. Actually, I shouldn’t say like me because it pretty much is me.
This is my gig. Okay? My passion. So meeting– It is my passion. So meeting Tracy was a pretty amazing moment, especially when I found that he’s fascinated by the history of his craft. It’s a great synergy. I’ve opened up that documentary history for Tracy, and his skill has shown me so much about what it means to work in glass. One of the things we’ve done is to begin recreating Liebig’s kaliapparat and the variance that it’s spawned. There’s the original. And we’re trying to understand how and why those pieces of glassware were made and what they meant for the science. What can the historian learn from the glassblower? Or in the case of this workshop Tracy and I ran about 18 months ago on campus for the Midwest section of the American Society of Scientific Glassblowers, well one thing I learned was that these are amazing people.
They are incredibly skilled and spectacularly generous. And as we’ll see, historical reconstructions done by people like this can teach us a lot about the historical origins of professional scientific glassblowing, of the origin of people like Tracy– And there’s no one like Tracy. [laughter] How can I say that? And the importance of glass and glassblowing to chemistry. So at that workshop we invited some of the finest glassblowers in America to make a kaliapparat just as chemists had to do in the 1830s. We didn’t give them an actual kaliapparat to copy. We just gave them Liebig’s life-sized diagram. And what’s more, they had to use glass similar to the kind made by mid-19th century chemists. Much softer than the borosilicate glass they’re used to today. And we gave them unfamiliar torches. These were skilled practitioners, but they were working with unfamiliar tools and unfamiliar glass and they soon ran into all kinds of difficulties.
And just to kind of give you an idea about, and Tracy hates it when I do this, but this is the first kaliapparat that Tracy made in soft glass. It gets to look a bit like this when he’s had some practice. But you can see it’s still not all that similar to a borosilicate glass replica kaliapparat made by Tracy on his regular torch. And so, as Tracy’s going to explain to you, the behavior of glass in the torch really depends very much on the kind of glass you’re working. – Right, so, visually, these two look exactly the same. They’re made out of glass and they’ve been worked in the fire. But these are in fact made from two different glasses. One, this is known as soft glass, and this one is hard glass. They have or that’s referring to the working characteristics and not the hardness. [taps glass] I mean they’re both glass.
So they’re made from two different recipes. And they have two different working characteristics when you heat them. And so what does this mean? These two glasses expand and contract at different rates when you heat them in a fire. And this is important because they each have different working properties and they require different skill sets. And they also require different torches to work. So if we look at the soft glass, this does not require a whole lot of heat to soften it and work it. And, like I said before, each glass expands and contracts at different rates, and the soft glass expands and contracts a lot when you heat it and cool it. And, as a result, it’s very prone to cracking. Early glassblowers compensated for this tendency by blowing everything very thin. That way the stress can’t build up because there’s no thickness to build up in.
As technology advanced, we moved on to hard glass. This is also known as borosilicate glass. Pyrex is one of the trade names that you probably recognize, similar to our kitchenware. It’s very stable when heated and cooled. And it’s very resistant to chemical attack. And these are ideal characteristics for glass scientific instruments, and it is still used today. This requires a much higher temperature to melt, and it required compressed gases. We have propane and compressed oxygen here to provide the heat. And the famous glass artist Emilio Santini compared soft glass and hard glass. He said the difference of borosilicate glass is that it’s like blowing wood compared to soft glass. So that gives you an idea, you know, of the differences. So after that workshop encountering all those glassblowers, getting them to try and make the kaliapparat, I understood my documentary evidence very differently. When I look back at this set of glassblowing instructions from 1833, so there is the finished kaliapparat, here’s the sequence of making steps. Ignore that bit in the top left. But that’s the kaliapparat. And I could see it produced a device that looked very different from the modern borosilicate replica, so it’s producing something that looks quite different and again, as Tracy’s going to explain, the chemistry that’s going to go on here in that analytical experiment will be quite different. There you go, Tracy.
– Thanks. So if you imagine this is filled up with liquid, both of these, when you’re passing the gas through here, because there’s no constriction or very little constriction, there’s not much slowing down the gas vapors as they travel across this three-bulb train. If you look at this version, the constrictions are much greater, and that’s requiring the air or the gas more dwell time in each bubble, before it moves on to the next. And so that’s going to increase the absorption as it moves along.
– And that’s going to make your analysis more accurate.
– Yeah. Yeah. So what I wanted to do was to demonstrate kind of the bottom train.
– Yeah.
– Yep, thank you. [laughter] So, like I said, this is a propane and oxygen torch. I turned on my propane, and now I’ll add my oxygen. [gas sizzling] I have these glasses on. If you guys are noticing, there’s an orange glow. These filter out that orange glow so that I can see what’s actually happening inside of the flame. There’s no health risk for you right now to just watch this. So, it just makes it easier for me to see what’s going on. So I’ve heated the end of the open tube, and I’ve pulled it down. I’m rotating it. There’s a little bucket of– This is just water right here. So. . .
I’m going to heat the end. I’ll be sealing these little tubes on, so I want to pop a hole this same diameter. So I blew a very thin bubble. Now I’m, and so it popped a little hole and I will now take just a little rod to clean up that business on the end. I’ll put a cork in this end, so that when I blow in here I have something to blow against. If you’ll notice, I’m adjusting my fire here and there. I want to get the right fire to do what it is I’m trying to do and not get everything unnecessarily hot. So now I have the two pieces stuck together, but they’re not sealed. If this were to rap it sharply, the two pieces might fall apart. So what I’d like to do now is continue heating this little joint and make the two flow together. . . until they become one piece, essentially one piece. Constantly rotating. I like to keep everything on axis. Okay, I make a little mark. I’m going to pull it off right at this point. When you heat glass, it naturally constricts. So as I’m heating this and rotating it, you’re going to watch that diameter start to decrease as it softens. It naturally will constrict. Okay? So now I’m going to do the exact same thing on this side. Blow a little nub. And then. . . blow that thin. Popped it. I have a little opening. Okay. I’ve got another cork for this end. Okay, now I have this little device in front of me. It’s called an Ein Schneider. So I’m going to divide this tube into three sections corresponding to the three bubbles. So this is the Ein Schneider. Catherine will tell us what that means in German. [laughter]
– So in German, literally Ein Schneider means in cutter. So a device for cutting in.
– That’s exactly what I’m going to be doing here. So I just roll it down there.
– Yeah. So to make those constrictions in this train of tubes, very useful device.
– Because it would be possible, for example, to blow three individual bubbles and connect them. It wouldn’t be unheard of. It tends to not be quite as efficient as just starting with one tube and necking them down and blowing as we go. Okay? So I have my three sections. Now I’m going to start with the middle bubble. I’m going to blow it in sections. Again, rotating. I’ll blow one side up and then I’ll bring the other side up and then I’ll combine the two and check to see where we’re at dimension wise. As all this is going on, we do want to check our dimensions. That’s part of the. . . Now we’re going to move on to. . . Again, this one is closest to me as I bring it up to blow. One of the things I’m doing as I bring it up, I’m rotating, but I’m looking down the line as I’m rotating to see how my bubble is behaving. And I’m making slight adjustments with my right hand to get everything on axis as I go. Flip my cork over and finish up the third bubble. And I flip sides just so that I’m not trying to see what’s going on behind the big bubble. I want everything as close to my eyes as I can as I am building this. Okay? So, there we have it.
– There you go. [applause] So Tracy makes that look incredibly easy, but I just want to remind you that it’s not that easy. [laughter] Okay? And if it’s that difficult for a skilled professional to produce a kaliapparat using unfamiliar tools and materials, then what did it take for 19th century chemists to become their own glassblowers? And what did the apparatus they produced look like? That’s one reason I’m learning to blow glass, and Tracy’s very confident that he can teach me to make a kaliapparat, but I’m not yet convinced, because I can’t even blow a single bowl, yet. And I bet that when I make a kaliapparat, it’s going to look a lot more like this, which was made by one of Tracy’s much better and more diligent students than I am, much more talented, but still not anything like this borosilicate replica. And that’s important, okay? So would something like this even work in that analytical experiment? So this is where I get to show you my holiday snaps. This is me in the Liebig museum in Giesen, Germany, where Liebig worked. And here you can see Liebig’s analytical apparatus, and here is his kaliapparat.
That’s a replica. That’s a borosilicate replica because even the Giesen museum doesn’t have an original. And, actually, as historians, we know that Liebig’s original did not look like this one. And we know that it looked a lot more like this or, dare I say it, even this because he was not a very experienced glassblower when he made that device. And that got me to realize that we have an impossibly perfect view of 19th century chemistry. And why does that matter? Well, as Tracy explained, differences like this, differences in these devices, would have a huge effect on the analytical experiment. The borosilicate replica gives much more reliable results than Liebig’s original. In fact, I showed some years ago, by studying Liebig’s lab notebook, that his kaliapparat didn’t work nearly as well as previous history’s claimed. Now, by working with Tracy, I know I was right, and it’s helped me see that much 19th century glassware started out quite wonky, which, in turn, made me think about the origins of the professional scientific glassblower. When chemists learned to blow glass, they gained access to enormous possibilities because, as Liebig said, they could make their own apparatus.
And here is a modified kaliapparat made by two of Liebig’s students, Will and Varrentrapp, in 1841. Where Liebig’s device measured carbon, this one measured stickstoff, nitrogen, which was really important because things like morphine contained nitrogen but extremely difficult to do. And this method, this Will and Varrentrapp method using this device, was the first reliable way of measuring nitrogen and, once invented, remained the best for over half a century. But that very flexibility also introduced problems. Unless chemists everywhere used the same apparatus, they couldn’t hope to obtain the same results, which was an enormous barrier to development. If you can’t agree on the results, you certainly can’t agree what they mean in terms of formula, which is the basis of all that theorizing. Solving that problem of getting the same results in different places, what historians of science call the problem of replication, required standardization. But making standard apparatus is a tricky business. I can’t believe, I mean he does it all the time, but, you know, Tracy blows those bulbs to the exact right size pretty much 100% of the time, first time. But it’s a really difficult thing to do.
One of the exercises in our glassblowing class was to make something to scale. Got to be the right size to pass the course, which is incredibly much harder than just making something that’s kind of the right size and shape. But that identical size, that standard size and shape, is the bread and butter of replication and so of reliability. And that’s where the skill of the professional begins to diverge from that of a good amateur. As more and more chemists worked in glass, they generated a commercial market that supported a new kind of professional, the scientific glassblower. This slide shows you just a few of the kaliapparat-like devices available for purchase around 1900. That’s partly because solving different problems expanded the variety of glassware being used. These top two here are used in experiments on respiration. The others are mainly analytical devices. And also, because the drive for standardization made it extremely useful to be able to buy items of apparatus made to spec, like Tracy just showed you, by an expert.
Some of these devices, like this one up here made by the bond glassblower Heinrich Geissler, significantly improved, here’s Tracy’s replica, significantly improved analytical results. And if you remember, this device works by trapping carbon dioxide in a solution. And so if you think about gas entering here, this device of Geissler’s forces those bubble to travel up through the liquid because they come, they enter through this bubbler and they have to force their way out and then into the next and into the next. So it’s a significant improvement in the precision of the experiment, but it’s at the cost of something that’s immensely more complicated to make. Far too difficult for an amateur. And at this point, I’m handing over to Tracy to talk to you about this modification of the kaliapparat.
– So this was, Catherine had brought this drawing in for me and I got very interested in this because I had absolutely no idea how it worked just by looking at that picture. That disc down in there, was that sealed in and the bubbles traveled in between the down tube? Was it free? I had no idea. And it wasn’t until we actually got a chance to view one of these in real life that we got to see that these are actually floating free in there. So now you’ve got the bubbles coming down and rather than just bubbling up through, they’re stopped by this disc, and as the bubbles build up, it raises that disc and then the bubbles then pass on. So, again, you’re improving the efficiency of the instrument a lot. But this is also very exciting from a glassblowing point of view too, because it’s tricky. [laughter] So what I’d like to do is just build one of these stems. Thank you. Build one of these so that you can see how we might go about putting that little disc inside there.
– And even though Tracy’s going to make this look really, really easy– [laughter]
– Yeah, I won’t be talking as much probably as in the previous. Well, and you can see I’m using a little bit larger tubing for a demonstration as well. I would not be talking at all if we were making it that size. So I have a tube and I want to just cut it in half. So I can use, I’ll be able to use this to make two, ultimately, but for right now I’d just like to build one for you. Okay. I want to heat this space so that when it starts to constrict and collapse, it’ll fall down and get a little bit heavier so that we have a nice wall thickness, nice and uniform as it comes up and around. It might smoke a little bit, but it won’t catch on fire. So now what I’d like to do. . . I’m going to heat a little section. You’re going to see a little orange ring form on the glass, and then I’m going to just press it together and it’ll make a little disc on the outside of the tube. It’s called a maria. I don’t actually know that history of that.
– We don’t know why.
– Yep. And if you make one that’s not solid, so this is solid glass, if that were a hollow maria, it’s called an olive. And again, I don’t know the origins of that. I think it’s Italian.
– I would guess so, yeah. So now I’m going to do, similar to the other, what I did earlier, only I’d like to have a little bit larger hole. Okay. Because what I’d like is for that little disc to nest in that hole. Okay, this is a piece of graphite. So, I’m going to rotate this and come in. I’m going to make a little lip. Now we’re going to just put this in here. We want that to just sit in the lip. It’s still a little bit small, so I want to open it up. Okay, so now we can see that it nests in there quite nicely. This is where it gets tricky. What I’m going to do is hold these together, heat it, and then seal these two. Okay. There’s a little hole.
I’ll do it a little more. So now, just like earlier where we had them stuck together and not sealed together, I want to go ahead and seal these two together. I’m heating it and that collapses down a little bit, and then I’ll blow it back up. . . just so that doesn’t stick down onto that center tube. That would be what you call bad form. [laughter] So. . . Okay, so now I want to make sure that that center tube, I don’t care about in my right hand, I just want that inside tube to be running true at this point. Now I’ll go back and heat just to the right of that seal and straighten out the right-hand side of this tube. Okay. So now. . . I’m going to blow this end up a little bit. Get everything running true again. Good. Now, I want to make that disc.
So I’ve got my tubes. It slides on– I’ll do it out here– It slides on here just nicely. And what I’ll do is I’ll take my graphite rod. We want this to be 20 millimeters. So now, what we’re going to do is let it cool, and then we’ll cut it so that the overall length is about 10 millimeters. And I’ve already done that here because this is going to take a little while to cool, and we don’t need to. . .
– And this is the magic part.
– Yeah.
– Just like a ship in a bottle, isn’t it? [laughter]
– So we just thread that disc onto that tube, and now we want to just make sure that we don’t accidentally move it so that it falls into the molten glass. But it’s, I mean, I’m not going to say that it won’t. [laughter]
– It won’t.
– [inaudible]
– I’ll say it for you.
– Yeah. So, now we’re going to neck this down. Okay. We’ll pull this heaviness off. We’d like everything to be uniformly thick as we go around. As I was stretching that out a little bit, it thinned out a little bit, so I’m going to do that business where I just heat it and let the glass collect all up on itself a little bit. We want to be at about 50. So it’s like– So now you can see that it goes up and down. [laughter] And what we’ll do is put a little hole. And now this will be ready to have a little, other tube put on off to the side here so that it can go to the next, so I would wind up making three of these and then connecting them all together in the train. – And there you have it. [applause] Okay, so what we’re seeing here is that link between skilled-making and precise, reliable results. These devices are what made it possible for chemists to know formulae and to build useful theories. This is the driving force behind the origin of the professional scientific glassblower around about 1850, two decades after Liebig’s original kaliapparat. Men like Geissler made possible the development of 19th century chemistry very much as Tracy works with today’s chemists. Realizing that much of what those 19th century glassblowing chemists made is wonky is crucial to understanding why skilled scientific glassblowing was and remains so important to chemistry.
It’s how chemists produce reliable results. And in this picture, just to say, that kaliapparat has to be made small to fit inside this precision analytical balance. Improving accuracy, increased complexity, as we saw with Geissler’s kaliapparat, standardization is crucial to making and identifying pure substances, to reliable formulae and, ultimately in Fischer’s work on the sugars, the creation and manipulation of the three-dimensional molecular micro world. For over a hundred years chemists have created and managed worlds within glass by building apparatus from standard components, a bit like Lego. These systems combine immense flexibility with reliable standardization, but they haven’t superseded chemists’ reliance on professionals like Tracy. The glassblower’s control over fire remains essential to chemists’ mastery of nature, an essential component of that black box linking experiment and theory. It’s important to appreciate that what we’re talking about here isn’t merely the craft skill underpinning chemical practice. Since about 1850, scientific glassware has been constitutive of what scientists know as well as what they can do. In other words, our project isn’t about experimenters distinct from theory, about the manipulative as opposed to the cognitive. On the contrary, it’s about what happens when you take the relationship between head and hand seriously, about how chemists like Liebig and Fischer reasoned from laboratory work in glass to abstract ideas of formula and structure.
In fact, chemistry was far from the only science built on glassblowing skill. Physiology and physics also relied on the construction of other worlds in glass. Glassblowing created spaces where skill, fire, and material meet to make new scientific worlds, whose shape and content was subject to minute control, that were impervious to corrosive chemicals, yet so fragile almost no traces remain. Chemists fought over their meaning, saw things inside we can’t, taught us to share their vision with colored ball and stick models. They were so successful it’s become almost impossible to remember how the models were made. Worlds within glass pushed the frontiers of science. Engineers scaled up these spaces to build industries that produced dyes, drugs, and new materials. Our project places glass and glassblowing, those worlds within glass, at the core of technical modernity. Telling that history is a grand ambition, one that requires the combined skills of historian and glassblower. Tracy and I are really excited by this future. We hope you are too. Thanks so much for joining us this evening. Thank you.
[applause]
Search University Place Episodes
Related Stories from PBS Wisconsin's Blog

Donate to sign up. Activate and sign in to Passport. It's that easy to help PBS Wisconsin serve your community through media that educates, inspires, and entertains.
Make your membership gift today
Only for new users: Activate Passport using your code or email address
Already a member?
Look up my account
Need some help? Go to FAQ or visit PBS Passport Help
Need help accessing PBS Wisconsin anywhere?

Online Access | Platform & Device Access | Cable or Satellite Access | Over-The-Air Access
Visit Access Guide
Need help accessing PBS Wisconsin anywhere?

Visit Our
Live TV Access Guide
Online AccessPlatform & Device Access
Cable or Satellite Access
Over-The-Air Access
Visit Access Guide
 Passport








Follow Us