– Lisa Johnson: Good afternoon.
Thanks for having me here at the 2024 Garden Expo to talk about container gardening.
I just have to say one sentence, which is, this is the tenth anniversary of Shelley Ryan’s passing.
Shelley was the one who started the Garden Expo.
So we should all think about Shelley today.
Shelley was somebody that I enjoyed working with and talking with about gardening, and one of the things we did talk about a little bit was container gardening.
So this presentation is going to talk about different kinds of containers, different materials of containers, different kinds of soils that you can use, how to plant things and make combinations, proper watering, sun/shade, all of that, and we’ll finish up by talking about container design.
And hopefully, we will then have some time for me to take some questions at that point.
All right, so moving on.
So you can get really carried away with container gardens if you want to.
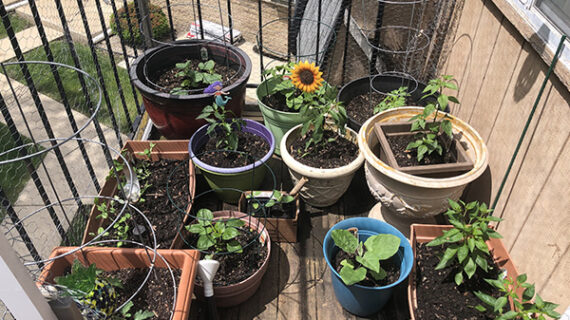
They are a great way, if you have a very small space, to still have a wonderful garden.
And you can see from this shot that they’ve got everything from vines, to annuals, to vegetables.
You can even do perennials in containers.
There are a lot of good reasons to garden in containers.
One of the best ones is if you have soil that is, oh, shall we say, less than ideal for gardening.
It also gives you more options for plant placement.
If you are somebody that wants to grow tomatoes but you only have one spot in your yard that you can do it and you are not able to do crop rotation because of that, a container is a good way around that problem.
And of course, all of us don’t have as much time to garden as we’d like.
So sometimes a container garden is a little bit easier to take care of because you don’t have to weed it as much as an in-ground garden.
And as we get older, of course, there’s limited mobility.
I know that I don’t bend as well as I used to, so I do appreciate my raised beds and container gardens for that.
Also, it’s a great idea to container garden if you have limited funds or space, or if you’re in a designed community that doesn’t allow you to garden in ground.
There are so many different types of containers that are out there.
You should be able to find a shape, a size, a color, a material that suits you.
And you can find things, you know, online these days just as easily in garden centers.
This is one that’s actually off my front porch.
I got that container at a local garden center.
And it has holes in it, which is the one crucial thing that you should, if you remember nothing else about today, your container must have drainage holes.
That’s the rule.
Also, if you’re growing mixed species, obviously they need to get along with each other.
In other words, they need to have the same needs for sun or shade, and moisture and fertility and so on.
And it’s also helpful if you know what size the plant is going to get to be when it’s at the end of the season so that you don’t have one plant taking over the whole pot.
Because believe me, that can certainly happen.
Match your pot size to your plant type and your growth rate of your plant.
Do keep in mind that if you garden in a really small container, that that is going to, especially as we go through the summer and the root system gets bigger, you’re gonna be watering that puppy all the time.
So do keep in mind that sort of thing.
And also if you garden in a hanging basket because it’s not got protection on any of the sides, it’s going to dry out even faster.
And one final thing is that the mouth of the container should not be too narrow to get your plant in properly.
So that’s the general information.
And now I’ll move on to different container types.
You can certainly get containers made of clay.
That’s an oldie but a goodie.
And you can see here, these were taken at Olbrich Gardens.
They make a nice kind of grouping together.
One thing that they do have is you can see the one plant on the far right with the ferns in it, they do tend to get that calcium or mold buildup on the bottom of the pot.
So that is one thing that you might consider a disadvantage.
One of the other disadvantages is that they’re fairly heavy and that you do have to store them inside over winter so that they don’t crack.
Some of them can be expensive, but some of them can also be quite inexpensive.
So I would shop your options to see what you can find.
It’s not a bad idea to soak your clay pot in water before you plant it because that porous surface is gonna wick the moisture out of your pot pretty easily.
So making sure that it’s hydrated to begin with can be helpful.
Another type of container is plastic, resin, or fiberglass.
I’ve probably used all of those.
They are available in many different colors and different sizes and shapes.
They generally are gonna hold water longer than clay, and they’re going to be quite a bit lighter than clay.
One of the things to watch though is if you have black plastic and you’ve got your plant out in full sun, that can actually end up cooking the plant.
So you need to be a little bit careful about that.
Sometimes these will be less expensive, sometimes more, depends on how fancy you wanna get with them.
Also, there are some that may fade over time in sun as far as the color goes, so that’s something to think about as well.
And many times, they’ll come with texturing on them.
Now, one of the things that people rightly bring up is an issue is, hey, what do I do with this pot after it’s got a crack in it or whatever?
Unfortunately, trying to find recycling for plastic pots can be a little bit difficult.
So I try and use mine for as long as I can.
Okay, stone containers.
This is a picture that I took in British Columbia.
Now, you can’t really tell from the picture, but that’s about four feet across.
Nobody is gonna be walking off with that particular pot.
So stone is very durable, but of course, it is heavy.
I have a dolly cart, a hand truck that I use to move a lot of my containers around, and I bungee them to the hand truck or I move ’em around in my wheelbarrow because I hate to say it, but I’ve got a shameful number of blue ceramic pots.
And I counted them once, and I was like, “Oh, okay.
“No wonder my back hurts at the end of every year because I have to haul the things back inside.”
So stone is the same way.
It’s kind of heavy.
If you like though the look of stone, but you don’t want the heaviness, you can buy a plastic pot and you can use very fine-grained sandpaper on it, just a little bit, and then you can spray it with… You can get a stone finish from the craft store or from home improvement stores and then put a clear coat over it to protect it.
You may need to respray every once in a while, but if you like that texture and look without the heaviness, that’s one way to get it.
They really do look like stone.
And again, the ceramic pots, the two on the right are some of my copious collection.
And the one that’s hanging is called an upside-down pot.
And what you do is you turn it upside down so that the mouth is upside-down.
It’s got a little plug in it so that all your soil doesn’t fall out, and then you have to kind of mash your plant into the hole in the bottom.
So this particular one, I said, you know, don’t have the mouth be too narrow.
I have to only choose plants that have a fairly small root system, and I have to plant them early in the year.
But they do cascade beautifully and they’re kind of fun.
Down under pot, that’s the correct name for it.
So with glazed ceramic, very popular, lots of different colors.
They’re becoming a little bit cheaper than they used to be.
You still do need to bring ’em in over the winter because again, they may crack and they are heavy, but rather lovely things.
You may decide to go with wood.
A lot of people like to plant in half barrels.
You can get, you know, different sizes and shapes.
You can use wood if you wanted to build yourself.
Teak is good, cedar is good, redwood is good.
All of those are less likely to come apart anytime soon.
And most of them are paintable and sealable.
Window boxes, another kind of container.
If you have an appropriate window, there are different styles and sizes of window boxes that you can get.
I would avoid any that are too narrow or that are, you know, fairly short because they dry out so darn fast.
But they are a good option if you’re in an apartment building for example, maybe you’re in the lower floor so you can, you know, get to your window if you, you know, don’t have a balcony site.
They also have things that look like window boxes that will clip onto your balcony.
So if you have a balcony out there, you can still have something that looks like a window box.
I like to, with window boxes, because sometimes at the end of the season, things are looking a little tired, and I’ll show you this a little bit later on.
You can seasonally change out some of the plants, and that kind of gives the whole thing a new look.
Here’s a type of window box that’s metal, and then you put coconut fiber lining in it so that that holds the soil in but allows drainage, and that works out really well too.
The one that’s on the lower right is another one of my collections that just hangs on the wall, and you can’t see it because the plant has overgrown it, but it’s also a metal filigree look.
Hanging baskets, I mentioned those earlier baskets of different types.
The one on the bottom was another one I took a picture of in British Columbia, and it was gargantuan.
I imagine they probably have their city municipal department come with a long extender hose to water those.
The other one is, on the right, is from Olbrich Gardens, and that one actually is house plants.
And it’s under an eaves, so that one is a nice one too.
And these also come in plastic or metal.
Or the one that I’ve got hanging on my house there is an actual basket, and I just put that coconut liner in it and I spray painted it.
That does help preserve it for a little while longer.
You can also use sphagnum moss if you don’t wanna use the coco mat liners.
The one thing to consider is making sure that your support is going to hold the weight of the basket.
This one is really cool, but a whole lot of work ’cause you have to keep all those little succulents pinched so that they don’t get too large.
But that is a fun thing that you can do, and you can do it, you know, with plants other than succulents.
It’s the same kind of thing where you use a coco mat liner on the inside for the one on the bottom that’s open, and then you put in your soil and you slap the two together and there’s a latch, and you can poke into the ribs so that you can stick your plants in afterwards.
And anything can be a container as long as it has drainage.
If you drill holes in an old teapot or an old watering can, that will work just fine as a container.
Just don’t use anything copper because copper is toxic to plant roots.
Another couple of examples.
You have an old wheelbarrow; punch some holes in that and voil, you’ve got a big planting bed.
This one was at Jan Wos’s Nursery Garden Center, and he was, like, the king of interesting container types.
He planted in suitcases and shoes and all kinds of different things.
You can also, you can spend a lot of money, [laughing] and you can get either indoor or outdoor wall planters of various types and shapes.
And they sometimes have drainage built into the bottom of the pot.
Ones that are meant to be used outside usually have their drainage so that it will drain onto the ground.
But some interesting ideas there.
If you go on the internet, you can find a lot of different options for living picture or wall planters.
This particular one, you water it from the top and it has a reservoir in the bottom, where it collects the water, so that one’s actually meant to be used inside.
Here are some; Shelley made one of these once, and it was the most amazing thing.
She used some of the little succulents to make the foliage of a tree, and then she had some twigs in there that looked like the trunk and the branches.
So that was pretty cool.
And the other one is a pallet.
You’ve probably heard of pallet gardens.
That particular one I can see is attached to a wall, but you can also just lean it up against a wall.
So that’s yet another type of container you can make.
Okay, so that’s the types of containers.
Now we’ll talk about what to put in them.
So many different choices for soil out there.
It’s really difficult to figure out what you should use.
I think that it’s not necessarily what products you use.
I mean, you can use pretty much any potting soil these days is going to be a soilless mix.
It doesn’t actually have any soil in it, even though it’s called potting soil.
Potting mix is a lot more accurate term.
Usually they have coconut fibers, they may have peat moss, they may have vermiculite, fur bark, or other types of bark, and it’s very light and fluffy, and so that’s great for plants and containers because heavy soil in containers tends to turn into a brick, and that’s no good.
So what I usually do is I will mix some type of soilless mix potting soil in a, probably one to– In small containers, like a one to two or one to three ratio, where the mixed potting soil, soilless mix, is the bigger number and the smaller number would be topsoil or composted manure or something like that.
Because the thing about the soilless mixes is that they don’t have a lot of nutrition in them unless they’ve got a slow-release fertilizer included.
So I use the organic topsoil or composted manure to provide some weight to it and some nutrition.
Now, I still will fertilize, but that, I think, is a really good compromise between being too light or too heavy.
Okay, so we talked about drainage being the most important thing.
Another thing to think about of course is that you have limited root space.
So when you’re looking at that plant in the garden center and salivating over it in the spring, think about how big it’s going to get before you try and ram it into a pot that is not going to accommodate its needs for the whole season.
It’s better to err a little bit on the side of having the pot too big rather than too small.
So again, don’t use straight garden soil.
Use bagged potting soil, and you can amend it with compost or topsoil.
Consider that shallow pots are gonna dry out faster, and the taller your container is, it will drain less well towards the bottom.
So if you have, for example, a five-gallon pot, or a five-gallon bucket that you’re growing tomatoes in, I would drill a few holes on the sides as well just to make sure that it’s draining well, at least at the beginning of the year.
By the end of the year, the tomato will have totally filled that space, but at the beginning of the year, it can get a little wet.
I’ve kind of talked a little bit about what is in soilless mixes, but again, they do have some kind of mineral component and then an organic component, but typically not actual soil.
And if they do have a slow-release fertilizer in there, the bag will usually tell you how long that is good for, whether it’s like, you know, three months or six months or so on.
The great thing about those soilless mixes, besides that they’re lighter to carry around is that they’re very porous.
They do hold onto water pretty well.
Now, if you are like me and you shop for plants all season long…
I’m an equal opportunity shopper.
If I have the opportunity, I will buy plants.
And I know at the end of the annual season, it’s very tempting to get some of those that are on a good sale.
It’s not that you shouldn’t buy them, but keep in mind, that root system has compacted into that little market pack for a long time.
So when you pull it out, it’s probably going to be quite pot-bound.
So if that is the case, make sure that you, what we call tickle the roots.
So you try and kind of piece those out a little bit so they’re not circling so much.
Now, if you have a bigger pot, a taller pot that you wanna use, but you don’t want it to weigh so much, you can put old water bottles, soup cans, butter dishes, you can put them in, like, a plastic bag so that they’re not all over the place.
People used to use the styrofoam peanuts, oh my gosh, what a mess that is.
So I much prefer using these other bigger items.
Just make sure that if you have it in a plastic bag that the drainage is still good.
So you would put that at the bottom and then put your soi on the top, and plant your plant into that.
Do not reuse old soil if the plants were diseased.
I do reuse some of my soil if the plants were fine, and then I mix in new soil the next year.
Moving on to fertilizer.
So with fertilizer, you’re going to, if you’ve ever shopped for fertilizer before, you’ve probably seen a bewildering variety of different concentrations, and they’ve got some for tomatoes, and they’ve got some for roses, and you know, this and that and shrubs, and it’s really confusing.
So what you need to look for is the percent of the macronutrients that plants need, which are nitrogen, phosphorus, and potassium.
So they’re always in that order, N, P, and K, and it should be somewhere on your fertilizer product.
Now, there are some organic fertilizers that may not have that on there.
Organic fertilizers are a lot less concentrated so I wouldn’t, you know, worry about overusing those the way that I would with traditional fertilizers.
Now, many fertilizers also will contain some of the secondary nutrients that plants need as well as micronutrients, and that’s fairly common as well.
If you don’t want to use a traditional type of fertilizer, and you know, there are good reasons not to.
They’re again, very concentrated, they use fossil fuels and petroleum products to make those fertilizers.
If you wanna use something organic like fish emulsion or compost tea, that is fine, you can certainly use that.
But do keep in mind that it’s a lot less concentrated.
So if your plant starts to yellow, I wouldn’t add more of that.
I would go back to a traditional type because they’re much more concentrated.
And if you’re in a deficiency situation, you wanna take care of that as soon as possible.
Now, they also have fertilizers that you can spray on the leaves.
Those typically are also not very concentrated, and that’s a good thing because otherwise the leaves would get burned.
But that is another thing that you can use.
What I’ve shown here is how to brew your own compost tea if you’re interested in doing that.
What you would do is you would, the easiest thing to find is an old pair of pantyhose, and you know, it needs to be porous.
So you could also use cheesecloth if you happen to have that.
And you get some organic matter from, it can be either bagged or from your garden, and then you brew that in a bucket, and you need to buy yourself a small aquarium pump.
Those are fairly inexpensive.
That will keep the mix aerated.
And you can then, once it’s all mixed and aerated, you can use that in your watering can, and that will provide a lot of nutrition for your plants.
Do also keep in mind though that organic fertilizer products, the nutrients are not all available right away.
They need to be broken down first by microbes.
So that’s another thing to think about.
So here’s, the top one is an example of watering with compost tea.
The bottom is an example of a granular product, probably a slow-release product.
So there are a couple different types of major categories of traditional fertilizers.
There’s the granular type that you mix with water and it dissolves, and you use that to water in, and the nutrients are available right away.
But they don’t stay, you know, they’ll leach through a container, so you do need to fertilize a couple of times a month.
And if you use a slow-release product, that usually will fertilize for an entire season.
Now, there are some annuals like petunias that if I used a slow-release, I probably would also use another type of fertilizer with it just because they’re real fertilizer pigs, and they certainly do bloom better if they have good nutrient availability.
Also, if thinking about those kind of pot-bound plants that you purchased, they might also be very dry because the roots are filling those containers.
So if they’re very dry, water them first.
Don’t, you know, give them fertilizer first because that can burn their roots when they’re very dry.
So if you’re using one of those kind of, like, you know, Miracle-Gro or Peters or Scotts, one of the water-soluble types where you dissolve it in water, that should be applied usually every two weeks or once a month, depending on the types of plants that you have due to it leaching out of the pot when the water goes through.
Now, I always tell people, you probably don’t need to fertilize in July.
It’s hotter, the plants aren’t photosynthesizing as much, they’re not growing as much, no point in applying extra fertilizer at that point.
So if you’re using something like the compost tea or fish emulsion or something like that, you may need to fertilize more often because again, it’s not very concentrated and it has to break down first before the nutrients are all available.
If you’re growing flowering plants, which I imagine most of you will, you may wanna use a fertilizer.
If you’re using traditionals, that is higher in phosphorus because phosphorus promotes flowering.
So if you are finding that your, you know, impatiens or what have you is not blooming very well and you wanna use a fertilizer, you might wanna use one that’s higher in phosphorus than nitrogen or potassium.
And usually, they’re labeled as, like, bloom builders or something like that.
Watering is the one thing that is really tough for me to tell you about.
And the reason for that is because it’s going to vary with the type of container that you have, how much sun it’s in, how many plants you’ve crammed in there, what your soil is like, all of that is going to factor in.
The one thing I can tell you is that earlier in the season, when the pot is gonna…
It’s gonna stay wetter because you don’t have as many roots filling it up.
So you may not need to water other than every maybe couple of days.
But once you start to get into end of June, you’re probably gonna need to check it every day just to make sure that it’s doing okay.
So again, lots of different things are going to affect how fast your container is going to dry out.
Usually people also ask me, “Can I use rainwater?”
Well, yes, obviously you can use rainwater because it comes down from the sky.
So if you have a rain barrel, I think that’s excellent.
The one thing I would not use it on, though, is containerized vegetables or herbs.
And the reason for that is because the rain hits your shingles and you can get little traces of shingle chemicals in that water, so we don’t wanna use it in anything that we’re actually going to consume.
But if you have house plants that you’ve put outside for a summer vacation or you have pots of annuals, do feel absolutely free to use your rain barrel water on those.
When you do water, I like to advise people to water well.
Let all the water come out; well, not all of it, but some of it will come out through the drainage holes.
And that tells you that, hey, I’ve gotten all the way through the soil profile and my plant should be good to go for a day or more.
You can’t always use the top of the soil as a good indicator of whether or not you need to water.
You might want to invest in, and they’re fairly inexpensive, a water meter that you can stick in the soil and it will tell you whether it’s getting dry and you need to water, or whether you’re good to go for a while.
Those are really nice to use.
Some of them are digital, some of ’em have, like, a little meter that gives you an idea of where you are.
Some of them are even really fancy that you use for house plants, and it’ll tell you based on the type of houseplant, whether you need to water.
Those are a bit more expensive.
The other tool you can use is your finger.
So stick that in a couple, three inches and see what it feels like, if it feels like it’s dry.
But what we want to avoid is doing a lot of light waterings that don’t go all the way through the soil profile.
Then the next thing is sun and shade.
This is a really tough one to figure out sometimes too.
When you’re purchasing plants and you’re looking at the tag, or you’re looking at the description and it says it needs partial sun or it needs partial shade.
And you’re like, “Well, is that the same thing?
“What does that mean?
Them’s kind of weasel words, you know, what does that mean?”
So I can try and demystify it a little bit.
Usually if it says it needs full sun, the plant needs about six or ideally more hours a day.
Partial sun is usually three to five hours a day.
Partial shade may mean anything from– And that’s, I think, the slipperiest term, partial shade.
It may mean that it gets morning sun or that it gets afternoon sun, but often what it means is that the plant can tolerate an environment where it gets dappled shade for most of the day, or direct sun for a couple of hours, kind of peeking through the leaves.
Now, if it says it takes shade with no modifier on it, then I would assume that that plant can take a fair amount of shade, and that might mean no direct light at all.
Not a whole lot of those unfortunately.
Okay, so we’ve talked about container types, we’ve talked about the mechanics of maintenance with different soils, and watering, and fertilizer, and all of that good stuff.
Now we’ll talk about the actual plants.
This is the fun part.
So lots of different plants will do well in containers.
Some of them, you may need to pinch back a little bit if they start to get too leggy.
Or in the case of the vining ones, if they tend to get too long, you may need to cut those back a little bit.
There are plenty of annuals that look great in the spring when the weather is in the 60s and 70s and don’t look so good once you get to the 80s and 90s in the middle of the summer.
So sometimes, you’ll find that out the hard way and you might need to change some things out.
It’s perfectly okay to pull one thing out of the pot and replace it with another.
But these are some flowering annuals, and in the case of sweet potato vines, a foliar plant, that do fairly well in pots.
You can grow vegetables in containers as well.
Particularly with vegetables though, you need to really make sure that you have enough volume of soil.
That tomato that you put in that five-gallon bucket, I would prefer to actually put it in a half barrel, that kind of size, because by the end of the season, that thing is gonna be rooted all the way through your planting media.
So for sure with vegetables, you wanna make sure that they have enough space for root development.
There are some that you can grow in fairly small containers, and others definitely need bigger ones.
If you’re growing from seed, look for varieties that say they’re compact, or bush, or patio, or dwarf.
You can also find those as transplants, often, you know, patio tomatoes, those are not going to get as tall.
One thing that you need to make sure of, if you’re growing a tall tomato in a pot, you may wanna drive some rebar through that pot so that it doesn’t turn into a sail and tip over.
I’ve seen that happen many a time, and it’s very sad because tomatoes tend to break when they fall over, and that’s, you know, lost production.
So if you can do that, same as with a straw bale, you usually are gonna wanna nail those things down if you’re growing anything tall in them.
If you’re using a trellis, also make sure that the trellis is appropriate in size for the plant and it can support the plant.
And like I was saying, either the pot is heavy enough that it’s not gonna blow over or that you use some rebar.
Now, most of the smaller growing vegetables are the ones that are better for containers.
So lettuce and spinach and other leafy greens are really good for pots.
Some of the things like radishes, you can grow some of the shorter carrots pretty well in pots too, especially if you’ve got rocky soil and you don’t want carrots with legs.
A container might not be a bad idea.
Just make sure that it’s, you know, deep enough.
Bush-type peas do well.
There are some dwarf pea varieties like Little Marvel that work really well in containers.
Again, patio tomatoes, cherry tomatoes, only if they’re determinant varieties.
The indeterminate varieties are probably going to get too big for you.
Some of the bush cucumbers like Spacemaster would be a good type also to grow in pots.
I’ve got here a list of different pot sizes that work pretty well for different crops.
And you can see, there’s a lot of variety towards the large end of the scale.
Like a sunflower, I probably would put in, you know, something like an eight-gallon or ten-gallon pot, especially if it’s the large variety that gets very tall and heavy.
And I still would rebar that thing into the ground.
Tomatoes, at least a five-gallon pot, even if they’re patio tomatoes, if not a larger size.
But you can see that there are a whole lot of different plants, herbs as well as vegetables, that will do very nicely.
And speaking of herbs, the annual herbs are the easiest ones to grow because you don’t feel like you need to try and bring it inside and nurse it over the winter, and then it gets spider mites or powdery mildew or mealybugs or what have you.
So you know, if you wanna do something like basil, that would be a good one.
I do have a talk about, you know, indoor plants, including some herbs that you can do, but you need really good light for herbs.
Or you need to make sure that you have like, a plant grow light is gonna help.
And then you need to be very vigilant checking for insects because boy, those spider mites, aphids, white flies, they will certainly enjoy those conditions inside and build up on you.
So this is a list of some that do fairly well inside.
One of my favorite ones to grow inside is Cuban oregano.
That works really nicely as a houseplant, and you can give it a haircut and it will nicely bush out again.
Rosemary, I tend to have issues with getting powdery mildew about halfway through the winter, but it is one you can try.
Basil, if you don’t have really good light, I would not try, and the same with chives.
But most of the others are fairly adaptable.
You can even grow perennials in pots.
Now, you of course have to store them somewhere over the winter or sink the pot into the ground.
That’s one thing you can do.
In Japan, they actually grow hostas a lot as house plants or, like, on a three-season porch or something like that.
But if you wanna do that, you can see that they can work very nicely in those types of situations.
So anything from hens and chicks to ornamental grasses, lots of different things that will look very nice in pots and will survive for you pretty well.
Okay, let’s talk a little bit about container design.
There’s always new gardening trends coming out, and one of the trends that is often seen with container gardening is gardening in groupings.
And you can see that in this particular grouping, they’re repeating the colors.
So you see that there’s repetition of chartreuse, there’s repetition of that kind of coraly red, but they have also planted so that the plants are not all the same height or all the same form.
So you have some that are upright with larger leaves, you have some that are vining, you have some that have larger rounded leaves, others that have more filigreed, highly dissected leaves.
So all of that goes into making a visually pleasing design.
Now, some designers like to work with just one plant variety in a pot and then have different plants in different pots.
Or sometimes, people like to put complementary types into the same pot.
But you can also see that here, they’re using the same type of pot, and the pot also has very similar edges on it up at the top, so it gives it kind of a cohesive feel.
Not that you have to do that.
With my blue pots in my yard, I have some that are more aqua blue, and I group those together.
And I have some that are more bright blue, and I group those together.
So you can get a lot of different effects.
I mentioned before, seasonal arrangements.
Some people like to do fall plantings because we have so many cool fall annuals.
We have mums, we have ornamental cabbage and kale, leftover annuals, like in the upper section there we have the sweet potato vine.
And so you might want to, if one or more of your species in preexisting pots is looking a little tired, you may wanna rip that out and plunk in another species that is more fall themed.
Some people even like to incorporate gourds and other sorts of fall items into their fall plantings, and that’s kind of a fun thing to do too.
Here’s an example of a spring seasonal arrangement.
Now this one, I would take apart and plant something else in later or at least remove the bulbs.
Tulip bulbs in particular do not appreciate the type of moisture and fertilizer that annuals are gonna need.
Tulips, well, they have a huge range, but a lot of the places that they evolved in have rocky or sandy types of soil.
They come from, you know, Kazakhstan, and Iran, Iraq, you know, the Middle Eastern countries.
And they really just do not do well with heavy soil and wet conditions.
So if you’re trying to grow tulips, I have a whole talk on bulbs, but tulips are one of the things that I always say, “Don’t plant them next to perennials “that need a lot of water “or annuals that need a lot of water.
“Try and put them someplace where they can be hot and dry over the summer months.”
But you can see, isn’t that a beautiful arrangement there?
They’ve got some spring annuals with the, I see the snapdragons aren’t blooming yet in the bottom pot, but they’ve got those.
Osteospermums are nice in the spring, pansies, violas.
And mixing those with bulbs is a lovely thing to do.
The problem is, you had to have thought of it back in the fall because you can’t get the bulbs in the spring.
So something to think about for the future.
This is another pot I took a picture of at Olbrich Gardens, and I really liked the subtleness of the design here.
They’ve repeated the chartreuse color, but they also have wonderful texture, you know, between the caladium with the big, tropical-looking leaves and the perennial Japanese forest grass as kind of a draping spiller item is nice.
And then picking up that chartreuse color with the coleus is a really nice touch as well.
So if you ever take a container design class, they’re probably going to tell you to, and this is just a typical thing you do, it’s not, you know, hard and fast rule, but typically, they’re gonna use what they call a thriller, which is a very upright vertical plant.
And sometimes it’s called a filler, sometimes a chiller, which is the kind of medium rounded plant that takes up space in kind of the middle area of the pot.
And then having the spiller, which is the viney plant that will spill over the edge of the pot.
And again, you don’t have to have all of these.
You could do this without a spiller.
It would be just fine, but often, this is something that’s used.
But I really like this example as it, you know, it’s got texture, it’s got contrast, a nice repeatable color palette, and just a really nice job, whoever put that together.
Here are some professional examples.
And of course, if you go on Pinterest or you go on Proven Winners website, you can find all kinds of things.
And you can see that not all of them follow that thriller, filler, spiller sort of formula there.
The one with the pink petunias, for example, there’s no thriller in that one.
It’s more of a draping, arching kind of design, which is just fine.
The one in the white pot, the sweet potato vine is eventually going to cascade down a little bit more.
But you can see, they’ve put together really nice, pleasing color palettes with plants that will be good neighbors with each other, that need the same kind of conditions.
Here’s some other examples that I found out there.
So you can get all kinds of different effects.
I work in a greenhouse in the spring part-time and it’s really interesting, the American psyche has totally glommed on to the idea of a dracaena, red geraniums, and you know, that’s your container.
But there are so many great options out there.
So I encourage people to, you know, let your artistic self free and, you know, play with it.
It’s lots of fun.
Here’s some other designs.
I like where they’ve put, you know, an all purple-blue color palette with some pops of white.
When you have a long horizontal planter, those tend to be a little bit harder to design.
In this case, they’ve got kind of a roof.
You know, it kind of gets taller in the middle, but it’s a little more subtle than in some pots.
And the one on the bottom, of course, is absolutely gorgeous as well.
That is gotta be, I would think, a seasonal one ’cause they’ve got mustard there in the back and they’ve also got the flowering cabbage or kale, and even some perennials in that one.
So they’ve got little mini pumpkins, so it’s obviously a fall seasonal planting, but very nice.
So in summary, lots of different options for container materials, sizes, shapes.
Go for what you like.
And if you like a whole rainbow of different pots, well, I say go for it, it’s your yard, and you do what you like.
Make sure that whatever you choose though, that it’s got good drainage and using appropriate potting media is important.
Be sure and be careful with water and fertilizer needs ’cause you do need to monitor that somewhat.
And you can grow, you know, again, many different kinds of plants, including vegetables and herbs in containers.
That’s an example from my yard.
I actually, I have a gazing ball in one of the containers and then I used silver falls dichondra, ’cause it’s a fairly tall container, to kind of soften it.
So you don’t even necessarily have to have all plants in a container.
I have no idea who this person is, but I love this slide and I appreciate them wherever they are out in the universe because it really shows you that you can really have beautiful gardens only using containers.
So thank you, and I will be happy to take some questions.
[audience applauding]
Search University Place Episodes
Related Stories from PBS Wisconsin's Blog

Donate to sign up. Activate and sign in to Passport. It's that easy to help PBS Wisconsin serve your community through media that educates, inspires, and entertains.
Make your membership gift today
Only for new users: Activate Passport using your code or email address
Already a member?
Look up my account
Need some help? Go to FAQ or visit PBS Passport Help
Need help accessing PBS Wisconsin anywhere?

Online Access | Platform & Device Access | Cable or Satellite Access | Over-The-Air Access
Visit Access Guide
Need help accessing PBS Wisconsin anywhere?

Visit Our
Live TV Access Guide
Online AccessPlatform & Device Access
Cable or Satellite Access
Over-The-Air Access
Visit Access Guide
 Passport










Follow Us