

 Passport





This video is no longer available.
Trusty Triangles - A Row-by-Row Sampler Quilt, Part 2
10/10/16 | 26m 47s | Rating: TV-G
Half-square triangles serve as the foundation for three stunning row-by-row quilt designs. Nancy demonstrates how to create Perpetual Pinwheels, Star Gazer, and Flying Home. Incorporate these rows into the Trusty Triangles Row-By-Row Sampler Quilt, or use the techniques to create your own work of fiber art.


Copy and Paste the Following Code to Embed this Video:
Trusty Triangles - A Row-by-Row Sampler Quilt, Part 2
Patchwork designs are often created with blocks, occasionally in columns, and more recently, in rows. The row-by-row concept provides an ideal palette to create projects from table runners to bed-sized quilts. During this second episode on row quilts, I'll show you the remaining three quilt rows of the sampler quilt. Only one quilting technique is needed to create the diversity of designs. "Trusty Triangles," a row-by-row sampler quilt, that's what's next on Sewing With Nancy.
gentle instrumental music
female announcer
Sewing With Nancy, TV's longest-airing sewing and quilting program with Nancy Zieman,
is made possible by
Baby Lock, a complete line of sewing, quilting, and embroidery machines and sergers.
Baby Lock
For the love of sewing. Madeira, specializing in embroidery, quilting, and special effect threads, because creativity is never black and white. Koala Studios, fine sewing furniture custom-built in America. Clover, making a difference in sewing, quilting, crafting, and needle arts for over 90 years. Amazing Designs and Klass Needles. During the first episode of this miniseries, I showed you three of the six row techniques, and today, we'll finish up the rows. And all rows are, in height, finished 12 inches. They were made with 12 1/2 inch blocks. And all of the components within the 12 1/2 or 12-inch blocks are factors of 12. So three, four, six are all factors of 12. And--as well as two, I might want to add. And so that way, we can nest or put together different sizes of the same element. And the element is half-square triangles. We have 6 1/2 inch half-square triangles in this row, called perpetual pinwheels. And then we also have two-inch finished half-square triangles, and four go together to make a size of four. It's just kind of fun to see how you can create different designs when you work with factors of the finished size. Now, in the first program of this series, I detailed how to work with fabrics needing ten colors, three different color groupings, and then a blender fabric that goes with the light, medium, and dark with at least two of the shades so that-- this is kind of a blue-green color, and we have the light, medium, and dark of the other shades. And if you'd like to watch the first episode, you can go online and watch it at NancyZieman.com, and see the details and also how to work with prints, if you'd like. As a quick review, just making those half-square triangles is the key, because if you know how to make them, you can create any design you'd like from this quilt. And you can use a straight ruler; you can use a ruler that's designed for half-square triangles. Regardless, you cut strips of fabric, of pairs that are going to go together, fabrics that will be made into half-square triangles. And you cut the strips 7/8 of an inch wider than the finished size. So this will be a two-inch finished half-square triangle once sewn into the seams. So here, the strips are cut 2 and 7/8. You can find that also marked on the gauge to tell you exactly how wide to cut it. Then you cut it into squares so that you have both squares together. Place the ruler, the gauge, so it-- the square fits in with the confines of the ruler. Use a fine pen point, and mark down the center. And if you'd like to do-- just working with a ruler, you can do that too. Make sure you get it straight. That's really the important part. And then set your machine for a straight stitch and use a patchwork foot that's 1/4 of an inch wide. And here, you can see that I'm stitching down along-- following the edge of the foot, along the mark line. And you can butt up or kiss up the next squares so that they all meet together, and after you've sewn together many at one time, then rotate them. And here, you can see I'm stitching on the other side. You just assembly line, chain stitch them together. And here the little squares have been cut apart. And you just slice down the center. As we see here, press the seam allowances to the darker fabric, and you'll get two half-square triangles that are all on the straight of grain, or all have straight edges, from two squares. So, presto, that's how you do it. Now, with our perpetual pinwheel row, we have the 6 1/2 inch size, the 2 1/2 inch size, plus some square blocks. And these square blocks were cut 4 1/2 inches square. And the layout is fairly simple to consider, to work with. For that large pinwheel in the middle, we have the four blocks alternating, as you can see, with the light/dark, light/dark. And then they'll be sewn together by meeting right sides, sewing down the side, and then sewing the rows. And I'll show you that in just a few minutes. And the smaller ones-- you're gonna be making quite a few smaller ones made in the same manner, just having different color configurations. You get to plan the colors, because you have ten fabrics to work with. I also find it interesting and effective to work with lights and darks-- not always have mediums together, then you don't necessarily see the pinwheel design. Now, when laying out the blocks, I'd like to show you that I have four different designs included. And we have the big pinwheels, design number one. Here's a block with, obviously, like a letter M. We have three blocks going together. And here's our third one. And I have started to lay these out on... The board, alternating, as you can see, the blocks. I'm getting that kind of M shape here. Here would be one block that I'm going to sew together. Here's another block that I'll sew together. And then, let me lay out the last one. And we'll fill in the blanks with the squares that are cut 4 1/2 inches. I find it easiest to sew nine blocks together at a time, and that's what I'm going to show you at the sewing machine in just a few minutes. But if I'm going to sew this block together, we'll take this section to the sewing machine; I'll show you how to meet right sides together and do the stitching. In the row that I call perpetual pinwheels, there are seven 12 1/2 inch blocks. And six of them are made up of nine patches, and you saw me lay some of these out. So I have the nine blocks. And to stitch them together, I meet right sides together-- column two on top of column one. That way, I'm gonna be stitching along the right side of the block. If you work on a flannel board like I'm doing, it really works out well, because the fabric kind of sticks to it, and it doesn't fall down. So I have, again, my 1/4 of an inch foot, and I'll give myself a little speed. My stitch length is set at about 2.5. Bring up the next block, butt it together. Kind of make sure all the edges are meeting. And then just keep sewing. And it's not necessary at all to cut the threads. And I better make sure that this is-- seam allowance is tucked underneath. Take a little time. And keep sewing. And bring up the next square. After you stitched column one on top of column two, then we'll add the third one.
machine whirring
Baby Lock
Simple as that. Now, I'll put it back on my flannel board, open it up. And then... show you that I put three on top of two. I like to have the seam allowance to the right exposed so that it makes it easier to feed it through my machine. So we're just gonna be honeycombing all these together. Honeycombing, because the thread tails are holding them together. This is basic quilting techniques. But it's well worth reviewing, so... There we go. That row, and then I'll get the next one. And just keep aligning everything. Take a little time, which, probably, I'm not right this minute. But butt the next one, kiss it next to each other, and stitch. Now, make sure that the seam allowances are going in the right direction, the fabric isn't tucked, like I have it here. And we have the last one coming up. Then we'll do some pressing. After you've sewn, honeycombed, the nine patches together, I like to press the seam allowances in opposite directions. And I'll show you what I mean by that. Now, you can see this honeycomb feature, that they're all put together, just kind of held together roughly. And I would press the seam flat the way it was sewn. And the top row, I like to press the seam allowances-- let's say we'll press the seam allowances to the outside. And then I did the same on this side. Now, I'm doing this a little bit in a hurry, but you can see, I have the seam allowances pressed to the outside. The interior row, I'm gonna press the seam allowances to the inside, toward the center. So here, this row is pressed to the inseam, or interior. And then press again. Then the opposite happens. We'll press the seams outward. Both of them go outward, so we'll press them out this way. The reason? It will make sewing the rows together much easier. I do like to top press. That way, I'm not getting a tuck in the fabric. And to set the seams, which you can do-- we learned from an old tailoring technique-- is just to press and let a wooden tailor clapper, a wooden block, absorb the moisture. And it gets very flat. So you can do that to all of your seams. Then, to put the rows together, you're going to find that your seam allowances are going in opposite directions. And that's why we press in the opposite way. Now I can sew the rows together. So for each nine-patch block, you'll have two rows to stitch, and... you'll have a fair amount of seam allowances to contend with, so make sure that the seam allowances are tucked in the correct direction. As I get to the seam, that-- where the seams are going in opposite directions, just double-check that they're meeting. We'll do one more. And here, I'll double-check that everything is just-- one seam allowance goes under, one seam allowance comes forward on the top. And I do one more row. But I think you get the idea how that's done. And then the pressing-- you can press it flat, press the seams in one direction. I have this almost finished. But this is how you honeycomb a nine-patch block together, to make sure that all the seams are matching properly. Of course, that would happen after I'd sewed the final row. But this is a technique I use for all quilting. Once you've mastered the process of creating half-square triangles, take time to experiment with different layout configurations. That's how I happened upon th e design I call "Star Gazer." The pieced constellation is linear, yet the effect is worth an admiring observation. There are seven blocks, seven finished blocks, that are in the size of 12 inches that go across this row. It would be a great table runner, or, as you can see, a part of a quilt. We'll start in the center of the row to show you my focal point, where I have the star, and then in each corner, more half-square triangles in contrasting colors. When we go to the left, to the next block, kind of followed the lead of the center block and continued the corner design. Made the star. And then the opposite corner, introduced a new color. So you can see how the five-- or the nine blocks, excuse me, create the four different color configurations that we have here. Then these last three blocks, one, two, and three, are repeated on the opposite side of the center block, just to give it some balance. You can work with any colors that you'd like from your palette of ten. I always like to choose, perhaps, a light and a medium or a light and a dark, never having two mediums together. I said that before, but I used to do that a lot when I first started quilting, so I wanted you to be aware that the contrast is always a good thing. We have four different half-square tri-- or, we have four half-square triangles in the medium yellow and the light green and then a 4 1/2 inch square cut for the middle. Now, remember, we were making half-square triangles in the beginning of the program. When you make a half-square triangle, you always cut the strips of fabric 7/8 of an inch larger than the finished size. And that will give you the right measurement to create this design. So you can kind of see the star. And then the contrasting-- another contrasting color, and using the same background fabric, are put in the corners. And that look gives you that center block. Just a few minutes ago, I showed you how to piece these together. You'd piece together the nine segments to create the finished nine-patch block, just the way I did before. Now, the next block has the continuation of the corner squares in the same colors. And I'll just put those down. And then the blocks. The blocks are laid out, and you can see what colors look good together, and it's just kind of an interesting way to put things together. And you can see that now I've introduced another color for the corner, and that leads into the next color. If you just wanted to make it simpler, you could--I'll just put this over visually for you. You could create all corners in the same color. And that just shows you the look you'd get. But as we look back to our finished quilt, I kind of like how the continuation goes from color, to color, to color. Now, we've separated each row of this quilt with a-- cut a four-inch strip of fabric. That gave a visual break to help set the blocks-- or, I should say, not blocks, but the rows aside. This is a busy quilt. A lot of different designs of half-square triangles, but when you see the whole effect with the color breaks in the middle, it helps you be able to look at one row at a time. So, so far, we've done five of the six rows of this sampler quilt. And now I'll show you how to create a row that has many different sizes, using, again, just that one simple half-square triangle. The time-honored flying geese design is the feature of my last row of the sampler quilt. I've entitled the quilt pattern "Flying Home," where you'll learn how to combine half-square triangles in different sizes with ease. When you take a look at this top row of the quilt, it maybe will look complicated to you, that there are a lot of things going on. Well, actually, there are just three sizes of half-square triangles. Again, they're all factors of 12, because that's the finished width of the row. There are 6 1/2 inch blocks we'll be making, as well as 4 1/2 and 2 1/2. That's it. Three different sizes and four different colorations. So on the board, I have the sizes that we have and the colorations. There are two that are colored in-- there are two that are made in the 6 1/2 inch squares and one in the 4 1/2 and another design in the 2 1/2. Of course, you'll have many to create these, but this is all you need to create the style to make the "Flying Home" pattern. Now, if you're not familiar with flying geese design, it is created in, many times, with two half-square triangles. So rather than working with blocks, square blocks, we're gonna be working with rectangles. Two of these half-square triangles are met. The geese portion of it is the meeting of two colors together. So this fabric right here is what we have for the center. Now, if we take another look at the center of the quilt, you'll see that we have one piece, that's a strip of two half-square triangles, and then on the opposite side, it's inverted, a mirror image. So from the center point out, the whole design is mirror imaged on the left and the right side of it. Following the first 6 1/2 inch pair of geese, we have another 6 1/2 inch pair of geese. So that's where we get the second coloration. And I'll start to lay this out for you. So here we have two that we--would be laid out together, and as you have seen through this series, I like to work on a flannel board so that I can transport this to my sewing machine, and it works out very well. Now, here's a 4 1/2 inch block. So I'll put two of these together. And since they're factors of 12, to make-- this now becomes eight inches. And then I can create smaller geese that are flying home. There we go, you can see how this is put together. Now, I would sew this section together and then these two flying geese sections together to create another rectangular unit. Now, to get another look, you can simply rotate the designs, if you'd like, so that you have the flying geese in another configuration. So it's just really interesting to see how you can lay out the design and get different looks. After you've laid out the design, then you can do the stitching. Just meet the top onto the bottom row, and then sew the columns together. You could sew all different sizes. And here's a close-up of-- I'm just sewing from a 6 1/2 inch to a 4 1/2 inch. It doesn't really matter. It's just straight stitching. So after the pressing of those seams, you can see how these linear units would be sewn together to create the block. So we looked back at the "Flying Home" geese pattern, and you see again from the center, everything is reversed out. And it's just a great way of working with color, working with one design, and stretching your limits to see what interesting designs you may create. We usually think of quilting as a creative process. Today's Nancy's Corner guest found out at a very young age that quilting gave her the courage to succeed in life. Please welcome Phyllis Lawson, who joins us today from Melbourne, Florida, via Skype. Good to see you, Phyllis. Good to see you too, Nancy, and thanks for having me on your show. You have a fascinating story, how a quilt was pivotal in your life. And why don't you tell our viewers what happened at the age of four? Well, at the age of four, I was-- I was born in Detroit, and at the age of four, I was sent down south into Livingston, Alabama, um, rural Alabama, to live with my grandparents. I didn't know-- I had never seen my grandparents before in my life, so it was a very traumatic experience for me, going from a city environment to a-- in Michigan-- to a very rural environment. And so, when I got down there, I was afraid, I was very afraid. Because they had a lot of, you know, chickens and cows and-- but my grandmother just made me feel very, very-- she--she, you know, made me feel very comfortable. She--my grandmother was a quilter, and through my fear, I was able to heal, because she made quilts, and she kind of, like, drew me into this quilt-making, and I started, you know, feeling much better. She quilted-- she used people, her ancestors and her friends from the 1800s and early and beyond. She used their clothes to make her quilts. And as she would take clothes out of this bag that she kept all these pieces of clothing in, she would explain to me the life and death of each one of those people of the cloth that she was putting into my quilt. And through this quilt, I was comforted, and it made me-- gave me a feeling of-- that I belonged to something that was much larger than myself. And, you know, that was-- that was healing, that was my catharsis, I guess, so to speak, through watching my grandmother make quilts. And as well as watching other women from my grandmother's era, who would sit in that front yard, and together, they would hum the most beautiful songs and sew quilts and just sew. And you could see it in their eyes that it was healing for-- not only for myself but for everyone that was involved. You know, because I have to look back, in retrospect, these were women who were born in the 1880s, 1870s. Some women, that I met in their 90s, were actually slaves at one time. Of course. But just to see these women quilt, it was--it was very therapeutic for me. And so, each chapter in my book, I tell the story of that person's pieces of clothes that went into my "Quilt of Souls," who I have right here, who I've kept-- I've kept all my life. And I talk about it in my book, how those people went through so many tragic circumstances that my circumstances didn't seem very--very bad after all. Your grandmother was quite a woman. Luella--Lulu--Lula Horn. I love this photo of her. It's-- tell about the hat. Yeah, the hat was, um... you know, and I asked her about that hat, because I just fell in love with her picture when I saw her picture, 'cause it was set on the mantel, and she said she would make hats for people when she worked in Laurel, Mississippi. Now, my grandmother lived 120 miles from Laurel, but she would travel twice a week--twice a month between Laurel and Livingston, and she would work-- she worked for Doc Rogers, and while she worked for them, she made quilts and she made hats as well. And one of-- and the hat that she has on is a hat that she hand-made herself. Well, she's very talented. And as you mentioned, you wrote a book of "Quilt of Souls," and that was-- is draped behind you, and it contains lots of memories, and I think many other women in this country have memory quilts, only, everyone tells a different story. But then, your story continued. At age 12, you went back to Detroit, correct? Yes. Well, and then you have now-- gonna be soon making your first quilt out of fabric scraps. And in closing, when are you gonna start, Phyllis? Well, right now, I'm collecting scraps from family members who I discovered through DNA, because my grandmother's lineage was sold in slavery, so now I'm collecting the DNA. It revealed the family members of my grandmother, so I'm taking their scraps, and I'm going to have it sewn around the pieces of clothing that she left for me. I'm gonna take those pieces and put their clothing around hers. Well, I want to thank you for joining us and for telling this touching story of how a quilt gave you resilience and also connection to your past. Thanks for joining us, Phyllis. Thank you, Nancy. And thank you for watching. This concludes our two-part program on "Trusty Triangles," making a row-by-row sampler quilt. You can go to NancyZieman.com and rewatch this program and find us on social media. Thanks for joining us. Bye for now.
announcer
Nancy Zieman wrote the book "Trusty Triangles" to accompany this two-part series. Get techniques and instructions to create a row-by-row quilt featuring easy half-square triangle quilt blocks for $9.99 plus shipping and handling. To order this book, call 800-336-8373, or visit our website on sewingwithnancy.com/3009. Order item number BK3009, "Trusty Triangles." Credit card orders only. To pay by check or money order, call the number on the screen for details. Visit Nancy's website at NancyZieman.com to see additional episodes, Nancy's blog, and more. Sewing With Nancy, TV's longest-airing sewing and quilting program with Nancy Zieman,
has been brought to you by
Baby Lock, Madeira threads, Koala Studios, Clover, Amazing Designs and Klass Needles. Closed captioning funding provided by Riley Blake Designs. Sewing With Nancy is a co-production of Nancy Zieman Productions and Wisconsin Public Television.
The latest from Nancy's blog
May 26, 2026
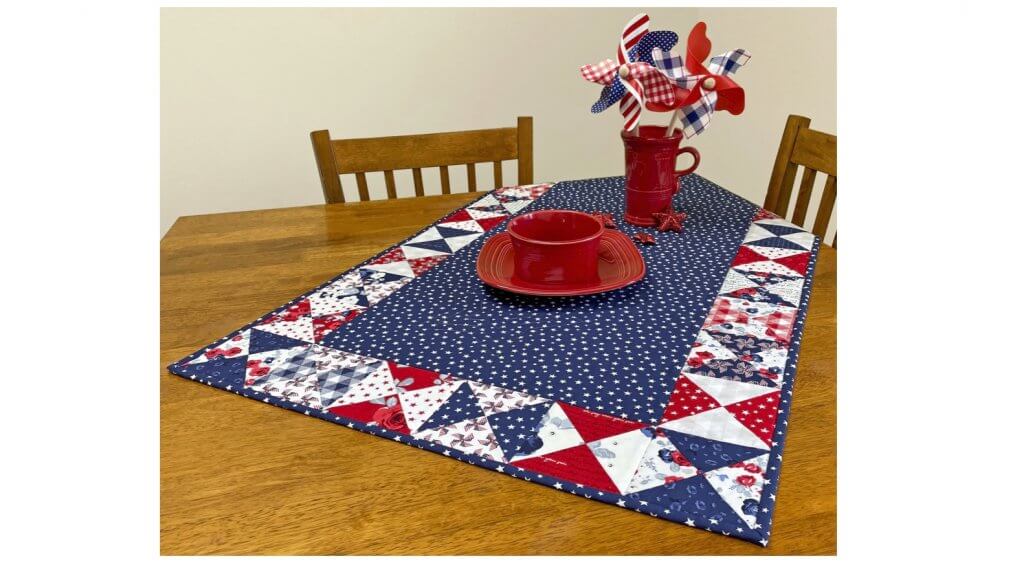
S!S 213 Sew A Celebration Patriotic Quarter-Square Triangles Table Runner Sewing Tutorial
Search Sewing with Nancy Episodes

Donate to sign up. Activate and sign in to Passport. It's that easy to help PBS Wisconsin serve your community through media that educates, inspires, and entertains.
Make your membership gift today
Only for new users: Activate Passport using your code or email address
Already a member?
Look up my account
Need some help? Go to FAQ or visit PBS Passport Help
Need help accessing PBS Wisconsin anywhere?

Online Access | Platform & Device Access | Cable or Satellite Access | Over-The-Air Access
Visit Access Guide
Need help accessing PBS Wisconsin anywhere?
Visit Our
Live TV Access Guide
Online AccessPlatform & Device Access
Cable or Satellite Access
Over-The-Air Access
Visit Access Guide




Follow Us