 Passport


Simple to Chic T-Shirt Remakes - Part 1
01/04/16 | 26m 47s | Rating: TV-G
Nancy and guest Eileen Roche show you how to update necklines with fashionable embroidery and other easy yet creative accents. Learn how to hoop a ready made top in your embroidery machine and then watch as the programmed stitching not only adds beautiful embellishments, but changes the neckline shape.
Copy and Paste the Following Code to Embed this Video:
Simple to Chic T-Shirt Remakes - Part 1
Knit tops are a wardrobe basic. Most of us live in them, but after awhile the style can, well... become boring. Welcome to "Simple to Chic T-shirt Remakes," where you'll learn how to turn a basic tee from mundane to flattering. Joining me is our resident embroidery expert Eileen Roche, who uses her embroidery machine to transfer off-the-rack tops. Welcome back, Eileen. Thanks for having me, Nancy. It's great to be here. We're going to show how to transform the common knit shirt into a fresh- and smart-looking fashion. Embroidery machine designs are the key to adding embellishment and also the neckline transformation. It's rather marvelous how it all happens. "Simple to Chic T-shirt Remakes," that's what's coming up next on Sewing with Nancy. Sewing with Nancy, TV's longest-airing sewing and quilting program with Nancy Zieman
is made possible by
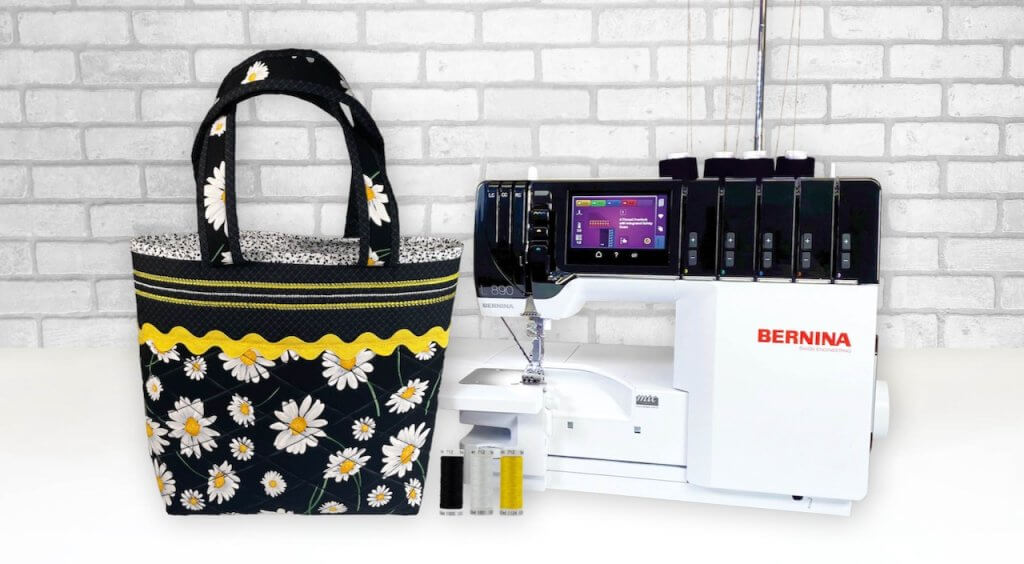
Baby Lock, a complete line of sewing, quilting, and embroidery machines and sergers. Baby Lock for the love of sewing. Madeira, specializing in embroidery, quilting, and special effect threads; because creativity is never black and white.
Koala Studios
fine sewing furniture, custom built in America.
Clover
making a difference in sewing, quilting, crafting, and needle arts for over 30 years. Amazing Designs and Klass Needles. We're going to start off by showing you several of our T-shirt remakes. Starting with what I think is one of my favorites, Eileen, where a basic tee was purchased, but here we have a design and it has an opening transformed in the middle. And that's the last step of the embroidery design. Before that stitches, you have some eyelets that allow you to insert a cording or yarn and then lace it up and tie it closed in that fashion. So, Eileen and I have purchased some common shirts right off the rack. Very lightweight cotton, about 3/4" neckline. And these designs that Eileen has have a little lesser stitch fill in. Right, these are really just what we call a bean stitch, and a bean stitch is a triple-run stitch. It's not heavy. It's very light. So, because we use water-soluble stabilizer to hold the garment in the hoop, we do not need an additional stabilizer for those types of designs. And if you're new to machine embroidery, stabilizers are a key. Heavy-fill stitches, such as you see here, It's pretty easy to look at. Even on my sleeve, you can see the heavier density of the sleeves. You'll need a poly mesh fusible stabilizer. You can see the fusible side. It's poly mesh on this side, and on the wrong side of the shirt, you're going to-- just a little bit longer than the design-- fuse this to the shirt to prevent-- to give the shirt extra stability. That's what it's all about. It builds a foundation for the stitches, and it comes on a roll, but I just trimmed it to curve around the neckline, which you can do, too. Sure. So, we fuse this on in advance, but the style we're going to work with is this design today. And it's a running stitch. Yeah, but it's a lot of fun. And it's really pretty. And it jazzes up a simple $10 T-shirt. So let's show them how. Yep... The first thing we're going to do is hoop water-soluble adhesive stabilizer, and you would score the paper and remove that protective paper so that what is left is a very sticky surface. Insert the hoop into the machine and stitch color one of the design, which is the placement guide. It has a vertical line and a horizontal line. You can see that we're stitching that now, and it just takes a few minutes to do. And here's one that's done. Right. Amazing. And then, we would mark our T-shirt, just finding the center front, and we fold it in half, matching the shoulder seams and stick in a pin in the center and you are set. Now we're going to use an ironing board to get this in the hoop because you really want to center the T-shirt on that horizontal and vertical placement line. So the top of the tee, the very top of the ribbing, goes along the horizontal line and the vertical placement guide is aligned with the marked center. And you just carefully smooth the fabric. You don't want to distort the fibers. It's still a stretchy garment. So just smooth it down. Keep an eye on the grain, and once you're set into the hoop, it's time to nest the rest of the T-shirt above the hoop. This is a really important part and the reason why Eileen is using an ironing board. Yeah, it's just-- We'll nest it above, and I'll get those sleeves. I even turn them inside out. Just kind of bear with me, there's a lot of... Fabric. A lot of fabric. We'll pull this over here. The purpose of having this nest is so that the embroidery area is flat, clean, and the sleeve or the hem isn't going to get caught in the stitching. And then when we go to transport it to the machine, I actually bundle everything up on top of the hoop and I transport it very carefully, maybe even using a clipboard or a cutting board to transport it over to the machine. And then, we'll do some stitching. So give us some time to put this in the machine, and then we'll show you the next steps. Now that you have your T-shirt in the hoop, it's time to apply it, of course, or attach it to the embroidery unit of your sewing machine. And Eileen's going to show you that in just a minute, but in addition, you need to choose thread colors and, of course, start off with a new needle. We're using rayon thread. Some of the designs can be stitched all in one color. Eileen's wearing one that's to have been done in just one color, or you can use the color variations that come with the design. Be sure that you use a bobbin thread that's very lightweight that coincides with what your machine recommends. It's a lightweight thread, that's important. And the needle; We always use a new needle to start a project. Embroidery needle makes sense. New design. Lightweight fabric. It's all going to work together well. Now, Eileen, you've placed your hoop into the embroidery unit, but there's a little extra blue happening there. Yes, I've added painters tape to control the bulk of the T-shirt so it doesn't fall into the sewing field. You know, you have to take a precaution. It's tempting to want to put your hands in there while it's stitching, which is very dangerous. Don't want to do that. So use a little bit of painters tape to keep it under control. Let's take a look at the embroidery design that we're going to stitch. So our printed template of the design shows it in actual size and shows all the different details. But we'll actually take a look over at the machine at the different colors. Color one is the placement guide which we stitched right on that water soluble stabilizer. Color two is a basting file that travels around the whole design. Normally, you add a basting file in the beginning of a design, but in this case, it's been added, digitized into the design at color two so that it secures that loose T-shirt to the stabilizer before the beautiful stitches. So, color number three is the inner areas of the petals, and then color four is the outside area of the petals. Color five is the eyelets. And then color six is where the magic really happens. It's just a straight line, but that's where it will transform the T-shirt into a slit open shirt. So, I will advance over to color two, the basting file, touch "Okay." Let's lower the presser foot, and off we go. It starts stitching just below the ribbing, which is a good thing because we don't want the presser foot to catch the ribbing and pull it out of the hoop. And it'll travel around the perimeter of the design before it moves on to the pretty stitches. They're long running stitches, so you can take those out, very easily take them out after the design is complete. That's right. And they're away from the decorative area. And we'll continue on with the design. The first color is the inner petals, and then, it'll do the outer petals. And it's a bean stitch, Nancy. So, just to remind everyone that a bean stitch is three repeats of the one length of a running stitch. And it's a more pronounced stitch so that it sits on top of that pretty knit fabric. Now, as this is stitching, Eileen, we're going to talk a little bit about stabilizers on the top. Often, when we work with knits, we put a clear water-soluble stabilizer on the top. These fabrics, Eileen, are thin. They're very thin. They have no nap, no ribbing. So, it's not needed. Now, you can see on this design, all the pretty petals have been stitched. And Eileen's going to-- Next, we're going to take some time off to put this hoop into her machine so that she can show you how the eyelets are stitched. Now that the decorative stitches are done, it's time to stitch the eyelets. And they'll start up at the top of the design, travel down one side, and go back up the other side. There are a total of six of these eyelets on each side, and this happens to be a finished one. We can see all six of them have been stitched. The transformation is a beauty that comes next. This is fusible interfacing. Knit fusible interfacing. We recommend it to be prewashed, as the pattern instructions say or the package instructions say, so that when we press it later it doesn't shrink. So now we're going to take another little time off, and Eileen is going to insert this into her machine and stitch that transformation. We've started our transformation. It goes down one side, and then cuts the thread up at the ribbing and begins again on the opposite side. It does reinforce the bottom of the transformation because that's where we'll be clipping into or very close to those stitches when we take it out of the hoop. And you're guaranteed of even stitching, an even opening, which is wonderful. It is and consistent every time you make a T-shirt. So when you pop that out, you can show a close-up of how that is stitched. We had, first of all, a stitching line to show placement. We tacked it down, then we had embroidery, and now you can see that magical transformation. We'll go to the table and show you how to cut, turn, and press, and then finally do some lacing of the design. The next transformation is finished at the ironing board. And, Eileen, you've already taken the T-shirt out of the hoop and done some trimming. I have... I've trimmed away the excess water-soluble stabilizer. This will eventually, of course, wash away. And I have slit open the transformation. I have a little piece of paper back here so you can see how you want to cut into that corner on each side, but not through. That's key because that'll ruin your whole project. So, you know, a sleeve board is a great tool to use for finishing this. I'm pulling the tricot knit interfacing to the wrong side, and before I start any pressing, I'm just going to turn down that ribbing, just a little bit, so that from the front, it looks nice and clean. I'm just going to show that just so you can see that she's cheating it to the back. And there you go. Yes. And then I'll just press that right at that point. And once that's secure, I'll then work on pulling the tricot to the back of the shirt, and you know if you're seeing some T-shirt on the back, you know that the front is going to look great. And do it one side at a time. And then we'll repeat the process for the other side, and then we'll finish the bottom, pulling it back. These finishes are fast and easy and really feminize a basic T-shirt and make it, you know, a little bit more fashion friendly. And by folding these corners under, we'll show that these corners are kind of about the same size folded under. You don't see that interfacing from the outside. That's right. And you know you don't want that peeking around. Now, if, perchance, you don't do such a great job and you have some of that knit, this interfacing showing on the right side, you could always color it in with a Sharpie. Permanent marker. Yes, those marking pens, that's kind of our secret weapon. Secret weapon. Okay, so now both sides are secure. I'm going to pull this down as best as I can. You know, a pin might help here to secure the top part in place. And I'm pulling that down, and then I'll finish with the hot iron. And magic! It is magic. It is. It is great magic. I'll pull this so you can see how nice that looks all finished. Very, very nice. Now, here's another design that Eileen has stitched. This is my favorite. It's the one I'm wearing, too. And it has been turned under to the underside. Remember, this fusible interfacing also is available in black, so that works for the darker fabrics. Now, the eyelets, we found that just using very sharp scissors and kind of clipping into the corners-- not the corners-- the center is all you need to do. If you use an eyelet punch, you might cut the thread. The satin stitches. So just kind of go, "Clip, clip, clip," and cut open the areas. You found that bamboo thread cord... Or hemp cording is available in many craft stores, and it's a nice, heavier yarn that will hold a bow and some beads on the end, if you'd like to add a little bit more embellishment. So, you got it. Just like you thread your gym shoes, you're going to thread these, lace them up. And then we'll show you some of our finished fashions, our T-shirt remakes. Here's a heavier stitch density, and then you have the little ends at the tie. This is the same design, Eileen. It is the same design, and it pops on that red. It's so attractive. It looks really pretty. And I think just is just pearl cotton. Embroidery floss that someone has used to finish the lacing. And I reference the same design as the design we used today to demonstrate. And this is the finished one. And here you added two of the ties and just one little ball. One little bead... ...bead at the end. Now, when you cut your lace, we cut it about, oh, 1 yard and maybe 1/4 because you need to leave some excess so that when you want to put it over your head you can open it up. You don't have to tie a bow. You could do what you did over there with the one bead. It looks really fun. But there's more. There is more! There's more-- Not just at the necklines. If we show you what we're wearing, yes, or modeling. To finish this shirt, Eileen's going to, solo, show you how to stitch an embroidery at the bottom of each sleeve. Now, there's an embroidery for your left sleeve, an embroidery for your right sleeve so that they all are centered properly. But if you know how to do the neckline, you'll be certain to understand how to work with the sleeve. But there a few hints that you'd like to pass along. So Eileen will do that right now.
Our transformed shirts have a surprise
an unexpected, yet tasteful repeat of the neckline design at each sleeve hem. Here is how you can add thread accents to your sleeves. You'll notice that I'm even wearing that here today. I love this new wrist accent. It's a subtle touch of embroidery, but when you're talking, it really draws attention to those beautiful designs. Let me show you how easy it is to do. The first thing we're going to do is cut open our side seam-- our sleeve seam-- underarm seam. I just literally take a pair of scissors and cut it right along that seam allowance. And then I fold it in half and find the center of the sleeve. Now... let's take a look at the embroidery design because it's a little bit different than our neckline design. We have a left and right design, and that's because with a left and right sleeve, we want the design to be centered on figure and not actually on the sleeve. In this sample, we're going to stitch the left. You'll notice that it has an 'L' on it, so that helps you remember what sleeve to put in the hoop. As we take a look at our embroidery design, color one is the placement guide with that letter designating what sleeve that you're decorating. As we advance through, it's followed by the basting stitch, which is going to hold down that sleeve safely in the hoop. And then we have the decorative flower details around the petals and then the outer petals, and satin petals that decorate inside of that outline. Our last color is the polka dots or the flower centers. You'll notice there is no transformation on this design because we're not slitting it open. We're just decorating the sleeve and then, after the decoration is complete, we'll sew the sleeve closed on the sewing machine. So let's go ahead and advance over to the basting file. And I have my sleeve prepared with the needle-- I mean with a pin designating the center. And I'm just placing that pin, which is the center of the sleeve, on that horizontal line stitched in the hoop, and then the vertical line with the sleeve hem. It's a sticky stabilizer so all I have to do is finger press it in the hoop and lower the presser foot and it will baste the file. This is a little bit easier to work with than it is on the neckline because it's a flat piece of fabric at this point. It's not a tube any longer. It makes it so easy to manipulate in the hoop. And we'll let it go ahead and stitch some of the pretty stitches. And then I'll show you how beautiful it looks when it's complete. Embroidery is a fascinating process to watch, and it can be kind of mesmerizing as you watch the needle travel around and decorate the fabric. Here you'll see we have a finished embroidery design. All of my decorative details and my satin petals have been added. Of course, we have the basting outline. So at this point, I would flip it over and use a seam ripper to remove the basting stitches, and little by little you need to pull that apart, and once you take it out and rinse away that stabilizer, it's time to sew it back together. So you take your sleeve, aligning the raw edges that you've cut open, and you go to the sewing machine, and you stitch with a wobble stitch, and before you know it, you're done. Get ready to be amazed to learn about a museum dedicated to quilting and the history of quilts. Please welcome my guest, Carolyn Ducey, who joins us from the International Quilt Study Center and Museum in Lincoln, Nebraska. Carolyn joins us today via Skype. Welcome to Sewing with Nancy, Carolyn. Thank you so much for having me, Nancy. I'm so impressed with this museum. I was there shortly after it opened in the late '90s and haven't been there since. So it's on my list to go. But please give our viewers an overview of how the museum started and how vast your collection is. Well, it's such an exciting place to be. We were founded in 1997 with a gift of about a thousand quilts from Robert and Ardis James's collection. The Jameses were native Nebraskans who lived in New York and were looking for a home for an amazing study collection that they put together. So at the same time that we acquired the collection and began our museum, we also established a study center so students can come from around the world to study and research quilts from our historic collection to brand new quilts being made today. Since 1997, we've grown rapidly, and in 2008, opened our beautiful new museum with the support of the Jameses and many of our Nebraska quilt lovers. Our collection has continued to grow. We're at about 4,500 quilts now from 50 different countries. And, in addition to opening our museum in 2008, this year we are expanded already and have doubled our exhibition space and our storage space. My, my. In such a short time you've really grown, and you have about 12 to 15 exhibits a year. You're one of the curators. Right. And the exhibits, I know, have a theme to them and interesting themes. Not only just domestic quilts, but international and quilts from different tribes and indigenous peoples. Right. I think the opening exhibit for our new space really is a terrific way of understanding and learning about our entire collection. The exhibition is called "Getting to Know You." For those who can't come to Lincoln, it's available online. And it shows quilts from an entire depth and breadth of our collection. So not just fabulous American quilts and European quilts, which we're familiar with, but some new discoveries we've made in international quilting, quilts from many different cultures, the Amish, Native Americans, even Korean pojagi and Japanese patchwork. And you keep-- There are maybe a thousand quilts on display, let's say. I'm using that as an example, maybe less. But the remaining of the quilts are kept under perfect storage. We have wonderful storage. We actually are only able to show about a hundred quilts at a time in the museum. Oh, okay. Sorry. Like many places, the bulk of our collection is in storage. But we use methods of storing the quilts that will really ensure that they're going to last for as long as they possibly can and they are things that you can really do at home. We use primarily box storage, so we're folding our quilts. But once a year or once every two years, we refold every quilt in the collection, and that's really important so that you don't have creases occur and cause breaking of fibers along those creases. You want to watch your temperature and humidity, so keeping the quilts on the same floors you live on is much better than a basement or an attic. And then, also, being aware of light levels, even for your fabric stash. If you've got that on shelves where light is hitting it, you're going to have a stripe of fading along one edge of your fabric. So it's important to maintain as low level of light as you can. And even to put things away and really keep them from light altogether is really our best aim. So not only in the largest quilt collection under private ownership, but also for our own quilt collection, whether we have three or four quilts, we can follow your guidance, Carolyn. Absolutely. Most of our textiles tend to be cotton, silk, wool. Those are proteins and animal fibers that really are like living, breathing things still. They need a lot of attention. They need to be looked at regularly and cared for regularly. Well, great advice from a curator of textiles. I'm so glad that you could join us and tell us about the International Quilt Study Center and Museum, and rest assured, I'm going to be back to see this. I hope so. Thank you for joining us. Thank you so much, Nancy. You're very welcome. And you at home, watching at home or online, thank you for being with us during this first program of our series on "Simple to Chic T-shirt Makeovers." Eileen Roche will be back next week with our second part of that program, and you're going to learn many more ideas. You can rewatch this program or many seasons of Sewing With Nancy online at NancyZieman.com. You can also connect with us on social media platforms. So be sure and do that. And then, if you want more information about the Nancy's Corner guest, you can rewatch my interview with Carolyn. You can also do that online, as well.
As I like to end each program
Thank you for joining me. Bye for now. Nancy and Eileen have designed a multi-format CD of embroidery designs with printable instructions to transform T-shirts as featured in this two-part series. The CD is $39.99, plus shipping and handling. To order the CD, call 800-336-8373 or visit our website at sewingwithnancy.com/2922. Order item number CD00702, "Simple to Chic T-shirt Remakes" Credit card orders only. To pay by check or money order, call the number on the screen for details. Visit Nancy's website at NancyZieman.com to see additional episodes, Nancy's blog, and more. Sewing with Nancy TV's longest-airing sewing and quilting program with Nancy Zieman
has been brought to you by
Baby Lock; Madeira Threads; Koala Studios; Clover; Amazing Designs and Klass Needles. Closed captioning funding provided by Pellon. Sewing with Nancy is a co-production of Nancy Zieman Productions and Wisconsin Public Television.
The latest from Nancy's blog

Search Sewing with Nancy Episodes

Donate to sign up. Activate and sign in to Passport. It's that easy to help PBS Wisconsin serve your community through media that educates, inspires, and entertains.
Make your membership gift today
Only for new users: Activate Passport using your code or email address
Already a member?
Look up my account
Need some help? Go to FAQ or visit PBS Passport Help
Need help accessing PBS Wisconsin anywhere?

Online Access | Platform & Device Access | Cable or Satellite Access | Over-The-Air Access
Visit Access Guide
Need help accessing PBS Wisconsin anywhere?
Visit Our
Live TV Access Guide
Online AccessPlatform & Device Access
Cable or Satellite Access
Over-The-Air Access
Visit Access Guide


Follow Us