

 Passport



Sew Amazing Scarves - Part 2
10/13/13 | 26m 46s | Rating: NR
Create flirty textured scarves in a matter of minutes using a few knots and a little sewing. This program features Knot Your Average Scarf, 20-Minute Scarf, S-Curve Scarf, Flirty Scarf, and All Knotted Up Scarf—as easy as it gets! Learn new and innovative techniques that are perfect for scarves.


Copy and Paste the Following Code to Embed this Video:
Sew Amazing Scarves - Part 2
If you have a desire to sew, but hesitate because you're concerned about devoting hours of time to a project well, make a scarf. In fact, in today's episode of "Sew Amazing Scarves" you can select a style that's so speedy that you can make two in an hour. It's creativity with instant success. "Knot your average scarf" is my first option made with either knit or woven fabrics these two-tone scarves have definite focal points. Learn how to knot then sew. "Sew Amazing Scarves" that's what's next on Sewing with Nancy. Sewing with Nancy TV's longest-airing sewing and quilting program
with Nancy Zieman is made possible by
Baby Lock, a complete line of sewing, quilting and embroidery machines and sergers. Baby Lock, for the love of sewing. Madeira, specializing in embroidery, quilting and special-effect threads because creativity is never black and white. Koala Studios fine sewing furniture custom-built in America. Clover, makers of sewing, knitting quilting and embroidery products for over 25 years. Experience the Clover difference. Amazing Designs and Klass needles. The knot your average scarf can be sewn either with knit or woven fabrics. For lightweight woven fabrics you're going to need a half of a yard of two fabrics. The fabric doesn't have to be the same width just both must be woven. For knit fabrics, a heavier knit fabric you'll need a fourth of a yard of two fabrics. This is quite beefy and you'll see the scarf when I'm finished. If it were lighter weight then you'd need a half of a yard. I'm going to show you one of my samples I made. This knit only had a fourth of a yard and it was just too lightweight. So, for lightweight fabrics, a half a yard. For heavier weight fabrics, a fourth of a yard. Nine inches crosswise cut, or 18". This is 18". This is 9". You're going to fold both fabrics into a tube meeting long edges the lengthwise edges, and serge or just do a little zigzag stitch on a knit fabric to sew a 1/4" seam allowance. Sew these long tubes. They're either 60" or 45" long. You're going to turn them right side out. For one of them. The second tube, you're going to make with openings with two openings. You'll close them up after a while. But from each end, you're going to sew two to three inches and then leave a comparable opening of two to three inches. On the opposite end, I have the same thing. Stitch two to three inches and then an opening of two to three inches. The magic turn comes through these openings. After you've turned both of your tubes to the right side which doesn't take very long, you may want to press. You don't have to press the seam on knit fabrics. But you'll need to know where that seam is because the next step you're going to fold the scarf, meeting the ends. Now, let me show you on this scarf. I have it folded in half. Then the seam allowance is on the outer edge all the way around I have positioned the seam allowance. You'll see why in a minute. We're going to knot first. To keep those ends even, I'm just going to overlap them and pin. This will help in the knotting process. I have one tube with the seams on the outer edge. I have already pinned the ends of the second tube. I overlay one on top of the other opposing ends, just like that. I have a hole in the middle. The long ends are going to go through the opening to create a knot. I pinned the edges, because that way I can make sure that the edges are even. Create a pretty knot, there you go. Unpin the ends. This is a logistical scarf with a lot of turning. We're going to find that side seam of one scarf the side seam of the other scarf and pin them together. Stack those seam allowances. Just one pin, that's all you need. Remember that opening that I left? Here we go, here's the pin. Here's the magic. You tip the pin through the opening and pull, and pull, until the complete ends of both circles come out. Ta-dah! Use 1/4" seam allowance and serge or zigzag for a knit fabric, around the edge. You do this to both ends of the scarves. You can see with just, really, four seams two lengthwise seams and those two circle seams this has been stitched. You pull it out and now you have a scarf. You'd sew this opening by hand. You'd sew it closed. Here you have a knit scarf the knot your average knit scarf. Let's put this on the mannequin to show you. We have the woven style which was made with 12"-wide strips. This knit scarf was made with 9"-wide strips. You can loop it twice or wear it like this but it's a great accent. It's amazing construction and relatively easy to put together. Ever think you could complete a sewing project in less than half an hour? It's true, the 20-minute scarf takes about ten minutes to cut and another ten minutes to sew or serge. With only four seams, the 20-minute scarf just may become your go-to gift to serge or to sew. We're using knit fabrics for this particular scarf. It has three fabrics, as you can see with the three different colors. Compatible knit fabrics are put together. Drape, fold. You can get whatever color you'd like to be most prominent by just a little twist of the wrist. You'll need a fourth of a yard of two fabrics that's a 9" width the green and the turquoise. Then the stripe, we used a half of a yard. You'll need 9" widths. They're 9" by 36". Four panels that are 9" by 36". You could change the length. This is just a guideline. So, ten minutes to cut out these four panels. Then you're going to serge or sew the seams together the panels together. One stripe will go with a solid then the other stripe will go with the second solid. On this particular seam we used a four-thread overlock stitch. Here's a close-up of that stitch. It's traditional serging at its best where you're just zipping right along trimming the raw edges and creating a seam. I kind of like the serge stitch because it has a lot of stretch. This particular fabric does have considerable stretch. Most knits have the greatest stretch in the cross grain and that's how you're cutting the strips so a perfect combination. If you don't have a serger, just use a little zigzag stitch. So, two seams to sew the panels together. Here's the other panel that has been sewn together. then just meet opposite ends so that a stripe goes with a solid and vice versa. Serge the top edges. That's it. We did not serge the outer edges because knit fabrics don't ravel. You can definitely leave them unsewn. On our finished garment or finished scarf you can see how the four panels come together. Because we're twisting it around the neck it creates a neck frame piece. There's really no worry about these outer edges. Something probably 20 years ago, I would've never done and now I do with great ease. It's fun to put together, easy to sew. The 20-minute scarf with two fabrics that are a fourth of a yard and one that's a half of a yard and just a little bit of serging. Different fabrics, different looks. That statement couldn't be more obvious when looking at these two scarf options. Even though we used the same pattern the edge finish plus the fabric choice change this scarf from elegant to casual. It's called an S-curve scarf. Two donut shapes are the pattern pieces. Wonder how it's made? I think you'll be surprised. The knit fabric is the red one, obviously. We've used a lettuce edge finish which I'll show you how to do in just a few minutes. It's lightweight and drapes. Wrap it around your neck, wear it however you'd like. The more elegant scarf was made out of woven fabric. It's the same pattern piece. The edges are just serged with a three-thread overlock stitch. This is perfect for weddings, or put it over a black dress. It's kind of fun to wear. The pattern piece, as I mentioned looks kind of like a large donut with an opening in it. They're 21" circles. In the book that accompanies today's program you'll find the pattern, or you can make your own. You can see the opening. Cut two. No matter what fabric you're working with, cut two. You'll need 5/8 of a yard of fabric. Here we have two circles that have the opening. Now you're going to meet right sides together of just one of the ends. I have a little tape here that tells me that's the wrong side of the fabric. I'll remove that. Let me lay this out so you can see. What you're going to do right now is make it look almost like a figure eight a sideways figure eight. You would serge or stitch this seam. I'll do this one. This is called an S-curve, because after you stitch this and I open this up, you'll get a sideways looking S. I just pinned this, obviously but you can kind of see it's one large S. When I made this scarf, I just serged the edges just with the overlock stitch, and it was ready to wear. The knit fabric, to give it that flounce look the lettuce edge requires a little extra stitching at the sewing machine. I'm going to show you how to set your machine and do that stitching. To continue with the look of the S-curve scarf giving a knit a lettuced edge, a fluted edge we're going to do zigzag stitching. Because this is a knit fabric it's important that you choose a stretch needle or a ball point needle. I've chosen a size 75, the smaller of the two sizes. You would work with all purpose thread matching thread in the bobbin and in the top that matches your fabric, obviously. This is just a little bit of a different color. I've purposely chosen to show you the stitching with a different color so you can see the stitching a little bit better. Zigzag stitch. Here you can see what it will look like when I'm sewing. But to know the settings, I did some testing which I would recommend that you do, as well. I have a "3.5" width, and the length set at "0.7". You may put it at "1" but just test, you know, test your fabric. You're going to have a tug of war with your sewing machine. You're going to tug the fabric in the front of the needle and behind the needle. Not pulling way down here, but very close about one inch from the needle. The knit fabric will roll. Just doing a little bit at a time so that when you're zigzagging you're going to try to get the zig in the fabric and the zag right off the edge. Pull and stitch. I'm pulling it as taut as it will go. Just do some testing, as I mentioned because it does take a while to do this because it's such a short stitch. But I like the look, so yin and yang pull and push, tug of war, whatever you want to call it this is what you're doing around the edge. When you're done sewing, and I'll just clip the threads and show you this. This has contrasting thread, slightly contrasting. Notice how it's lettuce, it curves. This S-scarf can have great looks, elegant to casual. This scarf started out as six circles. With a little creative cutting each circle turns into a flounce. It's practically a no-sew technique since non-raveling interlock knit is the fabric of choice. Here's how to make a flirty scarf. The scarf has six different components. They are just attached in the back with a little bit of stitching. Again, as I mentioned, non-raveling fabric or knit, an interlocking knit a third of a yard. You'll find a pattern for this or you can make a ten-inch circle and make it into a flounce. You'll cut three shapes down this area. There's two layers of fabric, so you'll have six flounces. The cutting is probably the key element for his. You have the shape that's on the circle. I'm going to use a rotating cutting mat because I'm on an angle. Just simply start at the top and cut. As you go around, just shape it and curve it. I'm using the 28mm rotary cutter and I've just gone off my line a little bit and it's not going to matter in the least. Just keep cutting, and cutting, and turning... and turning. Hopefully, I cut through all the layers. I think I have. I'll unpin the tissue, and then you'll see how the flounce appears for the scarf. I'll move this, and then I'll just lift it up and there we have this nice flounce. Notice the drape of it. It's really a very attractive drape. You'll cut two layers usually at a time so you'll cut three sets to create six flounces. Any which way you work at it, and you can do this in a variety of ways but you can take two of the starting point ends and sew them together, end to end. One set, two sets, and then three sets. We've talked about very quick sewing techniques. Well, this requires a little bar tacking at these pairs. Then, from a scrap of fabric, cut, oh let's say, a 1" by 2" piece of the knit and wrap the ends. I realize this is almost a no-sew technique but isn't it fast and creative? You can even try different fabrics in this, combinations. Just do the stitching and you have an accent to put over a basic colored top. Here it is, draped around the neckline. It looks attractive and fun. Just because you know how to sew and cut, you can create it. For scarves with plenty of dimension and texture turn knit fabric into yarn-type strips and tie knots. From fleece to slinky knit use a half of a yard of fabric or less to fashion your version of the all knotted up scarf. This is almost a no-sew project, working with fabric fits the Sewing with Nancy theme. The sample that we have here was made with an interlock or slinky knit fabric where square knots have knotted in a pattern 12 fabric strips together, fabric yarn strips. If you're working with a heavier weight fabric such as a fleece you're going to get, of course, a much bulkier look. Working with the knit in the crosswise direction that's what has the most stretch is what's going to achieve the yarn effect. You can cut 1" to 1/2"-wide strips of the fleece. Give it a pull and it becomes more yarn-like. The narrower it is, of course, the less texture you'll have. Don't go less than 1/4" on fleece. It will shrivel down to nothing. On an interlock or slinky you're going to cut 1" strips, that seems to be the best. Just cut the strips. Then, if you want to make long strips, sew ends together. I'm just going to show you that you just pull it and look at how it curls to the middle and you have a version of bulky yarn. I've done many Sewing with Nancy programs, over 800 and I'm able to demonstrate upside down. Not this time! I have to do some knots. I'm going to have to turn this to the right side. But before I do, I'm going to show you the yarn set up the fabric yarn set up. You're going to create 12 strands and pin them together across a board. Separate them into groups of six. The ends of the yarn have been clipped together so that you don't have a nest of yarn in that area. We're going to make square knots left over right, and right over left and find the outside strips and tie knots. I have a group of six. Using the outer strands I'm going to tie two square knots about four inches, three inches from the end. You'd do the same on the other side. Now you see what it's like for me! I always work upside down. Here, you see I'm working upside down. I would gather three strands from the middle of each grouping. Then I'd tie another square knot, two sets of square knots. Then I'd go back and forth, back and forth. You can tie square knots, probably better than I can. You just make a pattern. For those of you who were around when perhaps you did a form of macrame which is again coming back as a folk art. You can see that that's basically what's happened here. We take a close-up look. Here are six strands that have been tied. Another six strands, then three strands from each set tied into two square knots another set, and you have a very textural look. Depending on the fabric color and shape you have a great interest that has dimension and texture. When most of us see a conglomeration of outdated ties hanging in the back of a closet we might consider them as potential yard sale items. Today's Nancy's Corner guest thinks of ties as story tellers items that are ideal for art quilts. Please welcome Debra King. Debra is an art teacher as well as an art quilter and has great quilts to share with us. Welcome to Sewing with Nancy, Debra. Nice to be here. When I saw an article about you in the paper my little local paper we both went to the same high school I couldn't help but say we're going to show this on Sewing with Nancy because your quilts have great character, great depth. The first quilt you made is called Fall. It is. Tell us how you got all these ties. The ties came to me as a gift from a close friend when her husband passed away. She had a bag of ties of his. She thought that I could come up with something to use them in. So they sat in my studio for a while. I was inspired one day when I was using this fabric to create a fall tree. The tie colors just lended themselves to the quilt. What's the first thing you did when constructing this? With this quilt, the first thing I did was weave the ties together to create the outside shape of the leaves. The interesting thing, Deb is that you did not disassemble them. All the interfacing is in them, they're whole. Yep, I left them as is. Then after I had that assembled I used oil pastels to go in and draw the shape of leaves on top of the ties themselves. Then you just stitched over them. You can see the shading between them. That's really smart. Very good looking. Let's take a look at the trunk. The trunk, again, that was woven together. Really lovely. But then you got inspired not only to do one art quilt in this series. I have three. Let's look at winter because this is dramatic. It was one of my favorite ones to do. It has a lot of dimension. The trunk is a tie, or many of them. It's a lot of black ties. I had to ask a lot of men I knew to donate a tie or two. I also like to visit the thrift stores to pick up extra ties. You were telling me earlier that white ties are the most tricky to find. They are, especially at a thrift store. The background is white fabric and white ties. Really charming. So, we have winter, we have fall. Then comes spring. Spring, yes. Spring is when the tree is just starting to bud out so I have the ties themselves hanging on the tree with some little buds. They're very dimensional. You kind of stitched leaves, you were telling me. They hang out. The summer quilt has a lot of leaves that I just stitched right onto the tie and then cut out. There is a lot of interest with not only fabric, but thread. You use variegated threads, and you used beads. There was a lot to show here. Yes, and trees represent change to me just like men's ties. They're kind of a useless piece of fabric or you know, that men wear. They change in style so what better way to incorporate them in some art pieces, a good memory. I loved it. I loved working with the ties. I'm sure your friend is very appreciative of this. She is. Well, Deb, it's been a pleasure to share your art quilts with others. I got to see them up close. Perhaps some of our viewers will be able to go to an art gallery and see them sometime. Thank you for joining us. Thank you for having me. If you would like to find out more about Deb King's art quilts you can find all things Sewing with Nancy at our online website at nancyzieman.com. You can click on Nancy's Corner and at the 2700 series, you'll find a link to Deb's information about her great art quilts. This is our second program of our three-part series on "Sew Amazing Scarves." We'll be back next time with our third program. In all, I'll be showing you 18-20 ideas. If you really like this show you can watch it once again online at nancyzieman.com. We have a blog, so that three times a week I send out information on sewing, quilting, or embroidering. You can interact with me, find ideas that you might like to sew, quilt, or of course, embroider. So thank you again for being with us on Sewing with Nancy. As I say in all programs, bye for now. Nancy has written a fully-illustrated book entitled "Sew
Amazing Scarves
20 Easy-sew Options" that includes all the instructions and four patterns from this three-part series. It's $16.99, plus shipping and handling. To order the book, call 1-800-336-8373
or visit our website at
sewingwithnancy.com/2709. Order item BK2709 "Sew
Amazing Scarves
20 Easy-sew Options" Credit card orders only. To pay by check or money order call the number on the screen for details.
Visit Nancy's website at
nancyzieman.com to see additional episodes, Nancy's blog, and more. Sewing with Nancy, TV's longest airing sewing and quilting program with Nancy Zieman
has been brought to you by
Baby Lock Madeira Threads Koala Studios Clover Amazing Designs, and Klass Needles. Closed captioning funding provided by Oliso. Sewing with Nancy is a co-production of Nancy Zieman Productions and Wisconsin Public Television.
The latest from Nancy's blog
May 26, 2026
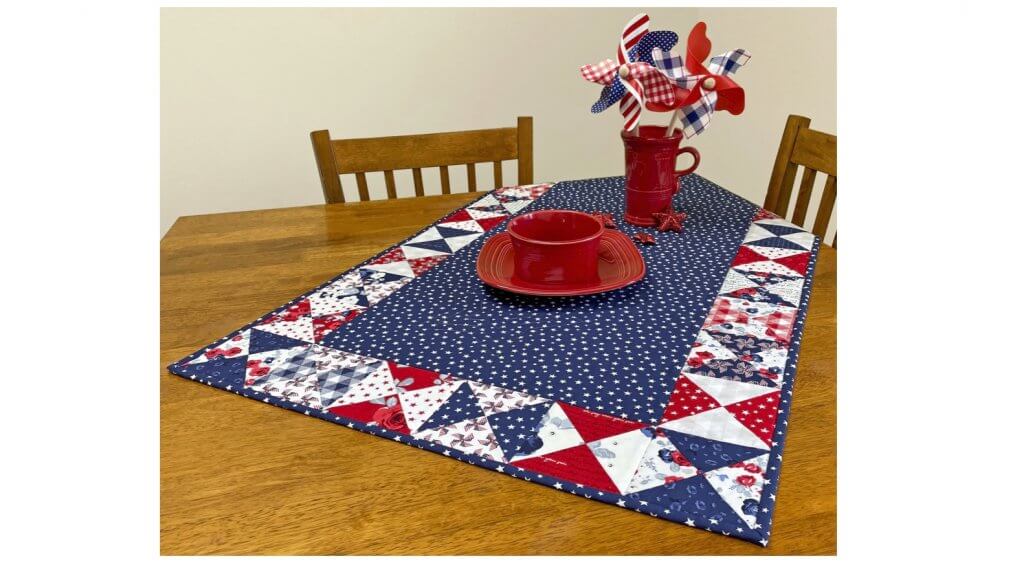
S!S 213 Sew A Celebration Patriotic Quarter-Square Triangles Table Runner Sewing Tutorial
Search Sewing with Nancy Episodes

Donate to sign up. Activate and sign in to Passport. It's that easy to help PBS Wisconsin serve your community through media that educates, inspires, and entertains.
Make your membership gift today
Only for new users: Activate Passport using your code or email address
Already a member?
Look up my account
Need some help? Go to FAQ or visit PBS Passport Help
Need help accessing PBS Wisconsin anywhere?

Online Access | Platform & Device Access | Cable or Satellite Access | Over-The-Air Access
Visit Access Guide
Need help accessing PBS Wisconsin anywhere?
Visit Our
Live TV Access Guide
Online AccessPlatform & Device Access
Cable or Satellite Access
Over-The-Air Access
Visit Access Guide




Follow Us