 Passport


Fancy Footworks 2 - Part 3
09/23/12 | 26m 46s | Rating: TV-G
Dig out your specialty presser feet and save some sewing time and effort using the Bias Binding Foot, Buttonhole Foot, Sequins ’n Ribbon Foot, and the Free-Motion Quilting Foot. Nancy teaches you how to use these feet to their full potential in this workbook style class that has you sew and save your samples.
Copy and Paste the Following Code to Embed this Video:
Fancy Footworks 2 - Part 3
Almost every sewing machine is sold with at least four to five different presser feet. Yet, the average sewist or quilter uses an average of two feet for all of their stitching. Somehow, with the feet hidden away in an accessory box we tend to forget about them. Welcome to "Fancy Footworks 2," a Sewing with Nancy  sequel showcasing the uses of presser feet. The bias binding foot is our first feature. Designed to assist in the stitching of bias tape on the edge of fabric this unique design aids in this sometimes tricky task. "Fancy Footworks 2," that's what's coming up next on Sewing With Nancy. Sewing with Nancy,  celebrating30 years of sewing and quilting with Nancy Zieman
is made possible by
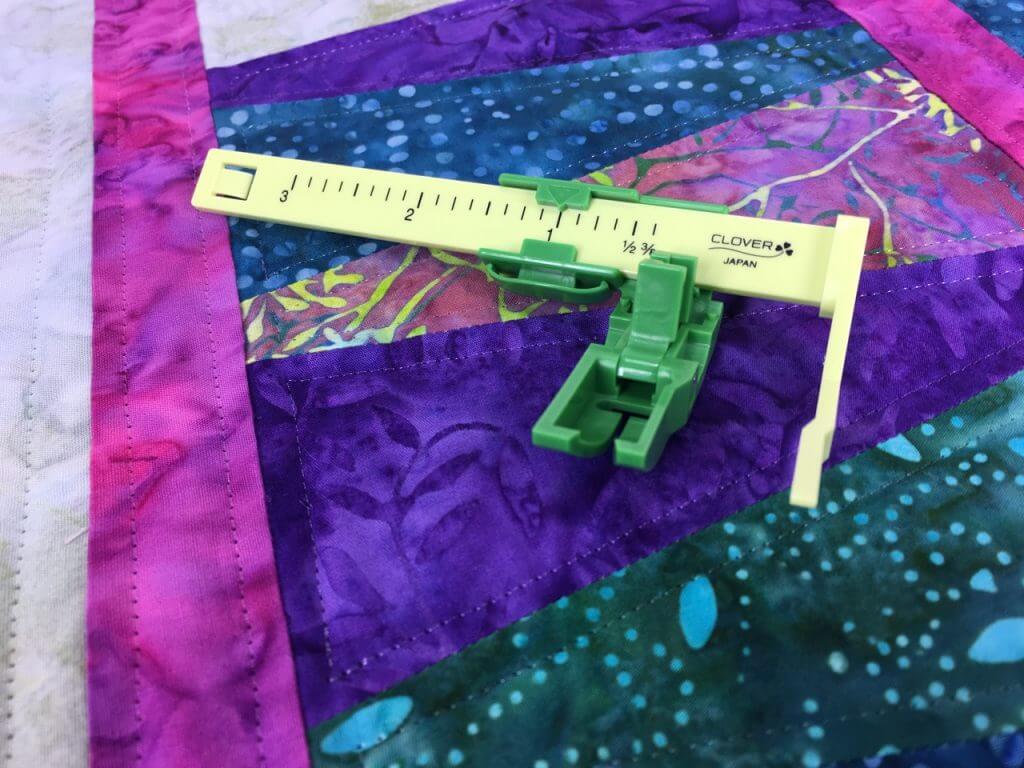
Baby Lock, a complete line of sewing, quilting and embroidery machines and sergers. Baby Lock, for the love of sewing. Madeira, specializing in embroidery, quilting and special-effect threads because creativity is never black and white. Koala Studios, fine sewing furniture custom-built in America. Clover, makers of sewing, knitting quilting and embroidery products for over 25 years. Experience the Clover difference. Amazing Designs and Klass needles. Generally, when you're putting bias tape on an edge it's a two-, even sometimes three-step process. Well, with this foot that you may find in your accessory box it can be attached with one seaming. This little sample showcases bias tape around an edge. A curved edge is really a key point. If your project allows, do curve the edges. It's a lot easier to attach the bias tape to curved edges than it is to a square edge. You may want to round it with a template or even a saucer. A cup saucer works out really well, too. Bias tape, you can buy it by the package but not always can you get it to match your projects. If that's the case, then cut bias strips 1-1/2" wide or 2", however wide you'd like to make your bias tape. You're going to make single folded and then double folded bias tape. Here is a bias tape maker. There's an opening down the center that I've started to advance the fabric through. As it comes out at the edge, you start to do the pressing. Let me move that. Move the bias tape maker and just advance. You can't really see this but notice that I have the iron very close to the edge. Let me just press a little bit more so you can get the idea. When you are doing this at your ironing board it will be very fast. Then after you have the single fold then fold it one more time meeting the folded edges together to make the double folded bias tape. Then it's ready to be inserted into the foot. Before I insert it, let me tell you about this foot. It has three parts. First of all, a C-clamp, which is rather unusual. If you pick this out of your accessory box you may think, what does this do. Here's the C-clamp. You can see this bias tape is going to slip in this area There's a side screw that adjusts the width. As I turn it, it's getting narrower. The other way, it'll get wider. The inner fold will butt up against this edge. To make certain that the needle is getting in the correct place you can adjust this screw next to the shank of the foot. There are measurements imprinted on the C-clamp. They're in centimeters so depending on the width of your bias tape you could set that but I just usually do it visually. Then you insert-- I like to do this before I put this on my machine. Insert the bias tape in the C-clamp. It fits right within that configuration. I have the edge a little bit too narrow so I'm going to turn it the other way. There we go. It fits so that the inner fold is adjusted next to the interior. I already have a sample on my machine. I have a quilting needle put on here because I'm working with thicker fabric. I'm using all-purpose thread as I mentioned, a quilting needle. A straight stitch. Now, I have the presser foot raised so that I can glide my project through the opening. A little bit easier to do when you're not talking. There we go! I have it positioned. Let's look at the underside. You can kind of see that it's wrapped around. as I lower the foot, I'm going to do one more check. Visually, I can see that my needle is going to align just to the right of that fold. Now just sew. As I do the stitching, it catches both the top and the bottom layer at the same time. As I'm going around this fold you'll see my fingers do a little fold. Or, the fingers are not "folding" but they're aligning along the fold. It zips around the edge, catching both the top and the lower edge at the same time. The double fold of the bias tape is now attached with one row of stitching. Instead of sewing one-half at a time we now have two halves at a time. You can see how much easier it is with rounded corners rather than with square corners. I'm not going to finish doing this whole edge. I'm just giving you a little precursor of how this works. I'm going to check my work. Oh, it worked! Here you can see the stitching around the top. We used contrasting thread on the underside so you can see how it caught in this area. Set up is important, and then you can stitch. Buttonholes. The word can cause palms to sweat and heart rate to quicken. Adding buttonholes to a project has at times received a bad reputation, without cause. My goal is to show you that buttonholes can be added without hassle. Whether you are making a very small or a very large buttonhole they are all made in the same manner. I'd like to show you how to make traditional buttonholes as well as corded buttonholes using the feet that come with your machine or perhaps a foot you'd like to buy that is an accessory. Almost all buttonhole feet have the same kind of apparatus a sliding tray, a gripper on the underside so it does not slip on the fabric and an adjustable area for the button. The button is placed in first in the back of the tray and then the shank is moved to meet the button. As you can see on the side, I would loosen the screw meet it to the foot, then tighten. The operative word coming next is test. You have to test a buttonhole to make sure that this is the right length for this particular button with the shank. On some other feet, you may have a tray in the back where you meet the button into the space. It's the same kind of concept. You may have a tray where the button doesn't fit. It may be too large. In that instance, I just take a little piece of paper, wrap it around the button mark a mark at the lower side and then again at the other lower side. Then on the adjustable tray-- Again, you're going to test a bit later-- You lay this in the back. You'll be able to do this better on a flat surface. Adjust the screws so that the buttonhole length fits within the tray. Again, test. I spend more time testing buttonholes than on the actual application onto a garment. Once you get it the right size, with the correct fabric you're good to go. Use interfacing on one layer of your fabric and then stabilizers. It's very important to use stabilizers. On medium to heavyweight fabrics I always add a wash-away stabilizer on the top. This is a cotton. I probably wouldn't need it, but I placed it there so I would remember to tell you about that. Then a tear-away stabilizer on the underside and then, interfacing in the fabric. When I first started teaching sewing there weren't stabilizers. I used adding machine tape. This works so much better. Now I'll snap my foot onto the machine and then set it up according to your manual. I have selected a buttonhole stitch. I'm going to make this buttonhole right in this position. You would mark on your fabric where the buttonhole would begin and end. Or, begin, you don't really need the ending spot because you've measured it using the button. This is why you test because a shank or different fabrics you could need totally different lengths. This is obviously an automatic buttonholer on my machine. You may find at times, that you might need to adjust or at least control the stitch at each of the settings. You'll just have to follow your manual. But that way, you'll be able to open this. We'll open it in just a few seconds. I'd like to show you how to make a corded buttonhole at this point. Use matching thread. You can buy cording, or gimp. Sometimes, your instruction book will call for gimp. I've never seen gimp labeled in a fabric store so I just make my own. I grab the bobbin thread and the top thread that comes through the machine. I'm going to make a little shorter length. Make six strands, or three lengths of thread and kind of cut them and then twist them slightly together. Now set your machine for a zigzag stitch and use the traditional foot. Here you can see a close up. I'm just zigzagging over the whole length of thread so that I have matching cording. It's really easy. Then on your foot, you'll find that there are toes. You have a foot, you've got to have toes! There's a single toe in the back and sometimes there's a triple toe in the front or a place where you can tie your cording, which I have done. Then snap this on. After you have loaded it lower the foot and get ready to do another buttonhole. I have this cording kind of long. It's a little longer than I need right now but I'll just show you that I can make the next buttonhole. It zigzags over the cording. Because it's the same thread color it will just make a heavier weight of buttonhole. It's more durable and perfect for medium to heavyweight fabrics. So here's another sample that I made prior. I'll show you how to remove the top layer of the stabilizer. To cut open the buttonhole, there are two options. With a seam ripper, score the interior place the point of the seam ripper at one end and through the middle and cut. Go to the other side, point down to the middle and cut. There we go. Now you've cut open your buttonhole. We can remove the threads of the cording. To use a buttonhole cutter and block I'd like to show you how to work with that. Place this on the table. Place half of the buttonhole over the board and cut. Then flip it over and place the other half. With these two cutting techniques there isn't any way of cutting beyond the buttonhole. These are my favorite buttonhole techniques. Narrow strips often slip to one side or the other during the sewing process. Use the sequins and ribbon foot to tame unruly trims like sequins tape, ribbon, or even rick rack during that stitching process. This whole three-part series is on presser feet. When you have specialty trims from evening wear to home decorating you may find that these trims slip and slide. So rather than gluing or pasting them down there is a foot that's designed to handle that. This particular foot is a unique configuration. I'd like to take a close look at it so that you understand what's going to happen. Rather than having two toes the right toe is completely eliminated and this accessory guide is attached on the side bar. You can see the opening that's allowed for the trim whether it's ribbon trim, or little sequins. Your trim may not fit in that opening. There are other sizes that you can screw on. This little visual shows you. Here we even have a double for two trims or a much wider trim width, about 3/8". There are even additional ones so that you can see that you can match the size of your trim. Then you're either going to straight stitch or zigzag it into place. I'm going to show you zigzagging because for one of the more difficult things-- It's really not that hard-- A difficult trim to sew is a sequin tape for example, formal wear or holiday wear. With sequins, pet it like a cat, going downward so that the sequins are lying one on top of the other in the downward position rather than in an upward position because otherwise the points will get caught in the foot going in the wrong direction. So pet downward, like you're petting a cat. You insert it into the opening of the accessory guide. I've already started to stitch this on my machine. I recommend that you use monofilament thread a clear thread when zigzagging over this. You have to do a zigzag for this particular trim. That's what I'm going to show you on the screen. I have a wide zigzag. For this particular trim, I needed that widest width. You can adjust the length as you are making a sample. So, I have the "pet" of the sequins going toward me. You can see they fit right into the opening. I can change the curve, or I can sew straight. I'm using contrasting thread, so you can see what happens as the zigzag couches over the edge. It's kind of a unique way of doing stitching. You can meander. I'm just aimlessly doing some stitching here. When I cut the threads, let me show you what happens. As I pull this up and out through the opening you'll see that the thread straddles over and you can manipulate the trim with this foot. One of the most common requests on my blog is how to get the courage to attempt free-motion quilting techniques. Trust me, you don't need courage, just practice. Here's a way to practice where the stitches are completely camouflaged by the textured fabric. It's a perfect testing ground for the special technique using a quilting foot. The quilting foot can look quite unique depending upon your sewing machine. It has a large opening so that you can see where you're stitching. The shank of the foot, believe it or not is shorter than the traditional length. From shank to the lower edge of the foot is shorter because it will ride above quilted fabric batting, backing and a top layer. With stippling, the technique is to sew little "N"s, like puzzle pieces or light bulb shapes, very neatly or sometimes not neatly, it's not that important. You just need to practice. This technique works so well making a textured fabric. You can later camouflage the stitching because we are going to give texture to the fabric. Rather than having a top layer and batting and backing we just have the top layer. For this embellishing technique I'm texturizing fabric that shrinks in size when steam and heat are applied. First, the foot how to work with free-motion quilting. Let's check the settings of the machine. This machine tells me that I'm going to use an open foot. Your quilting foot may vary from of the one I'm using. But the most important thing is that you're going to lower the feed dogs. This little button lowers the feed dogs. I have it set for a straight stitch. The length doesn't matter because you're going to be controlling the length of the stitch by having your hands on either side of the foot and guiding the fabric underneath. So when doing the stitching you are usually going to have many more layers. I just have these two narrow layers. So this is going to make a little bit more noise than you'd traditionally find. I'm going to stitch in the relief areas not the motif areas. As I'm sewing, I'm just going to be making little "N" shapes. You sew relatively quickly, but you move the fabric slowly. It's kind of like rubbing your tummy and patting your head. You know that little technique. You've got to think a little bit differently. Don't worry about neatness with this technique because the stitches are going to be camouflaged because you stitch around all these little areas. I'll just show you. I'm not the best stippler in the world but there aren't any stippling police so I don't worry about it. I just do these little "N"s that you can see. Now with the machine-- I mean with the technique, not the machine when you have that textured fabric underneath you just place it on the ironing board. Lift your iron on top. Give it a lot of steam, and watch it shrink. You may want to do this all over. It takes a bit of time, but it's fun to watch. It's kind of one of those sewing magic shows. So I have, in this instance, done the texturizing. Look what happens to the right side. All that stippling has allowed you to create texture and learn the stippling technique all in one swoop. Restoring hope though sewing that's the intent of today's featured organization. This restoration is accomplished by teaching sewing skills that will enable the students to support themselves and their children. This all takes place half way around the world in Ghana, with the help of enthusiastic volunteers from Point Hope. Please welcome Leslie Gemignani. She's here to explain how we can restore hope through sewing in Africa, welcome. Hi Nancy, thank you for having me on. We have an incredible program that we're starting over there. They've already had a year of being taught sewing, batiking. They're learning this to empower themselves to become these young ladies who are absolutely wonderful to give their children, and themselves a life, a reason for being. This place is in Ghana, and it's a refugee camp. It is a refugee camp that's about to close. It's been 20 years, I believe, in the making with this camp. Now there's 22,000 people that are going to be misplaced, homeless. Our founder, Delilah Rene, she went over there and found 40 acres of land, and she started a village. And in this village, they have many facets. What we're going to talk about is the classes that you're teaching people. Two types, sewing and batik making. Yes, yes. You make batiks that can be personalized. In any way, shape, form. Any designs. The batik making is done in, of course, the 100 degree temperature. Oh, yes. It's not for the faint hearted, is it? Not even a little bit, no. And yet these ladies when you see the picture you'll be amazed-- And they stamp with wax reliefs on the muslin fabric. On the fabric, yes. They heat everything in boiling, boiling wax. They put their stamps into the wax. They place them onto these fabrics. After the wax is dry, they put it into the dye and it comes out with these absolutely beautiful beautiful colors. Then they have to rinse out the wax so that you can see the relief area. But what beautiful batiks that they have. They are absolutely beautiful. You told me that on Fridays at the camp everyone wears a uniform. Yes, this is our Friday uniform. The children wear it, the adults wear it. This is their day of school their day of, I guess, welcoming Point Hope into their lives because it's made such a big difference so far. You know, and this is just-- It is a voice for forgotten children. It's wonderful and everybody looks adorable wearing the clothes. I'm sure they do! You're going to be going to Ghana soon and you're going to be teaching sewing. I'm hoping to come up with a second-year curriculum with them to help them finish what they've learned to do. Right now, they're learning to sew on hand-cranked sewing machines. Anybody who knows about those knows how difficult that is. These young ladies they have done a magnificent job. This is one of our tablecloths, and they've batiked it and then they do the silk screening. On the top. This is a symbol that you have through Point Hope and through Ghana. Yes, the symbol is, "Accept God" because without God, nothing is possible. They live in dire straits and you are giving them some encouragement and learning abilities. We are trying to teach them to be able to-- On the sewing aspect of it, we're trying to teach them how to do patterning, how to do finishing work. They have nothing. These women have nothing. They need sewing machines. They need fabric. They need these things so that they can build what they've got going. You mentioned a really nice thing and that is that we all sew and quilt for creative purposes and this something that has value. because they can express their creativity just like we do. Oh, they do, and it's amazing. I fell in love with this. It's adorable. This is a tooth fairy pillow. These are some of the different colors and some of the batiks that they've used to make them. They're just absolutely adorable. They certainly don't have tooth fairies there. No, they really don't. They had no idea what they were! It's amazing seeing all the detail that goes into it the child, the hair, it's just beautiful. I love it. These women, they have learned this. They're learning, making bags. We're hoping to start something where we can use the colors from different states and making like a backpack. What a wonderful way of giving hope through sewing and through fabric making. Thank you for telling us, Leslie. Thank you so much for having us here. You're very welcome. If you'd like to learn more about Point Hope
simply go to
nancyzieman.com where you'll find steaming videos of all our programs, my interview with Leslie. Just click on Nancy's Corner, the 2600 series and you will be able to find information on Point Hope and how, perhaps you could be involved in this great program. I hope you'll join us next time. Thank you for joining us on "Fancy Footworks," part three. Bye for now. Nancy's fully-illustrated "Fancy Footworks 2" workbook includes a 3-ring binder with laminated instructions for all the feet featured during this three-part series. It's $19.99, plus shipping and handling. To order the workbook, call 1-800-336-8373
or visit our website at
sewingwithnancy.com/2605 Order item number BK2605, "Fancy Footworks 2." Credit card orders only. To pay by check or money order call the number on the screen for details. Visit Nancy's website at nancyzieman.com to see additional episodes, Nancy's blog, and more. Sewing with Nancy,  celebrating30 years of sewing and quilting with Nancy Zieman
has been brought to you by
Baby Lock Madeira Threads Koala Studios Clover Amazing Designs, and Klass Needles. Closed captioning funding provided by Oliso. Sewing with Nancy  isa co-production of Nancy Zieman Productions and Wisconsin Public Television.
The latest from Nancy's blog

Search Sewing with Nancy Episodes

Donate to sign up. Activate and sign in to Passport. It's that easy to help PBS Wisconsin serve your community through media that educates, inspires, and entertains.
Make your membership gift today
Only for new users: Activate Passport using your code or email address
Already a member?
Look up my account
Need some help? Go to FAQ or visit PBS Passport Help
Need help accessing PBS Wisconsin anywhere?

Online Access | Platform & Device Access | Cable or Satellite Access | Over-The-Air Access
Visit Access Guide
Need help accessing PBS Wisconsin anywhere?
Visit Our
Live TV Access Guide
Online AccessPlatform & Device Access
Cable or Satellite Access
Over-The-Air Access
Visit Access Guide


Follow Us