 Passport


Grandmother's One-Patch Quilts - Part 2
09/25/11 | 26m 46s | Rating: TV-G
Nancy transforms hexagon blocks, such as those used in Grandmother's Flower Garden, into super-sized blocks created without any "Y" seams--just simple straight stitching. Make Grandmother's dramatic dahlia or a super-sized bouquet. These sensational quilts are easy to make using Nancy's faux-hexagon technique.
Copy and Paste the Following Code to Embed this Video:
Grandmother's One-Patch Quilts - Part 2
One of the quilt patterns that I have long admired is Grandmother's flower garden traditionally made with hundreds of tiny hexagons. I've only been able to admire this antique quilt knowing that I'd never have the patience to stitch such a masterpiece. Then a thought came to me. Why not super-size the block? With a few additional tweaks so I don't have any Y seams you can create hexagons with just straight stitching. This center, instead of being one inch is now six inches along the sides. You can make huge, impactful quilts. I'd like to share with you this fresh approach to patchwork. "Grandmother's One-Patch Quilts" that's what's coming up next on Sewing with Nancy. Sewing with Nancy TV's longest-airing sewing and quilting program with Nancy Zieman
is made possible by
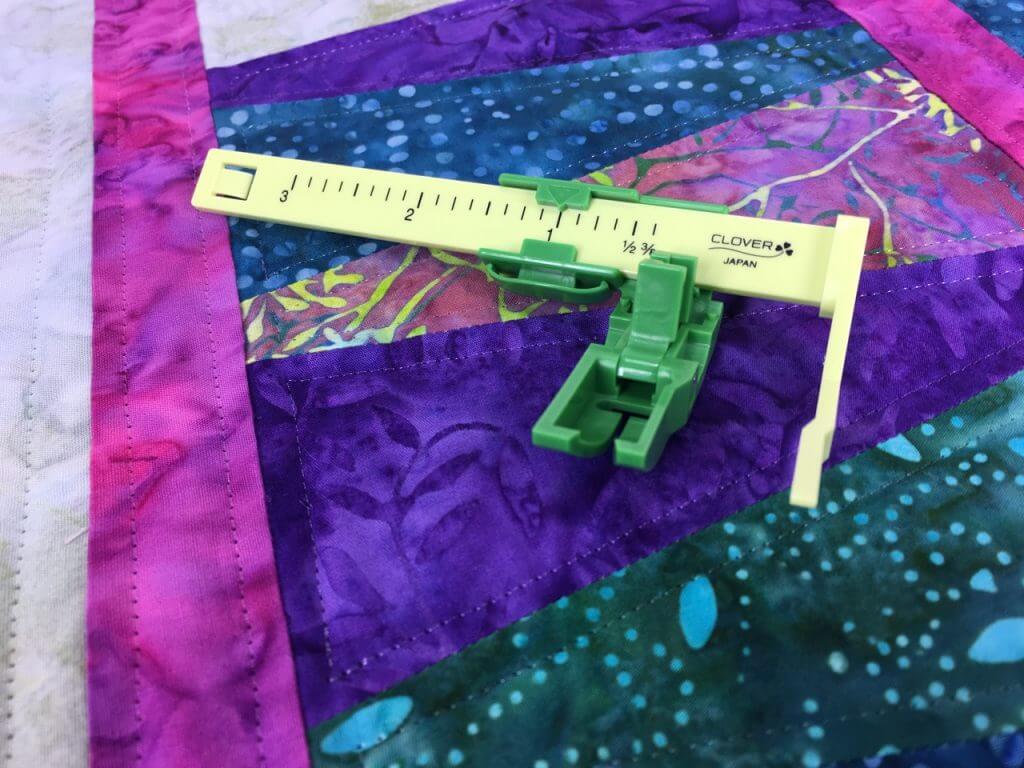
Baby Lock, a complete line of sewing, quilting and embroidery machines and sergers. Baby Lock, for the love of sewing. Madeira, specializing in embroidery, quilting and special effect threads because creativity is never black and white. Koala Studios fine sewing furniture custom-built in America. Clover makers of sewing, knitting, quilting and embroidery products for over 25 years. Experience the Clover difference. Amazing Designs and Klass needles. The hexagon shape can give you a variety of different pattern styles. You just saw this antique quilt created by Ida Kant, from West Bend, Wisconsin. She gave it to her niece, Diane Dhein who's a good friend of mine who loaned it to me today to show you. It's a charming quilt. It looks like Black eyed Susans to me with the black center, of course the yellow inner edge and then a scrappy outer edge. This is all hand-pieced, hand-quilted. It's a work of love. It's not quite finished so Diane has a task ahead of her to finish this. I just want to show you, by pulling this back that it has been hand-pieced together. There are little hand stitches in here. Ida stopped stitching right before the very edge. Here's a picture of Ida. She was born about 1890, or so. A humble woman, a kind woman. Now her quilt gets a little national publicity. I hope Ida's family can appreciate all the work that she did on this quilt and will enjoy it for a long time. Any hexagon quilt is generally created with Y seams. That's the term given where you have three intersections coming together. This is the Y, or an inverted Y. Here's the Y seam, where the muslin the blue print, and the blue and red print all come together at this intersection. Not an easy task to get all three areas together. We're going to create a hexagon, but a faux hexagon. We're not going to have any of these Y seams. I'll show this to you a type of a Grandmother's flower garden design. We're going to start off with an easier layout. That is with a honeycomb design. Before I show you the honeycomb I'm just going to enlarge that Y seam. I've enlarged it to show you a bigger template. The hexagon that I just showed you was about an inch, finished, so the side was 1-1/2". Here we have about a three-inch finish. This is that Y seam, where the seams come together. The sewer marked 1/4" from each edge. Stop sewing and start sewing 1/4" from each edge and then meet it in the middle. It takes patience and it takes accuracy. Truth be told, I'm not always that accurate. This is the way I like to do that. This honeycomb little table topper with hexagons if you look at them from first blush it looks like a traditional hexagon. But yet, down the center of each of the hexagons is a seam. We're going to create half-hexagons to create this kind of faux look of it. I'll show you how it's done. You could cut a hexagon template in half and then add seam allowances or you can find a faux hexagon shape that has four different sizes a two-inch, four-inch, six-inch and eight-inch. Hexagons are always measured by the length of a side. This is the eight-inch length. The six-inch, four, and two. Not only will you be able to cut pieces this large and you'll see quilts throughout this program using pieces of this size. Here you can see the four sizes. We'll also be cutting end pieces. Let me see if I can get it going the right direction. Here you go. The end pieces are so that you can finish it off very easily. That's also included in the template. Let me just show you that option. Here's this large, eight-inch piece. Then there's an arrow from this point to a dotted line. That becomes the piece for the finished edge. I'll show you what all this means. If you're going to make your own template make a larger hexagon. Those itty-bitty hexagons would be even smaller as faux, or half-hexagons. So if you're wondering how this is going to go together let me show you. On the template, it's written how wide to cut a strip. We're going to use kind of traditional strip quilting techniques. I'm going to take three colors from that honeycomb design and lay them out. So, you have the fabrics cut. I'm going to be cutting a four-inch finished one. It's the one with the orange around it. It tells me on the template to cut four-inch wide strips. I'm just going to start by cutting the end pieces. I'll just align the dotted edge for the end piece and mark. Before I mark it, I almost forgot this step. The step is to do some pressing. I really do like to, after cutting my strips add some spray starch or an alternative starch to stiffen the fabric. It marks easier, sews better. I'm sure many of you have found this. It's not a new technique but just something you may want to consider doing. Starch it first. Let it dry a little bit longer than I am. Then I'm going to first draw an end piece. Along the side, I'll make it a little straighter. Then, I'll flip this align the mark that was just marked on the fabric and draw the other side. Flip it and draw. You get the idea. You're just rotating this piece and you're cutting these faux hexagons or half-hexagons. Then we'll cut them apart. I'll get a straight edge and a rotary cutter. I'll move this over. We'll cut the end pieces... and then the somewhat of a modified tumbler shape. You get the general idea. You can cut several at a time. I've cut three layers at one time. After cutting, then take time to lay out your design. I've pre-laid some rows out so that you can see what happens. I think the end pieces are very important because then you don't have to finish a hexagon shape around the edge. I'm just going to lay row one out and then row two. We'll soon see how this comes together. Here's the hexagon, and it's in two pieces. The honeycomb shape is starting to be a little more evident. Row three and four are soon to come. These end pieces will form a portion of the hexagon. You would just add row after row of pieces. I'll just do a few right now to show you. After getting the columns or rows, whatever you'd like to call them. These are more columns. Then do some pinning. We're going to sew the sections together. I'm just going to meet, right sides together and put one little pin. You're not going to match the edges. You're going to have that little bunny ear that will stick up about 1/4". Just place a pin on that piece. Then you'll meet the next piece, right sides together. Offset them by that little 1/4". Place a pin. Then do the same for all of the other pieces. When we were creating some of the very large quilts that you'll see later on in the program we would pin all one row, stitch it then bring it back to the layout area then pin the next row. You really want to be secure and sure of the layout. You may want to put little stickers on the rows "row one," "two," "three," and "four." As you might guess, now it's time to take this piece to the machine and do some stitching. Sometimes in quilting, we do chain stitching. With this technique we're just going to sew the seams to create a row or column. Because the pieces are much larger you don't need to worry about chain stitching. That little overlap, by 1/4" you get accustomed to eyeballing that distance. You'll see what a difference that makes when putting this together. The set-up at the machine is a straight stitch. Put on your favorite foot that gives you 1/4" seam allowance. I've put on a foot that has a single opening and a guide so I can place the fabric right next to the edge. Use all-purpose thread, a new needle and you'll be ready to go. A straight stitch that will have about 2.5mm or 2.0mm stitches per inch. Then just do the stitching. It's very simple, because the Y seams are gone. They're all straight seams. Let me get these lined up and then I can go. There we are. I come out just at that little area where the bunny ear comes out. Then I go to the next one, flip it open. Again, get it aligned. Take a second or two to make sure you have the right extension, and sew. If you've ever considered-- I see that pin, let me get that pin out of there. I bet you never do that at home! There we go. If you've ever had a concern about creating a hexagon shape this is the way to do it. Using these larger sizes really makes things go faster. I have two more seams to sew. It's very simple to go about this. Since I placed a pin on the opposite side I'll reach under and pull out that pin. Here comes that little extension, again. I'm sewing right into the V of it. Cut the threads. I have one more seam to stitch. This happens to have the end piece stitched to it. Take out the pin in advance, and sew. I better line up these edges. And we have this mini-row complete. Next, is to do some pressing. This is maybe where I change a little bit from customary ways. I like to press these seams open. It saves some bulk. You could press them to one side or the other but right now, I'm just going to press them open. When you do this, you may want to press it flat first. Somehow, that always seems to set it and work a little better. Then, just finger press it open, which I'm doing right now and then guide the iron down. There we go, it's pretty fast. The reason for doing this is that this next sample has all been pressed open. We're going to limiting the Y seams and putting the columns together. It just works a little better with those pressed open seams. That may take just an extra second or two of time. Here are two strips that have been sewn. You have two complete well, almost complete hexagons. This one out of batik fabric and this green batik print. You can see the whole complete area once we get that seam together. Meet right sides together, pin the intersections. Match those little rabbit ears. It's amazing, they match together. It's not as detailed as you may think. You just place a few pins through the middle. Then, because we have the end pieces and they're exactly the right size just match the ends, the starting point and the ending point. If your seams were accurate, it will all come out all the straight seams! Here, the seam has been stitched. If you kind of squint you can't even tell that there is a seam down that middle especially when using prints. It kind of camouflages it. Let's take a final look at our table topper made with the hexagon shape. It's a big, impactful honeycomb design all made with some straight stitching and a little planning. Traditional Grandmother's flower garden quilts feature a meadow of blooms. With my super-sizing technique one bloom can make the entire quilt. Named after a dramatic flower Grandmother's dahlia is made with six-inch faux hexagons. Again, the Y seams are a thing of the past with straight stitching the only piecing option. Here I have the quilt on my table. The center hexagon with yellow branches out with three rows of hexagons encircling that center area. As I mentioned, it was a six-inch size. The length of one side was six inches to create this center hexagon. Again, we used some of the end piecing techniques on the template to square off the quilt. I'm going to show you how this is laid out. Basically, I gave you the technique working with the honeycomb design. We're going to cut shapes. Instead of working with six inches we've cut the half-hexagons, or faux hexagons, at four inches so they'll fit on my table a little better. But you'll get the concept of how this works. Here are the cut out pieces. I like to start off with the center piece. You could lay this out on the floor or on a bed top and get your center design. Separate them. Then, we're going to create the hexagons around the center area. You just keep on building adding two sections all the way around. We've used batiks in this particular design. It's one of my favorite fabrics. They're high quality. They're fun to work with. Beautiful designs. Again, you could choose a variety of prints and styles. You'll see two other quilt designs later on. We certainly have used a variety of options. You get one ring around the center with the hexagon. You can see I'm getting them into rows. Then add the second ring, the third ring and then the end pieces. I'm just going to show you how this comes together. Lay them out so that exactly the way you lay it out is the way it's going to appear. I'm not going to do the whole thing because I think you get the idea of what's going to happen. After you would create entire rows you could add another section, the path around the edge. I'm out of space. You would place the end pieces at the end of the rows to finish it off. Then, after doing all the placement you'd pin the pieces together, the various rows. This would be row three, as we are right now. I kind of started in the middle. Then you'd sew this entire row together. I think you have that concept. But just to make sure, I'm going to show you the pieces that we have put together. I'll quickly clean off my table. I have another quilt just waiting to be sewn here. Here I have a side piece then the next one. All straight stitching would come next. Notice how the bloom the dahlia flower is very large. Sometimes, I've had in my garden a flower called the Dinner Plate Dahlia it's so big. This is kind of that size. As this is shaping, the next step would be to sew the straight seams, sewing these columns together. It just appears in front of your eyes. The very large quilt that we had finished was bigger than this, but you get the concept. You can make this any size you'd like just by creating the rows, laying it out and sewing the stitches together. You don't have to go this large. You could go much smaller. Another idea is to use fabrics that were reproduction fabrics. These are from the 1930s. We see three blooms, diagonally across with portions of the blooms. Just fill-in the areas and then add end pieces. It's not difficult at all. It's really enjoyable to lay it out. When we were laying this out in our sewing studio we had a lot of fun mixing and matching the fabrics. For our most dramatic look we have Grandmother's super-sized bouquet. This time, using the eight-inch faux hexagon piece a very large piece to make a queen-size bed. We used fabrics that have an oriental influence or feel to them. Portions of the blooms intermix with each other, intertwine. It's a real dramatic look. We had a lot of fun laying it out and being creative. Make sure that you have an area on your floor or working on a bed sheet to do the layout so that it all comes together. Regardless, if you're working with a small size such as a two-inch, four-inch, or six-inch or even that eight-inch size like that super-sized bouquet design I showed you you just have to cut the pieces and then lay them out. Take time to enjoy the process of creating a hexagon shape without putting together any Y seams. Many of us have admired antique Grandmother's flower garden quilt patterns only wishing the quilter had taken time to write down the story behind the quilt. Since we don't have the history of Ida Kant's quilt that you saw in today's program I can only guess on some of the background. A person that has made it her job to be a quilt detective is with us today. Welcome, Carol Butzke. Carol is an AQS Certified Quilt Appraiser and quilt historian. She's been with us before on Sewing with Nancy. And is back again to give us some insight into our antique Grandmother's flower garden quilts. How appropriate that you're here today, Carol. Sometimes, when I think of flower garden quilts I think of 1930s and 1940s. Absolutely. Thank you, it's a pleasure to be here. This is the pattern that we probably most recognize as one of the vintage patterns that we grew up with through our mothers and grandmothers. But it has an even longer history than that. Probably going back even before we even know, but 1700s we know that there are quilts in England that were using this particular pattern. They were known as mosaics, or honeycomb patterns. Slightly different than what we utilize today in Grandmother's flower garden. But certainly, it's been around for a long time and a dearly beloved pattern. It was the first pattern that was ever publicized in a lady's book, "Godey's Lady's Book." It was in 1835. It said it was an ingenious and very pretty pattern. Oh, that it is. Still, we enjoy it today. Traditionally, the motifs are put together and you mentioned that there's sometimes a yellow center. A yellow center is the more traditional way that we would expect to see them. But as you can see this one has a variety of colors. Women certainly had a way that they could make it their very own. Followed, certainly, by a round of solids which is most often what we see and then a round of prints. What is between the blocks often is a single or in this case, a double garden pathway. It can be more likely than not either white or green is the most traditional. But I've seen them in red, black, or blue. So, a woman's creativity comes through. We say "double" because there are two offset rows of hexagons in this area, instead of just one. There you can see them, all hand-pieced. Hand-pieced. Hand quilted. Then the border was finished by following the edge of the design. This is a labor of love. Definitely, it took a tremendous amount of time. But it was something they could do on their laps in the evening, doing the hand sewing. I always say on an appraisal day that I almost always will come across a Grandmother's flower quilt or a top because oftentimes, the they weren't finished because women didn't quite know what to do with the edge. This is maybe more daunting than they wanted. A less daunting option maybe would be to work with a honeycomb or like you have right here, a bullseye quilt. The bullseye quilt is from around circa 1900. It is a charm quilt meaning every piece of fabric in that particular quilt is a different piece of fabric. So, the lady was a collector, whether she exchanged them with friends and family. But it seems to me more likely that she had a source book or a salesman's book of fabrics that she worked from because there will be as many as five of the same fabric pattern, but in different colorways. It's kind of fun to look at and explore. It is. The combination and the gradation of the reds for example, is a lovely collection. I'm thinking with you not that I know that much about antique quilts but they must have been positioned together at one time. You have taken your hand at-- I know you're a great hand quilter. But this time, you happened to piece this by machine. I did. It was probably made in the 1990s somewhere along the way. It has a variety of blossoms, that are a single round around a yellow center that's a print. It has a little garden fence around the garden. Notice the blooms. We've seen a lot of variety of Grandmother's flower garden quilts today. But your blooms, you have four of one color and then a darker shade. You've done that all the way around. I like that look, just a little extra shading effect. This is very sweet the little picket fence around the top and prairie points to finish the edge. Thank you for sharing with us, Carol the history of Grandmother's flower garden quilts charm quilts, and being with us to tell the story. Thank you for having me. If you'd like to find out more information from Carol
you can go to
wwww.NancyZieman.com You'll find links to Nancy's Corner, and Carol as well as all my other guests that you've watched on Sewing with Nancy. Plus, you'll be able to watch Sewing with Nancy programs online, read my blog and basically, you'll be directed to all things Sewing with Nancy. Thank you for being with us on this two-part series on Grandmothers' flower garden patchwork quilts as well as tumblers. Thanks for joining us. Bye for now. Nancy has written instructions and design templates that can be used to create the quilts featured in this series. They're $19.99, plus shipping and handling. To order this reference material, call 1-800-336-8373
or visit our website at
sewingwithnancy.com/2506 Order item number CL9525 "Grandmother's One-Patch Quilts Templates." Credit card orders only. To pay by check or money order call the number on the screen for details. Visit Nancy's website at NancyZieman.com to see additional episodes, Nancy's blog, and more. Sewing with Nancy TV's longest airing sewing and quilting program with Nancy Zieman
has been brought to you by
Baby Lock, Madeira Threads Koala Studios, Clover Amazing Designs, and Klass Needles. Closed captioning funding provided by Rowenta. Sewing with Nancy is a co-production of Nancy Zieman Productions and Wisconsin Public Television.
The latest from Nancy's blog


Search Sewing with Nancy Episodes

Donate to sign up. Activate and sign in to Passport. It's that easy to help PBS Wisconsin serve your community through media that educates, inspires, and entertains.
Make your membership gift today
Only for new users: Activate Passport using your code or email address
Already a member?
Look up my account
Need some help? Go to FAQ or visit PBS Passport Help
Need help accessing PBS Wisconsin anywhere?

Online Access | Platform & Device Access | Cable or Satellite Access | Over-The-Air Access
Visit Access Guide
Need help accessing PBS Wisconsin anywhere?
Visit Our
Live TV Access Guide
Online AccessPlatform & Device Access
Cable or Satellite Access
Over-The-Air Access
Visit Access Guide


Follow Us