 Passport


Ultimate Serger Techniques - Part 1
01/20/14 | 26m 46s | Rating: TV-G
Take the lead from Nancy and serger pro Pam Mahshie to get your serging skills up to speed! Learn the basics, and get the confidence to gather, add puffing or textures, and serge on ribbon trim with ease. You’ll be surprised as you learn new-age serging techniques for your projects.
Copy and Paste the Following Code to Embed this Video:
Ultimate Serger Techniques - Part 1
Using a serger sewing machine to only clean finish fabric edges is comparable to using a microwave for warming water for tea. In short, you're not getting the value of your purchase. To solve this dilemma, I've invited serging expert Pam Mahshie to be my guest and to inspire us to use sergers to their fullest potential. Pam, I've known you a while and I know you can just about make a serger sing. Well, thank you, Nancy, for having me. But before we actually sing, we do need some rehearsals. During this series we'll be detailing creative ways to use a serger. But I'd like to start with something as simple as a seam. Locking the stitches at the beginning and ending of a seam will be my first technique to share with you. It's easy once you know how. "Ultimate Serger Techniques" that's what's next on Sewing with Nancy. Sewing with Nancy TV's longest-airing sewing and quilting program
with Nancy Zieman is made possible by
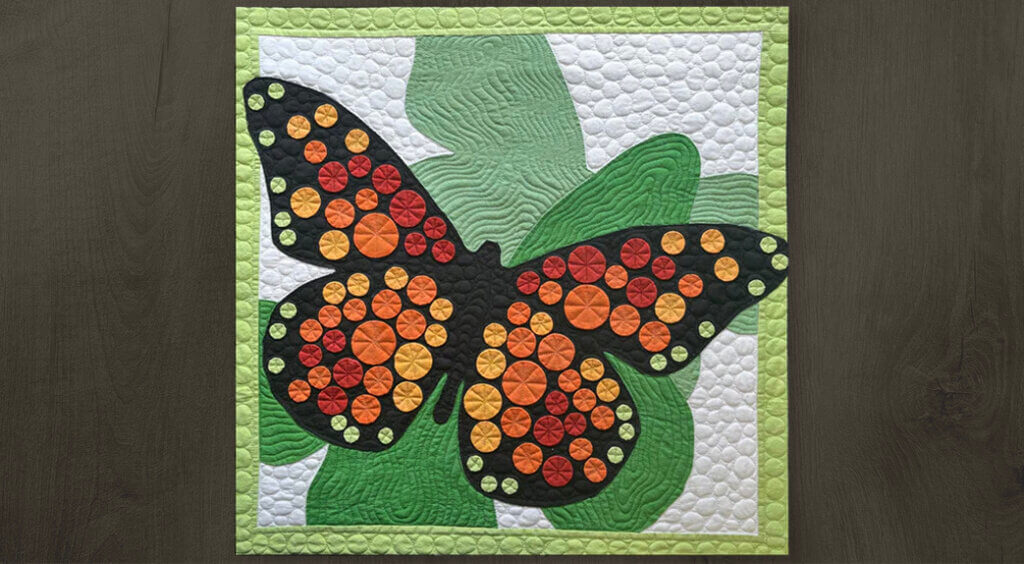
Baby Lock, a complete line of sewing, quilting and embroidery machines and sergers. Baby Lock, for the love of sewing. Madeira, specializing in embroidery, quilting and special-effect threads because creativity is never black and white. Koala Studios fine sewing furniture custom-built in America. Clover, makers of sewing, knitting quilting and embroidery products for over 25 years. Experience the Clover difference. Amazing Designs and Klass needles. During this two-part series, Pam and I are going to be detailing basic techniques and then some creative techniques. But the basic technique of locking the stitch at the beginning and end of the seam is something that not everyone knows. We're working with the basic four-thread overlock stitch the most common stitch on a serger. It uses two needles and two loopers so you have four threads, Pam. Right, we're working with four threads, right now on the machine as the basic set up. Let's travel down inside and look at where those loopers and needles are going to be. Inside, the machine will be threaded with the four threads. I'm just going to remove the presser foot and point out where the needles and the loopers are and how they react with each other in order to form the stitch. As that stitch is formed it's stitched over stitch fingers. As you can see how those stitches are formed you know, as you said, you can't reverse. Sometimes a seam sealant isn't always a product we're wanting to use. Let me just snap the presser foot back on and get it set up for stitching. Check your owner's manual for how the tension should be set. But using two needles, using serger thread that's two-ply instead of three-ply. It's best because there's multiple threads in there. Pam will show you how to start and stop at a seam. Okay, now, we do have our blade engaged so we are going to be trimming off a little bit. As you approach the beginning of the seam you want to stitch only two stitches onto the piece of fabric. Raise your presser foot. Bring the tail-- You have a long tail, generally on your serger at the beginning. Lower the presser foot and stitch for about an inch over the tail. Then after you've stitched, bring the tail down between the blade, trim it away. Our sergers can stitch 1500 stitches per minute but we don't always need to sew quite that fast. Especially as you approach the end of your stitching take only one stitch off the edge. Make sure your needle is in the highest position. Raise your presser foot. You saw how those stitches were formed on the stitch fingers. You need to simply pull a little bit of slack in the needle threads slide the slack up just enough to turn that piece of fabric over. Slide it back under the presser foot. What I like to do is back up at the threads I'm just going to pull a little bit. The slack that we put into the thread we're going to remove it. That will eliminate any of the loop that you had. You might want to disengage the blade so it doesn't cut all those stitches. Right, the previous line of stitches. We disengage the blade. Stitch over about an inch and then turn that stitching out of the way. There you can see how those stitches are locked into place. Another basic technique we'd like to share with you is stitching around a curve. Sometimes when you go around a curve it's difficult to get it smooth. This is the length of a traditional serger foot. You may want to consider working with a curved foot which Pam is snapping on right now. The shorter length makes it easier to maneuver around curves. Show that technique, Pam. Okay, very good. I am going to engage the cutting blade once again so that as I stitch around the curve the key to working and stitching around curves two things. We want to always have fabric in front of the presser foot and we also want to shorten our stitch length a little bit as we go around the curve. Always have that fabric in front of the presser foot. Turn the fabric. That curved foot is going to make a big difference in holding your fabric in place. Then just simply serge off the edge. Change the length, do a little trimming use a shorter foot. Then our last basic technique is to sew in the round like around a bottom of a pair of pants, a cuff wherever you have it in a circle. Just like we did at the beginning of our straight line stitching we want to pull the stitches off of the stitch former. Insert the fabric into the machine. Now, as you stitch we're just going to quickly stitch around that curve. We're stitching a curve, but on a straight line. Stitch all the way around. As you approach the beginning of your stitch again you can see how we're approaching the stitch just simply turn your blade to lock. I'm going to trim off that little tail. Stitch over it. You see that you can align the marks that are on your presser foot with the previous line of stitching. Stitch over for about a half-inch. Then just simply turn your fabric out of the way. And trim. Then you have a nice finished edge. These are the basics. Now it's on to the creative approach. Piecing a quilt top with a serger might have never crossed your mind. Yet, for simple quilt designs, the serger is a fast and accurate way to make a quilt top. Seam traditionally or with decorative threads and this time, you have the seams exposed. Either way, your serger can be your go-to quilting machine. You just saw a little framed art of serger samples with the Roman Candle design. The seam is with the four-thread overlock stitch. I've adjusted my serger for a slightly wider stitch to a 5.5 millimeter so that I accomplish the 1/4" seam allowance which is traditional in serging. I have two pieces of fabric, long strips together meeting right sides. I'm guiding the fabric along the blade area and just serge. Pam mentioned earlier that you can serge at 1500 stitches per minute. This is a fast way of creating a serged seam. It's not for difficult seams. But basic, it's great. Another option is to do the same serging but stitch with wrongs sides or the other right sides together with decorative thread in the loopers those lower areas that can have a larger eye. Pam will show you how to work with decorative heavier weight thread in the loopers, not in the needles. Pam, you have that just about ready to be threaded. We're ready and set up to go. As you mentioned, we're going to be placing the wrong sides of our fabric together so we have that pretty, decorative stitch showing on the outside. We have the machine threaded for our decorative threads. I simply just place the threads in the loopers, as you said. That's going to give us that decorative look and decorative stitch on the outside. Now, as I stitch, wrong sides together again just simply stitch, and away you go. You end up with a really pretty, decorative stitch on the outside of your seam. This time, we're not going to lock those stitches because different blocks will be assembled together but isn't that a pretty seam? It's exposed. It's very simple to design, it's great. You may have an option on your serger to do a wavy effect so that it has even more texture and dimension. If you use different colors of thread in your upper and lower looper, you can see that effect. There are a few little set ups you'll have to work with. Check your owner's manual. Pam, why don't you review those. Simply move the lever from overlock to wave stitch. We're going to set it so our tension is set properly. We're going to move our thread from the upper looper position over to the needle position. That just gives a little different tension on our fabric. It's also very pretty when we set our stitch to a little bit shorter stitch length. Our stitch width is still going to be at that 5.5 setting. Now, if you're wondering how you're going to remember all this the owner's manual will give you all these different settings. We didn't make these up. It's easy to do. Or the book that accompanies today's program will give you all the settings that you need. As as we stitch, you can create a very interesting stitch using the wave setting. It will look almost like a rick rack stitch. I'm just going to stitch a short section here so you can see how that looks. That's why you can do a simple design you're adding the detail with the serger. Experiment with decorative threads and have some fun. Home decor, wearable art, or kids clothes. Those are a few of the categories where piping accents add interest and texture. With a serger, piping is easier than ever to include in a seam or along the outer edge of your next project. Granted, we're working with small samples today but in a larger format you would see this adds a lot of interest as I mentioned, and texture. If you're working with a traditional sewing machine a conventional sewing machine, you'd put on a specialty foot. The same is true with your serger. You're going to be working with a cording foot that has a grooved-out section on the under side allowing the cording piece to glide through there with ease. It fits right in that groove. When Pam is doing the serging you'll see how smooth that stitch is. To create the fabric the right size, cut on the bias. Bias strips, about 1-1/2" wide. You can see the bias that we have. I like to fold this so that we have the point to my right side and we fold it in half. The cording will be placed on the wrong side of the fabric with an extension of the cording for about two to three inches. The reason for this is that, as I start this when I place it under the presser foot I have a tail to hang on to, to feed it. Pam, you've already done that on your serger. We've already started, and again, the cording is placed into the groove on the presser foot. Our stitch width is going to be set at 4.5. The beautiful part about this is that your piping is made exactly the width that you need it. It's trimmed away and when we re-stitch it which we're going to do in just a couple of seconds it's going to be the proper seam width. I'm just going to finish serging. You can see how easy that stitch is, the piping. Pam set her machine for a three-thread overlock. You can take out one of the needles so you don't have as many threads per inch. That works better for making the piping. Once we come to the end we're just going to serge right off the edge. Any excess piping, we'll just leave on the edge. Okay, now we're ready to attach the piping onto our piece of fabric. The easiest way to do this is remove some of the cording from the beginning of your piping. Just pull a little bit of the cording out and then slide your stitch back up. Lay the piece of fabric onto the fabric edge aligning the edge of the piping, the seam allowance with the edge of your fabric. Then reinsert this under your presser foot. Lower the foot in place. Turning a corner could be tricky. Your stitch width, do you ever change that? Yes, we do, thank you. We do want to increase our stitch width to the widest width. That will cover the previous line of stitching and also place our needle snug up to the piping. We'll give you all those instructions. But you want a snug stitch. You want a real snug stitch so it's not going to be loose inside the fabric. When we approach the corner, we want to stitch slowly and just have your fabric come up right onto the bed of your serger. Then we're going to pull the piping out of the way. Lay your scissors down at a 45-degree angle. Lay the piping back in place and then cut right up to the line of stitching. I'm just going to hold my fabric in place and turn the piping out of the way and continue stitching. Then reinsert it back into the machine, turn your corner. Reinsert back into the machine right underneath the presser foot again, so the piping is inside the little groove and stitch. Pam would do the same technique on every corner. If you would like to enclose it in the seam you just place your fabric on top of it and re-stitch that seam following the same sequence. When you're done with that the piping is sandwiched between those two fabrics and it looks lovely. A blanket stitch is an ideal way to finish the edges of fleece. Why? The stitches will always be even and the process is extra easy. Here's how to set up your serger for the blanket stitch. Just like on a traditional or conventional sewing machine there are different stitches and you have to make changes the same will apply when we're talking about the blanket stitch. We have decorative thread that makes a more pronounced edge and finish. It has a really neat look. Pam, it's a flatlock stitch that we're going to ask our viewers to use. I always have to refer to my owner's manual for the setting of this. Since it's a stitch we don't use regularly we will refer to the owner's manual. We're using a three-thread decorative stitch this time. When you look at the way we have our serger threaded you might say, whoa, something's wrong there. But notice that we have two decorative threads that we're going to be working with. Both decorative threads are going to be thread through the upper looper thread guide. We placed both threads through the upper looper thread guide. Follow it down to the front of the machine. Then at that point is where they separate. The needle thread will come across and down to the needle. We will use a size 90 needle because it's going to accommodate a little heavier decorative thread. I don't want to use a thread really, any larger than a 12 weight. Thread is always confusing to me because the smaller the number the thicker the weight of thread. So this is a pretty thick thread. It is a pretty thick thread. Then the other thread, which is in our upper looper we're going to place into the threading and thread it through our upper looper. We're also going to, by working with a knit fabric we may want to adjust our differential feed. The differential feed adjustment takes place typically on the side of your machine. We're going to raise our differential feed lever up one notch from the neutral setting. That differential feed refers to the feed dogs those little bite-like tools underneath the presser foot. The tighter it is, the more fabric it will bite into place and hence, will not stretch that knit fabric. You may not need to use that on the entire length only if you're stitching on the stretchier grain of your fabric. A little sample goes a long way. Absolutely. Test, test, test. That's something you always want to do especially when you're working with a decorative thread. You do also want to increase your lower looper tension. Increasing that lower looper tension will also adjust how our threads are going to lay on our fabric. Now, we're simply going to place a piece of water-soluble stabilizer on the top of our fleece fabric. We're going to adjust our stitch length a little bit closer and set our stitch width to the widest setting. Then we simply stitch. It's a lot of set up. A lot of set up. Then our stitch will look very pretty on the edge of our fabric. After you have the stitch finished, you may look at it and say that doesn't look quite so nice. But the beauty and the magic comes in when we take our water-soluble stabilizer and just roll it over the edge. Once it's rolled over, just simply pull the stabilizer away and you can dab it with a little bit of water. You end up with a very pretty decorative stitch. That's really a great ultimate technique using a flatlock stitch decorative thread in the needle and the upper looper and then doing the stitching on the water-soluble stabilizer. Pam, you've also done this on fabrics other than fleece. Yes, you can use it on like a blanket fabric or a boiled wool fabric all different types of fabric even like a t-shirt knit for a decorative neckline if you'd like to. This is a finish on one layer of fabric or perhaps two layers of fabric, with an outer finish a blanket, as well as knit fleece-wear. It's an ultimate technique that I hope you'll try. It goes without saying that vacations are a wonderful bonding times for families. Today's Nancy's Corner guests and their kids take their time off far from camp grounds or theme parks. Recently, they traveled halfway around the world to teach disadvantaged young girls to sew. To share their remarkable journey please welcome Brett and Kristy Moore from Montavilla Sewing in Portland, Oregon who join us via Skype. Brett and Kristy, thanks for being with us today. Thank you for having us. You have a remarkable story how you went on a trip to Thailand but then wanted to do more. Tell our viewers how you ended up teaching in Thailand but it started as a vacation. Well, it's interesting you bring that up. We have been a third-generation business and we've been in this a long time, 64 years. We were given a trip by one of our manufacturers to Thailand. During that time, we were at a place where we felt compelled to try to give back more and make our business more missional. We were given this trip to Thailand and we just tried to ask or open doors for how we could be of use in Thailand. We ended up stumbling upon an organization called Remember Nhu. You went back to Thailand with your kids. Yes, we went there with our kids. We went on this manufacturer trip first and stayed on there with the kids and sewing in the summer of 2012 at the Remember Nhu home. Kristy, your teaching conditions weren't exactly prime. No, they weren't. You sat with the girls. These girls are fairly disadvantaged. You saved them from a life of something we don't want any of our children to have. No, it was absolutely horrific. Remember Nhu, what they do is they have the ability to find different girls and boys that are going to be sold into the sex trafficking and they're able to see which ones are going to be most at risk. They can do this by various methods depending on the culture and what it is or why it is the culture would do this. But they will rescue these kids out and put them in one of these homes. They'll give them clothing, food as well as schooling. So, what we did, was we brought machines and transformers or anything else that's needed to be able to actually give them a vocation so when they graduate from high school they have a way and a means to be able to make money instead of, again, being into the sex trafficking. It's humbling to learn of this. One of the items you made, or the girls made is a bag with cording. Yes, it's kind of a fun project, because it involves a lot of people. The cording had to be bought by the kilo. It's always just a big mass of knots. So the little girls had the chance to untangle that and cut the strips, and then they did the casing. The whole project was just a lot of fun for them. Brett, you take new machines out there, not used machines. Absolutely. I might do it differently when we go to Cambodia because I got there and I realized we had the only new machines in the country there.
all laugh
with Nancy Zieman is made possible by
Very prestigious! Then you teach the boys how to repair them. Yes, they had some old sewing machines around that weren't working so we spent some time taking them apart and showing them how to do timing and tension and how to repair machines. Kristy, you said that your kids were the photographer and the journal keepers respectively, I believe. Yes, my son was in charge of videography and my daughter was in charge of photography. Of course, while they're actually capturing the various moments their hearts, in the process, were being captured. It was really an incredible experience. One of those things that you just can't even compare it. They have to experience it for themselves. You told me a very touching story earlier when you would ask your kids what they thought of this experience. Could you share that with our viewers, please? Yes, it was when we were on our trip to Thailand. We were at the airport coming back home after we had been there for several weeks. I asked them both, I said, what did you think of our trip. They said, well, mom and dad, this is what's going on. When we see Grandma and Grandpa, when we go back to the States and they look at us, and they'll see our faces they'll recognize us. But if all that they could see was our hearts they would no longer know us. Well, what a touching way to end this interview. You really are doing wonderful service, a mission as well as teaching your kids great value. Thank you for being with us. Thank you, Nancy. If you would like to learn more about Remember Nhu
go to our website
nancyzieman.com. Click on Nancy's Corner. You'll find information listed there. We would like to thank you for being part of this two-part series. It's the first of a two-part series on "Ultimate Serger Techniques." Pam will be back next time to share more interesting ways of using an overlock and cover stitch serger. Thanks for joining me. Bye for now. Nancy and Pam Mahshie have written an "Ultimate Serger Techniques" workbook which includes laminated instructions for all the techniques featured in this two-part series. It's $19.99, plus shipping and handling. To order the book, call 1-800-336-8373 or visit our website at sewingwithnancy.com/2724 Order Item Number BK2724 "Ultimate Serger Techniques Workbook" To pay by check or money order call the number on the screen for details. Visit Nancy's website at nancyzieman.com to see additional episodes, Nancy's blog, and more. Sewing with Nancy, TV's longest airing sewing and quilting program with Nancy Zieman
has been brought to you by
Baby Lock Madeira Threads Koala Studios Clover Amazing Designs, and Klass Needles. Closed captioning funding provided by Oliso. Sewing with Nancy is a co-production of Nancy Zieman Productions and Wisconsin Public Television.
The latest from Nancy's blog


Search Sewing with Nancy Episodes

Donate to sign up. Activate and sign in to Passport. It's that easy to help PBS Wisconsin serve your community through media that educates, inspires, and entertains.
Make your membership gift today
Only for new users: Activate Passport using your code or email address
Already a member?
Look up my account
Need some help? Go to FAQ or visit PBS Passport Help
Need help accessing PBS Wisconsin anywhere?

Online Access | Platform & Device Access | Cable or Satellite Access | Over-The-Air Access
Visit Access Guide
Need help accessing PBS Wisconsin anywhere?
Visit Our
Live TV Access Guide
Online AccessPlatform & Device Access
Cable or Satellite Access
Over-The-Air Access
Visit Access Guide


Follow Us