 Passport


Second Chance T-Shirt Makeovers - Part One
12/05/16 | 26m 47s | Rating: TV-G
Do you have a drawer filled with once important, but seldom worn T-shirts? Give those notable shirts a second chance. Nancy and sewing makeover specialist, Mary Mulari, share ways of using the fabric from T-shirts to create more usable projects and memory makers. Learn how to make a rag-quilt, ideal for graduates, plus Christmas Stockings, luggage tags, and more.
Copy and Paste the Following Code to Embed this Video:
Second Chance T-Shirt Makeovers - Part One
I can say with confidence that most families have a collection of T-Shirts. Some may be meaningful, so they're really difficult to give away. To give these memory-making shirts a second chance is our guest Mary Mulari, who has some great ideas on how to make over T-Shirts. Welcome back to Sewing with Nancy. Thanks for inviting me, Nancy. During this two-part series, we'll share some ideas that, if I do say so myself... -
Nancy chuckles
Make great gifts. Beginning with the T-Shirt Memory Quilt. You'll soon see it's an economical and streamlined way to make a commemorative graduation or life-achievement gift. This rag-style quilt is perfect for a dormitory bed cover or blanket. "Second-Chance T-Shirt Gifts," that's what's coming up next on Sewing with Nancy.
gentle instrumental music
female announcer
Sewing with Nancy, TV's longest-airing sewing and quilting program with Nancy Zieman,
is made possible by
Baby Lock, a complete line of sewing, quilting, and embroidery machines and sergers.
Baby Lock
For the love of sewing. Madeira, specializing in embroidery, quilting, and special effect threads, because creativity is never black and white. Koala Studios, fine sewing furniture custom-built in America. Clover, making a difference in sewing, quilting, crafting, and needle arts for over 90 years. Amazing Designs and Klass Needles. Mary's first T-Shirt-gift idea can be made large or it can be made small. And, Mary, we're gonna start with the large throw, and you need a lot of T-Shirts. 35, Nancy. - Uh-huh. You can use fronts and backs both. Sure. - But most of us have the collection to dig into. Yes, especially for high school graduations, what this quilt is. It's just a great idea. Now, if we look at this quilt row of-- it's five wide and... - Seven down. So 35 quilts, five wide and seven long, and it's got a quilt-as-you-go technique. That's right. It takes two layers for each square, a T-Shirt layer and a flannel layer, and then we stitch an 'X' through the center of the square, and I use clear thread, so the stitching isn't very visible. So you're not quilting the whole thing. You're just quilting each piece as you go along, which is a great idea. Now, you have a shirt ready to cut, and these are some of the tips. Yes, first of all, you'd want to press this to make it nice and flat, and you could use a press cloth over the main design, and then this 12 1/2-inch ruler is great, but inside the T-Shirt we've tucked a cutting board. So the easiest way to do this will be to rotary cut on top of a board that's inserted in the shirt. And get it centered the best you can. It's hard for us to cut on an angle. We're gonna faux cut this today, and then you get a 12 1/2-inch square. Yes, that's right. So here, we're all set to make our first square, and we needed that second layer of flannel. Now, there's a hint about the flannel because usually, the T-Shirts are well washed. Right, and we're going to prewash the flannel as well. That's very important. So then, with each square, after cutting, use a washable marking pen or chalk, whatever you'd like to use-- Mary recommends a 18-inch ruler-- and mark point-to-point down the center. It's easy to follow then as you're stitching. Now, at your sewing machine, you can set up with monofilament thread in the needle, and matching threader to the flannel in the back, and stitch. Here you can see I'm stitching from point to point. Notice I'm using an even feed, a dual feed-- whatever your machine is called-- foot, so that these two layers, they don't shift. That's right. They stay together. And sometimes, though, we have a design that's really full of screen painting... Yeah. - And it's difficult to sew. Sometimes the Teflon foot will be helpful, and then on the back, if you find you can't sew, you could make your 'X' from fusible tape that you would then put on the back of the T-Shirt, and then, we're going to match this up with a piece of flannel. And then, you would fuse this together. So we'll put this at the ironing board, and fuse the layers together. So we avoid sewing, but we stick everything together this way. Sure. Now, as Mary mentioned also, is that there's a option that you could use, and that is to use a Teflon foot, and here's a close-up of using that Teflon foot, and just real simple, it will glide over the heavy ink. Right. - Now, to lay this out, we're going to lay out just three in a row, and we've made row one.
chuckles
Baby Lock
Yes, and we're gonna leave this marker here, Nancy, until the very end. 'Till we've finished everything. And this would be row two, and we're going to sew these with the flannel edges together. Mm-hmm. And here it's been stitched. Flannel edges have been stitched, and then, and this is just a short little row, then make believe this is a large row, but then you stitch down these seams that you have in this area. Now, Mary, you're gonna cut... Right. - And give yourself some time. And some special scissors are really helpful here, because we want to clip, and I would go about a 1/2" apart,
but my advice is
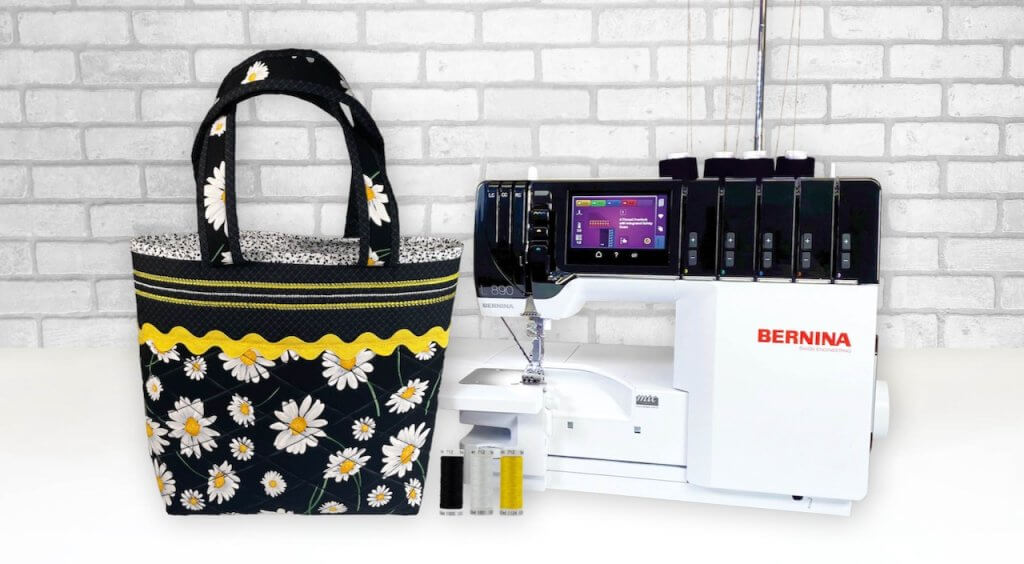
Don't try to do the whole quilt in one sitting, Nancy, because your hands will get too sore, so give yourself a break. - You can wash it. You can spray this area with water. Let it fuzz. You can make a small project, a pillow. The quilt we have here is horizontal. It's more of a wrap than it is a vertical bed covering. So, with T-Shirts, you have many options of creating gifts that create a memory or preserve some history. After making a T-Shirt Memory Quilt, you'll have leftovers from that shirt that are just begging to be sewn into other gift projects. Create a collection of T-bags from the T-Shirt remnants. Starting with the Sleepover Bag. Mary, this bag is kind of fun. It is. - Great for tweens, and...yep. Yes, great for sending kids off on a sleepover. -
chuckles
but my advice is
So we'll start with, again, our same ruler for 12 1/2-inch squares, and we cut two layers of T-Shirts... Mm-hmm. - Front and back, and then we're going to add this strip of fabric on each one. These are 1 1/4" wide x 12", 12" wide. You just turn under the edges and then center them about 2", or so, below the top. Yes, depending on the design, you can choose how you want to place this. Then you just topstitch it down. I mean, this is raw edge. This is the beauty of T-Shirts. Right, and then we're going to make fringe, but you notice that this does not look like fringe at this point. -
chuckles
but my advice is
We're going to place two pieces of fabric, 3" and 4" wide, and then we're going to place right sides together and sew up the sides of our bag. Pretty easy, so far. - Yes, very easy. This sample shows that the seams have been stitched along the side and the lower edge. So now it's time to turn this right-side out. Mm-hmm. - And so we have here, what will become fringe extending from the bottom of the bag. Excellent. Now, Mary, we're gonna make this casing, so I'll let you work with that. Sure, I have a bodkin loaded with strips of T-Shirt knit that are curled up, and we're going to pass this through on one side of the front of the bag, and then back through this casing back here, and then we're going to actually do this from the other side as well. So this is a double drawstring, Nancy. Very nice closure for a bag. So you can see Mary is doing one side and then on the sample that I'm holding, she would start from the other direction so that when it's closed... Ta-da. There you go. And this is just a strip of tubing-- cross-wise tubing-- we'll be working with. Tied at the ends. And excellent. Fast. Now, the fringe. - Yes, so all we need here is a pair of scissors, and I'm going to turn the bag, and here is how we create our fringe, and this is so easy to handle. We can cut maybe 1/2" wide strips with our scissors, and we'd cut all the way down, and then, to make this really interesting, Nancy, we pull on each of these... - Uh-huh. Do you see what happens here? - Yeah, perfect. We've got strips now in fringe that looks more interesting. So now we have another option for some of those leftovers, and that is to use the sleeve components of the shirts, and to make a great bag that is fast and easy. They're fun little pouches, Nancy, and the size can be determined by the two sleeves that you cut off the sweatshirt. So here are the sleeves, but we're going to invert it.
chuckles
but my advice is
Right. Uh, and so you can see that the stitching starts right below the hem areas. - You leave that hem free. Yeah, you-- and we're gonna take advantage of that as a casing for drawstrings, and we are going to do the double drawstring again after we trim these edges. So when you... so when you do not stitch the top casing, the hem of this T-Shirt is already the casing. It's already sewn. I mean, you can't get easier than this. Real time saver. - Oh, my. So this is a great project that you could do with beginner sewers. They can't go wrong. It's a T-Shirt, it's sewn-- Three seams, and a double casing, and presto, some T-bags. Take advantage of the nature of knit fabrics to curl and roll. Cut into strips, then pull. Create a fabric necklace from one or more T-Shirts. Add extra pieces of wrapped tr im for interesting dimension. You just saw on the drawstring of the sleepover bag that we had curl and roll strips, and, Mary, you made this by simply, on the cross grain, cross the shirt cutting tubes. That's right. This is the bottom side of all those sweatshirts that we have left over, and then the magic happens, Nancy, when we pull on these strips. Open them up and pull and we've created cords. Yes, great. - And you can experiment with different widths, too. And as we look at this finished necklace, you'll see that we have not only the tubes, but there's a finish at the back to hold the ends together, and these little sliders, kind of like little beads, but they're T-Shirt trim, and you have five lengths. Right, starting with a 22" length, and then I cut four more, each 2" longer than the last one. Sure. - So 22" through 30". Great. - And then the ends are pinned, first of all, over a piece of scrap fabric... Mm-hmm. - And then they're going to be easy to sew. - And you stitch 'em down to this scrap. And my next sample shows that they've been stitched on on both ends, and now we can cut away some of this excess. So you just trim that away from the back. That's right. - Mm-kay. And then, uh, what we need to do here on our next sample is we're going to build this piece that covers up the raw edges. - Mm-hmm. So I've already trimmed away some of this, and now I'm gong to cut a 4" square of fabric-- of knit fabric. I'm going to fold it in half and stitch up the side, and turn it right-side out, and then, the seam side is facing out. Now that's not gonna work. No, it isn't...
both chuckle
but my advice is
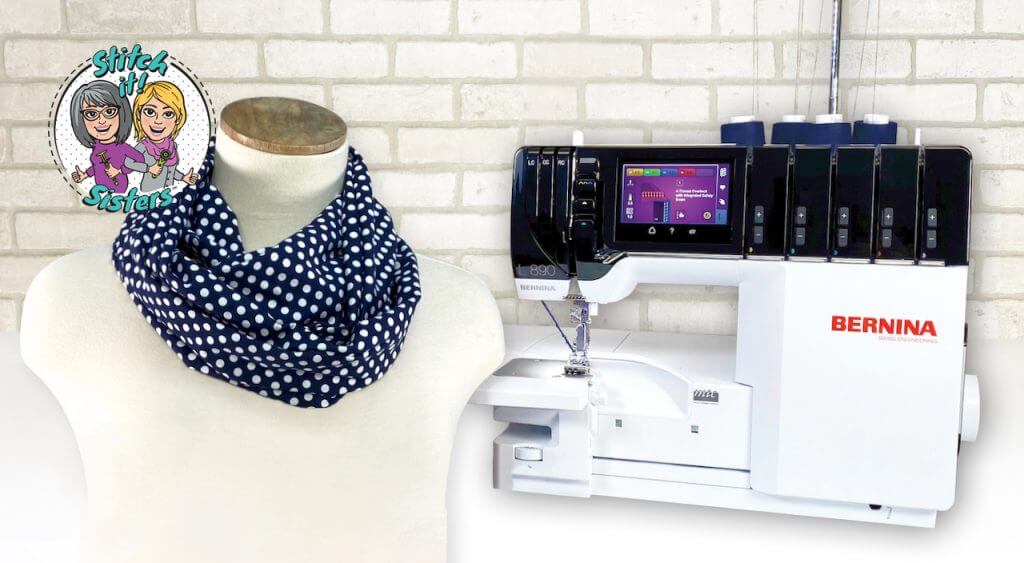
Because, of course, we've got to trim this narrower. Mm-hmm. - Get rid of that. And then, we want to roll this over, and it might take a little bit of doing. Encouragement. - Yeah, a little encouragement, and then, once it's turned right-side out, we're going to pull it over all of the seam ends, and just have kind of a nice, neat look to our necklace. And on the finished necklace, as Mary's getting that to look, we have it covering all the ends, and then the last step is to, if you'd like, you can add some trim. I've cut little sections of the knit, and I just wrap them around and sew them down, and then they can slide, as you say, as if they're beads. So, Curl and Roll Necklace. Fun to make with kids. Fun to make on a summer day, and wear on the summer day. A great gift from "Second-Chance T-Shirts." Take advantage of the tubular construction of T-Shirts to make a reversible cowl scarf. The notched accents provide an ingenious detail allowing both sides of the fabric to be showcased. We took the scarf off the mannequin, Mary, and it lays a little bit better around a neckline, but when we put this flat, you'll see that it really is very clever, what you've done. - It's two T-Shirts with no seams, Nancy, so we can add these notches wherever we'd like, and we've got leftovers. We sure do. -
laughs
but my advice is
And here are two that you can see where the holes were cut for the designs...
both chuckle
but my advice is
And I have-- they're of equal widths. So we'll want to make sure that's in order, and the next sample shows that I've cut off the hems of these T-Shirts, and I've pinned together two layers. They're wrong-sides together. And it could be from 9" to 6". It doesn't really matter. - Well, yes. Whatever the T-Shirt remnant allows, and after pinning, then we're ready to sew. And you just sewed tube around the edges, but you've marked notches. Yes, they're 3" deep into the fabric. And you make 'em asymmetrical. - Right. And you can add as many as you like, and then that's followed by simply using a pinking blade or pinking shears, to cut the edges, and, you know, since this fabric doesn't ravel... Mm-hmm. - We're all set. And here you can see that Mary cut the edges. It's a little hard for us to cut on an angle, but then also cut into the 'V's, and then can do the shaping. When it goes around your neckline, the cowl can reverse, and it's quite clever and fun to wear for summer. And you have another idea. - I do. This is for the Cut and Weave scarf. You use two T-Shirt backs to create another reversible scarf that tucks and weaves into itself for a cool-weather accessory. And here on our model we're showing this scarf. This has two layers also, and we have button holes sewn into it. So I'm going to take it off our model. and show here, um, some of the parts that we have. We have a narrow end and a wide end. Okay, and you can cut these-- In the reference book, in the pattern that accompanies today's program, Mary, you have all the details, but there's a seam and two layers and, as you said, four button holes. Now don't be worried. Easy to put button holes on knits, and here are two backs of shirts. These are the hems, so we have this turned 90 degrees. Right, and we want at least 20" of width... Okay. - In our shirt back. So one of the pieces is 14" by 8", and it's 20" length, and the other piece, because it's going to be joined together, is 8" and then tapers up to 2", and then, here's another sample. You're gonna have lots of scarves, Mary. Right. Lots of different colors. Here is the two pieces that have been cut. And they're also with right sides up. And when you separate them and sew them together... you're going to sew them together. Here's a seam, and here you have right sides up, but you have a little stability added. Right, this is a piece of interfacing that I've just added to one of the knits, and now I have a template for the placement of the button holes. - And the interfacing. Now I'm going to use-- yes, that's right. So I fused that first, but then once the scarf has been sewn together on the edges, then I can lay this in the interfaced area to add the button holes, and that's what we have here on this scarf. So we'll lay this on top. And that pinking blade technique-- you've pinked the edges, you added button holes, and they were interfacing in one layer, and then it can tuck around and weave in and out. So, unusual shape here, but still a very usable scarf. Great for cool weather, not cold weather, but great way to use up those T-Shirts. Here's a great way to use the small chest logos found on many T-Shirts. Turn them into decorated luggage tags. The bag owner identification is hidden inside the tag. You can make this tag holder extremely with ease or add a little extra detail. We have two options here, Mary. The edges are treated differently, and we're going to focus today on the variation here with the pinked edge. - Mm-hmm. And, as you show, Nancy, the inside has a vinyl pocket for identification, and then we have a tag to tie this onto our bag. Mary's developed a pattern that you can trace and then double in size as we have on this image of paper, and you can see this section was cut out of the shirt, and it stretched a little bit after cutting, but, Mary, often, the back of these small logo shirts will have a large logo on the back, so you can use it, you know? - When you make your quilt. Sure. -
laughs
but my advice is
To proceed with this, we cut out the two layers, and our second layer here has fusing material, fusible interfacing on the back. Yes, and this is the one we're going to make with a decorative logo and then a plain one. And we place our vinyl on the inner layer 1" below, at least, the top curved edge of the liner, and here we have that vinyl sewn in place. You can see that the opening is toward the center of this piece of fabric. And here's a hint when sewing the vinyl onto your fabric. Here's a close-up. You can see I'm using a Teflon foot. Topstitching that vinyl piece, made a little bit larger than the business card, in place. And our next sample shows that we've sewn the two layers together. The logo is opposite the vinyl section, and then we're going to trim the edge here with the pinking shears, and our next sample shows that we have also folded this in half and stitched. So that keeps the fold nice and crisp, and then you pink. We've used the pinking blade a lot for T-Shirts, but they don't ravel. That's right. It's great. And then we add button holes or eyelet holes. Something very simple, and if you've never made button holes, for first-time projects, this is a great place to do it. It really is. It's great. So then you simply just thread this through the area. Right, and we can do that pretty simply with our cord, and we're all set then to tie our luggage tag onto our suitcase. So, we've had many ideas of working with T-Shirts during this program. Whether they're big projects like the quilt, or small projects like the luggage tags... It's a great way to have a memory of a trip or going to a camp that you can keep with you from many times. Mary, thank you for these great ideas. You're welcome. My guest today on Nancy's Corner starts with a bolt of white or black fabric and transforms what is mundane into brightly hand-dyed fabrics to use in her art quilts. Please welcome Cherie St. Cyr, who is a fiber artist from Madison, Wisconsin. Cherie, I fell in love with your quilts when I saw them on display, and I thought, "Our viewers have to know about you." Thank you. I'm so happy to be here. I was wondering how you found me, and that you saw my exhibit at the University of Wisconsin Hospital. I did. And we're gonna start by sharing with you one of Cherie's quilts, and it's called "Bear Paw." But, a bear paw is a traditional design, but this is not traditional. - Right. So this quilt, I made for a competition from the Am erican Quilters Society, Mm-hmm. - And I used my hand-dyed potato dextrin fabric both in the direct dye application and in th e discharge application, and then I've never really been a traditional quilter. -
laughs
but my advice is
I kind of cut wonky lines and used all my crazy black an d white and red fabric. It was really fun to do. So it's a bear-paw quilt, as you mentioned, exploded. Exploded, yes. - Yes, so it's fun. So we're going to have two interviews with Cherie, and we're gonna start today with how you work with fabric because I think this is fascinating. Not that we're going to exactly give you all the details, but to see what starts with black fabric or white fabric, and this is one of your... It's a tie-dyed star, like the shirt I'm wearing. - Mm-hmm. I taught a discharge class to the Madison Sewers Guild... - Uh-huh. And I started kind of rolling in it. So this is a final product. - Okay, yeah, fun. But it doesn't look this way at the first stop. No, it's black and it gets tied, like this... - Uh-huh. And then I put bleach on it and it discharges. Not all black fabrics discharge to white. This is a sort of a special one. - Sure. Some go to copper. Some go to any other color, so... And then, before I untie it, I neutralize the bleach. I soak it in soda ash. I work with Procion fiber-reactive dyes, and then I put the dye on and I let that-- it's called batching, which is just sit around and be warm for 4 to 24 hours. Now you have to tell our viewers what you call yourself. -
chuckles
but my advice is
"A washer woman?" Well, I say, "To be a fiber artist is to be a washer woman," so... -
laughs
but my advice is
Because things take a lot of washing. Uh-huh. - So this piece was white. Oh, fun. It's cotton sateen. It was white and I died it navy blue. I call this one of the most beautiful pieces I ever dyed. And then, I put the potato dextrin, which is one of 114 sugars from potato, on with my hands. It's kind of like corn starch. You put it on and then as it dries, it cracks, and I use thickened dye to-- thickened bleach, sorry, to put over it, and then waited for the bleach to take the color out, and then rinsed it. Oh, wow, wish you could feel this fabric. It's weighty. It feels good. I love this stuff. We have a few more to show you during this segment, and this is very dramatic, as well. But here's the front side. - Oh, here's the front side. Sateen, you know, always has a front side. So this is a direct application of the sugar from potatoes. It looks really quite like corn starch, and then I was starting to run out of it one day, and so I made a silk screen, and I screen-printed, kind of with a little doctoring in Photoshop... -
Nancy laughs
but my advice is
In the positive and in the negative... Ah, nice, nice. Now, Cherie, where do you dye the fabric? I have a studio in my basement of my home on the near-east side. When I'm doing large work-- this is small work. This is a fat quarter. This is dye painting, but I do big yardage backs of quilts... -
chuckles
but my advice is
Giant paintings, 90" x 90". - Oh, fun. I do those outside in the summer. And you have a fine point, and just... I have a squirty bottle, like a hairdresser would put color on your hair. And, wow, let's show one more 'cause this is a clamp area. This is a clamped, and I tied wiffle balls... -
chuckles
but my advice is
...into it, and did color. Oh, lovely, lovely, and, yeah, you can see here are the wiffle balls, and... And here, clamped plexiglass shapes. So, many of these fabrics have been used in your quilts. We're gonna see some of those in our next segment following the program... - Yeah. I look forward to having you come back. Great. I look forward to being here. I hope you've enjoyed this first program of "Second-Chance T-Shirt Gifts" with my guest Mary Mulari. We're back next time for the second program. If you would like to join us to watch the show again, you can go to NancyZieman.com and watch this program or the interview with Cherie. Thanks for joining us. See you next time. Bye for now.
announcer
Sewing makeover specialist, Mary Mulari, shares easy to sew projects, transforming T-Shirts into memorable gift items. The "Second Chance T-Shirt Gifts" pattern can be used to make the project from this two-part series. It's $14.99, plus shipping and handling. To order this pattern, call 800-336-8373, or visit our website at se wingwithnancy.com/3018 Order item number MP29, "Second Chance T-Shirt Gifts" Credit card orders only. To pay by check or money order, call the number on the screen for details. Visit Nancy's website at NancyZieman.com to see additional episodes, Nancy's blog, and more. Sewing with Nancy, TV's longest-airing sewing and quilting program with Nancy Zieman,
has been brought to you by
Baby Lock, Madeira threads, Koala Studios, Clover, Amazing Designs and Klass Needles. Closed captioning funding provided by Riley Blake Designs. Sewing with Nancy is a co-production of Nancy Zieman Productions and Wisconsin Public Television.
The latest from Nancy's blog
Search Sewing with Nancy Episodes

Donate to sign up. Activate and sign in to Passport. It's that easy to help PBS Wisconsin serve your community through media that educates, inspires, and entertains.
Make your membership gift today
Only for new users: Activate Passport using your code or email address
Already a member?
Look up my account
Need some help? Go to FAQ or visit PBS Passport Help
Need help accessing PBS Wisconsin anywhere?

Online Access | Platform & Device Access | Cable or Satellite Access | Over-The-Air Access
Visit Access Guide
Need help accessing PBS Wisconsin anywhere?
Visit Our
Live TV Access Guide
Online AccessPlatform & Device Access
Cable or Satellite Access
Over-The-Air Access
Visit Access Guide


Follow Us