 Passport


Quilt With Carefree Curves - Part 2
11/18/13 | 26m 47s | Rating: TV-G
Tedious quilting methods are a thing of the past! Nancy gives a facelift to timely quilt block designs such as Hearts and Gizzards, Fan, and Wagon Wheel. Learn unconventional yet simple techniques for quilting curves, plus options for making big, dynamic quilt blocks.
Copy and Paste the Following Code to Embed this Video:
Quilt With Carefree Curves - Part 2
Traditional quilt blocks often have unusual names. As an example, here's the Hearts and Gizzards design a pattern that can be traced back to the late 1800s. The gizzard shape, opposite the recognizable heart motif is not something many of us would recognize. Yet the following curved design still bears that name and is the feature of today's program. Over 100 years ago, this design was created with difficulty but today, you're going to learn a carefree approach. "Quilt with Carefree Curves" that's what's coming up next on Sewing with Nancy. Sewing with Nancy TV's longest-airing sewing and quilting program
with Nancy Zieman is made possible by
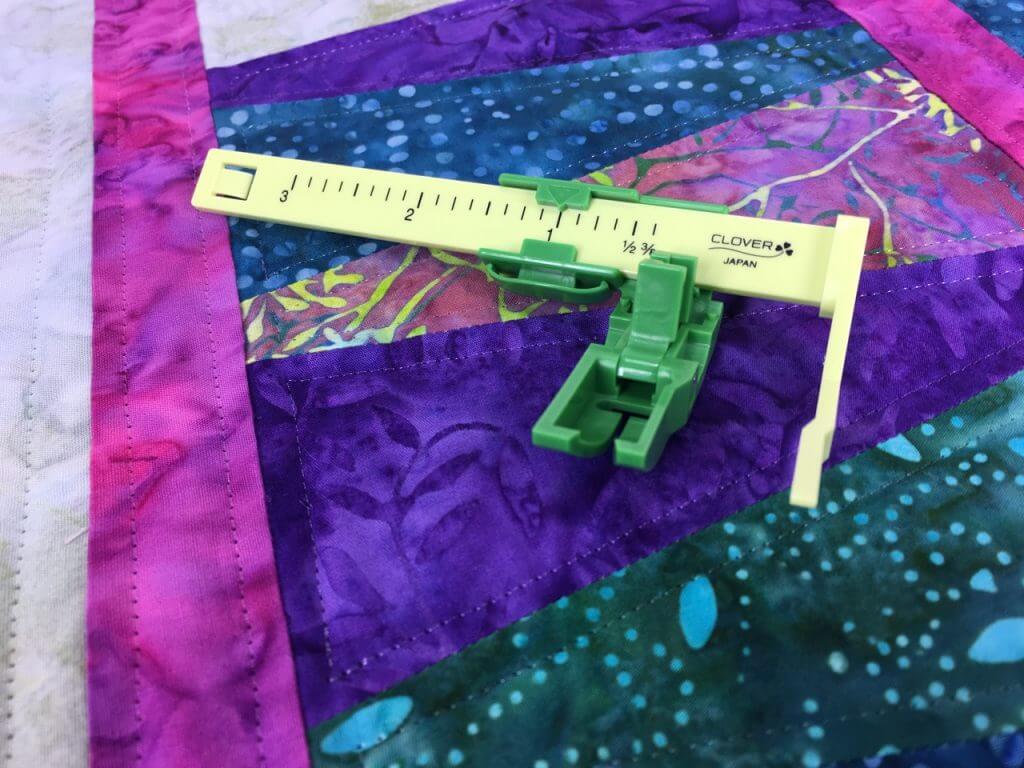
Baby Lock, a complete line of sewing, quilting and embroidery machines and sergers. Baby Lock, for the love of sewing. Madeira, specializing in embroidery, quilting and special-effect threads because creativity is never black and white. Koala Studios fine sewing furniture custom-built in America. Clover, makers of sewing, knitting quilting and embroidery products for over 25 years. Experience the Clover difference. Amazing Designs and Klass needles. Let's start by taking a close-up look at the Hearts and Gizzards quilt. You can see part of it on my board. The block is on point, and I have two sizes of hearts. This section is known as the gizzard shape. It's relatively easy to put together a carefree method but in years gone by, it wasn't quite as easy as the way I'm going to show you. One of the traditional ways of doing it at least as of late is to cut a piece of freezer paper that presses onto fabric the finished size of the heart of half of the heart shape along the top. Then you can see it's cut straight with the shape along the sides. This extra width at the top that you cut, about a 1/4" is pressed under to get the shape. Then the freezer paper is removed. After you peel it off and I'm going to assume that you can figure that out. Peel that off. You have to double check that it's still pressed under. Then position it onto the half-square triangle. You have to do a little manipulating so it all fits into shape. What I'm going to share with you now instead of using paper or freezer paper is to work with fusible interfacing. It's kind of a sewing technique or sewing product. It's going to be stitched around the top trimmed and turned, and pressed to the wrong side so you have a nice, round shape. It follows in line. If you missed our first program in this series you can watch it online how we did quarter-circle squares or making a Drunkard's Path, for example. I'm using a template. You can use your favorite template. This is the one that I'm going to be using. It has five different options from big blocks. This is a 16-1/2" block the same size that you see behind me with two same-sized hearts placed into it. It goes down to a 14-1/2". You can see the gradated sizes. Then, four blocks create a design. As I place these four blocks around you can also see-- This is sometimes called a Dutch Windmill. There you can see the windmill. A block by itself has the hearts and gizzards shape. It's kind of pretty. I like it. Contrasting colors work great for this. On this particular template it tells you exactly how large to cut squares and rectangles. No curves are going to be cut, but geometric shapes. To make this smaller 8-1/2" block, which finishes to 8" you're going to be asked to cut 8-7/8", kind of an unusual amount, square. Two squares, one of each color. Then, cut from point to point so that you have four half-square triangles. You can see those right there. So that's set. You have these half-square triangles. Now you're going to make the heart shapes. With the template, it says on here that you can cut a 6" crosswise cut. It's really hard to read, but I can see it. That's for this very smallish shape. I've started to do some tracing with a marking pen or pencil, a fabric marking pen. This one happens to wash out. I align the top of the template with the top of the strip and trace the sides. And also, trace the curve. It kind of looks like little ice cream cones. Then rotate, do the alignment so that the red line at the top aligns with the fabric, and trace. After you've traced a whole slew of these, quite a few you're going to do some cutting. For the cutting, use a rotary cutter, ruler and mat. I'll grab my cutter. Don't cut the curves, just cut the straight lines. You're going to have triangular shapes. I have to admit, you could cut two layers of fabric at once. But I usually just take the little extra time and cut them singularly. I have all these shapes. Now comes the interfacing. Cut strips 2-1/2" to 3-1/2". For these large ones, we cut 3-1/2". The instructions will be given to you. This is 2-1/2" of interfacing. I've seamed them. Just overlap them together. Now, place right sides together. I'd place the edge along one, rotate it. Give yourself a little space. Pin it, and keep on doing this. Pin the fabric triangle, to the wedge. Now it's time to do the sewing, trimming and finally, the pressing. I took a little time after pinning the triangular shapes to the fusible interfacing to snug them a little closer together. The next step we're going to do is some trimming. You don't have to leave as much space. If you have the ends or the sides meeting then just make a cut between the two before you do the stitching. You'll have many sections that you're going to be sewing around that curve that ice cream cone shape at the top. Now it's quite a steep curve. So to do that stitching, to make it easier and smoother what you're going to do is set your stitch length and it's just a straight stitch to "2.0" or "1.5", so that you can easily maneuver and just follow the tracing that's on this area. You'll sew many, many shapes like that. Just sew around and around and around or curve, curve, curve. You could make small shapes, you could make larger shapes. In the feature quilt, I used two different sizes. You can see perhaps that here's one of the largest sizes and a medium size. It gives it a nice proportion that's not always the same. That's totally up to you. By the way, the instructions to create this quilt type are in the book that accompanies today's program. But you can make any size that you'd like. Now for some trimming. Use a pinking sheers, or a rotary cutter with a decorative blade. Trim around the outer side of all the pieces. Then trim in the interior. If you saw our first program in this series it's much the same way. I'm going to try to make that a little bit smoother. I have kind of a bump in the road there. So, smooth that out. Make sure that it's double the width of the seam allowance. Then, turn it right side out. This is a batik fabric so it looks kind of the same on both sides but you can see the start of the shape. Run a bamboo shape, or this is a plastic hera marker around this curve, to reinforce that shape. That will help get it nice and round. Just shape it out. Then move to your ironing surface place it down, and press. After you've pressed it, when you pull it up it's nice and curved, and shaped just the way you'd like it. You'll need two of these for each half-square triangle. You'll put the lighter green on the dark fabric and you guessed it the reverse for the other side. You'd pin it to each corner. Now it's time to stitch this into place. Normally, in all my quilt samples my staff and I have used monofilament thread clear thread in the needle and matching thread to the fabric in the bobbin. But I'm going to use black thread so that you can see it a little bit easier. I'm going to shorten the stitch length to 2", or 1-1/2" even because you want this pretty straight. With the clear thread, you can't see it at all. Then just topstitch. Topstitch to each corner. We also sew along the sides. I'm just going to do this topstitching along the edge. Just sew and sew around that edge. After you've done that stitching then you can see. I'm just using black thread so you can see. You'd use clear thread to stitch it all into place. You could also stitch the sides. You'd stitch four of these shapes, two to the dark and two to the light, in opposite colors. Here we have the opposite colors together. You guessed it, you're going to put them back together. You've cut that square apart and now you sew the side seam. Press it open. I like to press these seams open rather than the traditional pressing a quilting seam to one side because of the bulk. You have a really interesting quilt block. If you'd like to vary it you could put a heart on a square. Seam two halves of the ice cream cone shape together as we have here, and then place it on a quilt block. Here's the little seam. Place it on the block, and there you have a variation. Quilt blocks with fan motifs are common designs. The curved edges are traditionally turned under using a hand stitching technique called needle turn. If you're not fond of hand stitching learn how to perfectly shape the curved edges with my fusible interfacing technique. If we look at the block that's on the design wall that you just saw it's in quadrants, four different sections. It can be made as a unit, as we have here or just a unit by itself. The template that I'm going to be using for this is very easy very comparable to the last shape that we just used for Hearts and Gizzards. But we have some options. We can have this section in the middle a quarter-circle section. We learned how to use that in the first program of this series. I'll show you the variations of this contemporary design with not a lot of fan sections. It's easy use. When we go back to looking at the template that I first used it had a much deeper ice cream cone shape to create the heart. This one is much more gradual. There are two options that you can have. You can have a center section that is very large starting with an 8-1/2" circle or smaller, a 6" circle. To work with this, I decided to use an 8-1/2" circle to begin with. You'll see that later. I'm going to be working with the next to the largest shape which will give me a block that's finished, 22". That's a big block. To know how long to cut my strip I just measure between those two markings. It's 6-1/4". It's the same tracing technique, only you have a different shape. You're going to be rotating the template and aligning, this time, two lines. I've already traced three sections. Here is my line at the top edge. I'll just align it here and on the lower edge so I get things nice and straight. This pen disappears. It's dark, I realize, but it disappears when pressed. You just trace the sides and the curve. Then do a little rotation, and do another one. We do this, for example, we needed eight sections. We use four different colors to do this block that's behind me. Someday this is going to be in a finished quilt! After tracing, then you cut apart just like we did earlier for the heart shapes. Here I have two sections. We're making a fan shape, so just one-fourth or one quadrant of what you see. It works best if you take the two sections that you're working with meet right sides together, and sew just one seam. It just makes it faster. On this section, it's been seamed and pressed open. Use the same interfacing idea. This is garment interfacing, light weight. In this instance, it's 3-1/2" wide and you sew to the interfacing. Then do the inverted image and place the next section down. You could pin these all down, of course before doing sewing but just so you can see what's going to happen. Then, cut it apart cutting along this seam. Just like before, we'll be doing the turning cutting, and trimming, and turning. Then you would trim along the inside and press, just like before. There's nothing different other than that the shape is much more gradual. You place this on a square and topstitch with clear thread. Now to create the fan section. In the first program of our series I showed you how to make quarter circles. If you didn't watch this, go online and watch the first program of the series. Make a smaller-- this started out as an 8-1/2" circle. Now it's placed in this area. This is a delicate, contemporary fan made with the fusible interfacing technique. Our last carefree curve design, the Wagon Wheel block can be made large or small. This block is a 24" square and really makes a statement. In this technique, I'm going to deviate from the fusible interfacing finish technique and show you that super-size blocks can have a bias edge finish, which adds interest and detail. There's always a change that can be made. This is exactly what we did here. This huge block in the center happens to be 24". Like the fan, it's made from the same template but notice the change the adding of the detail of the bias trim. This is a bright, festive table runner for out on a deck or if you have a Southwest design. Like the other projects, you'll get the instructions on how to make this in the book that accompanies the program. Now to make this, I'll give you the ideas. The size of the wedges are the same size that I used to make the Ladies Fan but rather than sewing just two sections together I think you can figure this out I stitched all eight. All eight have been sewn together. Notice that this inner section doesn't look too round. Well, that will be changed in just a few minutes. The size of the square to cut is printed on the template. If you're using a different template just make the size of the block the way you'd like it. As I mentioned, it's a 24" block. We've folded the block in half and then in half again. Press the folds to quarter-mark the section. Then you open it up and align the wagon wheel with the creases. The seams will align right together. You align this seam-- Let's see, where have we got it? This seam up here, one there. It all kind of comes together. Then machine baste I'm just going to pin it for you right now. Machine baste along the edges to get it positioned. You don't have to use a center, if you don't want to. You can use the fabric that shows through from the background. Now, trim. You could use a bias tape maker. You could buy bias tape. You could use a fusible quick bias. We chose these bright batik textile fabrics to make a trim with a bias tape maker. This is going to be a 1/2" finished width. We cut the width of the strip-- It's bias, cut on a 45 degree angle. We cut it 1" wide, double the width. We inserted it through the wide end of the bias tape maker. As I move this over to where I'm going to press my padded surface as it comes out of the bias tape maker it is folded, ends to the middle. We pre-folded this, but then I'm just going to-- Let me move it to the side so you can see a little better. As it moves, I'm just going to press so that it gets a nice press and a double edge. As I pick this up, you can see that it's pressed with the long edges toward the middle. Then with a fabric glue stick, or a paper glue stick it really doesn't matter. I usually use just a paper glue stick. This is a fabric glue stick. Position a little glue along the edges and then you can do some shaping. Find the end, and just mold this around the edge. It can't get much simpler than that. When you get around to the other side turn under one edge so that you have a nice finish. As we look at the finished wagon wheel do double topstitching and add some quilting and you have a dynamic look. My Nancy's Corner guest is one organized person. She shared with us in a previous segment last season how to clean, cull, and organize our creative areas. Today, she's back to share with us the next logical step how to set up our sewing and quilting rooms in zones. Please welcome back Gretchen Hudock. Gretchen is a professional organizer of Reorganize Today. Gretchen, good to have you back for a Nancy's Corner segment. The last time, as I mentioned you taught us to cull and organize. You used the word "Spring" as in spring cleaning, as an acronym. First, we were asked to... Sort. Pare down. Reuse, repurpose, recycle. Identify locations where you're going to put things. Yeah, that's an important one. Now is the time to buy containers. Gotta put things away. Okay, you've gotten kind of cleaned out and then there's a next step. I like this idea that you're going to tell us about. We're going to put our areas of sewing into zones. Just like you organize your kitchen in a work zone you're going to organize your sewing room work zones. In a kitchen you have... The refrigerator, the stove, and the oven. They're usually in a nice little triangle. Correct. And so, here's your triangle. Right, we have our cutting area sewing area, and ironing station. That may seem logical but I kind of know that I don't always do that. There's an advantage. Right, it just makes your sewing more efficient. We want to do as much as we can in the time we have to sew. I like this idea. you liken the triangle to a color wheel the basic three primary colors. Right, we have red, yellow and blue. So, likened to these three areas. Then, around the periphery you have the complementary colors or the combined colors. Right, and if you have a serger or an embroidery unit, all of those things would be outside of your main triangle. You don't have to have a big space to do this. No, even a small, little closet you can work all of your like items together. You recently re-did a friend's or a client's, I should say, work and craft area. In the cutting area, she did more than one thing. Right, she had a cutting area that was sitting in the middle of the room so half of it, we used for cutting fabric the other half, she could do her scrapbooking. Rarely would she be cutting both at the same time. You can see in this one image where her cutting area is for sewing. The flip side of the table was for scrapbooking. Correct. Keep like things together. You said that if you don't store right you end up buying duplicates, because you can't find things. That's very true. I hate to admit that but I've fallen into that trap! Then the sewing area, here's Judy's sewing area. Right, and she has her embroidery machine and her sewing area, and her sewing machine. She also has a little cutting station right there but just for minor little things. The main cutting is done over at the cutting area. I think this is important. You know, when I used to give some advice on this I would say, you know, get your ironing board close so you don't have to get up. Oh, wrong! We do need to move around once in a while when we're sewing, too. Get moving and enjoy the process but don't be sedentary and sit around. So, we have the cutting and the sewing and then the ironing area. Have all of your ironing supplies together so that you're not running across the room to get spray starch, or whatever else you need. Just have everything there, have a drawer unit. A basket works, too, just with all of your supplies in it. It looks pretty, too, and things stay contained. You know, okay, I have to put my ironing supplies back into my basket. That's the key thing, putting things away. Once you find a home for them put them back in that space. Okay, Mom! Good idea. Then fabric, you know, the fabric you go to but once you choose it it's a secondary area of storage. Correct. You want it near your cutting area so you can get to your fabric but you don't need it right on top of that space. Have it just off so it's not interfering with your triangle. The zone again. As a closing, it has cutting... Sewing and ironing. Get that together and you'll be more efficient in your sewing. Gretchen, thanks for being our guest. You're very welcome. If you'd like to know more information about reorganizing today for your room you can go to all things Sewing with Nancy at nancyzieman.com. You can re-watch this program, this two-part series on "Quilts With Carefree Curves." You can click on Nancy's Corner and find Gretchen's interview as well as 52 other interviews-- Or 51 other interviews, I should say as well as 51 other programs to watch online. Sign up for our blog. Again, at nancyzieman.com you'll find all this information. Thanks for being with us. Bye for now. Nancy has designed a set of three templates and written a book that can be used to create the quilted projects featured in this program. The templates are $24.95, plus shipping and handling. The book is included free with purchase. To order this reference material as well as notions used during the series call 1-800-336-8373 or visit our website at sewingwithnancy.com/2714. Order Item Number BK2714 "Quilt with Carefree Curves" templates and free book. To pay by check or money order call the number on the screen for details.
Visit Nancy's website at
nancyzieman.com to see additional episodes, Nancy's blog, and more. Sewing with Nancy, TV's longest airing sewing and quilting program with Nancy Zieman
has been brought to you by
Baby Lock Madeira Threads Koala Studios Clover Amazing Designs, and Klass Needles. Closed captioning funding provided by Oliso. Sewing with Nancy is a co-production of Nancy Zieman Productions and Wisconsin Public Television.
The latest from Nancy's blog


Search Sewing with Nancy Episodes

Donate to sign up. Activate and sign in to Passport. It's that easy to help PBS Wisconsin serve your community through media that educates, inspires, and entertains.
Make your membership gift today
Only for new users: Activate Passport using your code or email address
Already a member?
Look up my account
Need some help? Go to FAQ or visit PBS Passport Help
Need help accessing PBS Wisconsin anywhere?

Online Access | Platform & Device Access | Cable or Satellite Access | Over-The-Air Access
Visit Access Guide
Need help accessing PBS Wisconsin anywhere?
Visit Our
Live TV Access Guide
Online AccessPlatform & Device Access
Cable or Satellite Access
Over-The-Air Access
Visit Access Guide


Follow Us