 Passport


Nancy's Favorite Handbag Sewing Techniques - Part 1
08/09/15 | 26m 46s | Rating: TV-G
Create fashion forward handbags by making easy changes to your bag pattern. Learn easy functional handbag changes, add ribbon inspiration accents, create a recessed zipper closure or clutch handles, and more. Nancy’s favorite handbag techniques make personalized bags with designer appeal.
Copy and Paste the Following Code to Embed this Video:
Nancy's Favorite Handbag Sewing Techniques - Part 1
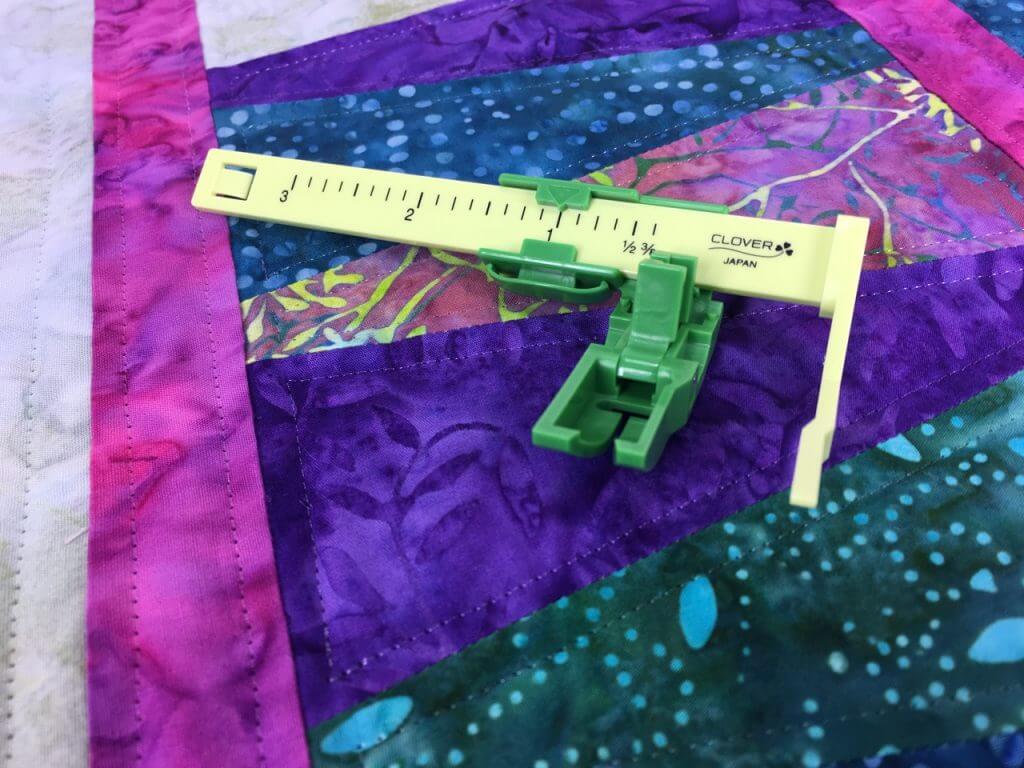
Weekly, one of the top search topics on my blog is how to sew handbags. Even though I've presented numerous Sewing With Nancy programs on this topic I'm really glad you want more ideas. Why? I, too, enjoy sewing handbags and totes. So welcome to my first of two episodes "My Favorite Handbags Sewing Techniques." A collection of ribbons inspired the first bag idea. The ribbons make a statement as a pocket accent and also can be used to accentuate the handles. I'll show you how in "My Favorite Handbag Sewing Techniques" next on Sewing With Nancy. Sewing with Nancy TV's longest-airing sewing and quilting program with Nancy Zieman is made possible by Baby Lock, a complete line of sewing, quilting and embroidery machines and sergers. Baby Lock, for the love of sewing. Madeira, specializing in embroidery, quilting and special-effect threads because creativity is never black and white. Koala Studios fine sewing furniture custom-built in America. Clover, making a difference in sewing, quilting, crafting, and needle arts for over 30 years. Amazing Designs and Klass needles. Most of the details that you notice in a handbag have to do with what's on the outside but we're going to start with the inside. It's kind of like life. The inside is what's important of you. If you don't have stability and stabilizers and thickness in a bag, which this one has it's going to be wimpy and lackluster. So in this instance I'm going to show you how I start with a bag pattern a simple style. You can choose a variety of patterns totes, bags. This is a tote of a template. We're going to use this template pattern for all five of the bags during this two-part series but you could use any of them that you have at home and make some modifications. Most of the time what we have to chose from, fabrics a lot have to do just with cotton fabrics. So with that in mind I have traced my various pattern pieces right on the fabric. And sometimes just tracing with templates I like it because every time you trace you get the same size. But I have the front placed on the fold there's a side panel. There are pockets that are right over here that would be placed on the fold as well the pockets within the design and then a long pocket. And if we look back at our finished bag you can see the various elements. The center section, the side panels and then the pockets. And you can put the pockets on the front and the back. Cut out your pattern pieces. I'd have to cut doubles one for the front and one for the back. And then add interfacing. There are two layers of interfacing that I'm going to recommend. And the first one is just a fusible interfacing that has been pressed on each pattern piece and before the stitching. It's just like a shirt weight or a tailor weight something pretty crisp. And then I stitched, would stitch the sides seams together of the front and the panel and then add the pockets. And we're going to talk about pocket detail later but I just show you how the assembly is created. So then the front I just put the pockets on the front on this one. And then sew from the bottom up construct, I should say sewing the lower seam. Now, you see another layer of interfacing and that was placed on the fabrics before the seam was stitched. This is a craft interfacing. You can kind of hear the stiffness of it. And I used my completed front of the tote bag or handbag to cut this heavyweight interfacing. Why? Well, then I didn't have to deal with another seam. You know what I mean? I didn't have to have a seam here. I just cut it one big piece. So that's layer number two of the stabilizer. Then, really, there are three layers. You can kind of see this is a plastic base for a bag or a handbag or tote. It's cut the finished size of the base. Easy to sew through difficult to pin. Every time I try pinning through all these layers I get U-shaped pins. So what you can see here, on the underside is double-sided basting tape. You just put that on peel it off and it works as a pin. And then just smooth it down. And then the stitching I lengthened the stitch a little bit maybe 3.5 millimeters in length and just sewed the base. So you have now constructed your bag so that it's very secure and you will have great shape to it. The stitching of the side seams is next. And we've got a lot of layers here. So with these layers you can pin or you can use clips or sewing clips which we often use just because of the thickness of everything. Easy to sew, kind of tricky to pin. And then you'd sew the side seam. I have another sample another bag that's at this point where the seam has been stitched. Now the seams on this particular pattern or template they're only 1/4" wide. So to make it easier to press open with that narrow seam allowance we would press over and on my ironing board I place this on the end of the ironing board and press over a wooden dowel, a pressing tool that is flat on one side. And that will get that edge very crisp and the seam flat. We're almost done with the basic construction except we have a hole in the corners. We just match the side seam and that lower seam and clip together. And here you can see a close up. You just sew that corner. Sew across that edge. And you get a very sharp, crisp point. And here that corner has been stitched. Kind of hard to maybe to get that exactly pressed but easy to sew. And it takes a little bit more time, probably to turn this to the right side than it does to do the pressing or that basic seam stitching. And then you cut a lining piece. The lining is cut, minus the pockets just really simple and then the lining is tucked inside. All the bags that you will see on this series have been made in this same way sewing with three layers of interfacing or stabilizers sewing from the bottom up and then cutting a lining piece. Now you know the basics now you can continue with the creative part. Now that you know how to do the basics the inside construction we can concentrate on the fun part the creative part. And can't get much easier than applying some ribbon coordinates. We have them, as you can see on the pockets as well as part of the strap area. And it all started by choosing the ribbons. I chose the ribbons first then the fabric came after that. And it was fun to kind of mix and match sizes. You can see, obviously the color that I chose for this particular bag. The pocket pieces, I must admit-- Or not admit, but explain that I did also add the interfacing to the pocket pieces. Not the craft interfacing, but just garment interfacing the press-on interfacing for this area. The other interfacing was sew-in. This one you can just press right on. So I made the pocket, just stitching the ribbon collection. This little ribbon is fun because it's reversible so that you get two views for the price of one. And then I using clear thread. Throughout this program you'll find that a lot of the stitching that I do is with monofilament thread. Easy to work with you can use a size 75, 80 needle. Use regular thread in the bobbin so you can see what you're doing or find those threads when you're sewing. But this way you don't have to get the thread to match your ribbons and see the thread stitching. So it can't get any simpler than that just add a pretty collection of ribbons. But to carry the ribbon theme through I chose these handles that are smaller in the carrying area and wider when they're attached to the base of the bag. And to make handles of any type make sure that you add fusible interfacing whether it's one complete sheet or size the same size as the strip, which is 2-1/2" wide. And this happens to be 27" long. Or you can use the perforated interfacing for straps and just press it on and then you'll be pressing along the perforations. And it just makes it for ease and crispness. Whatever you'd like to use is fine just make sure you add some interfacing. And then cut two 5" lengths of grosgrain ribbon. 3/4" wide works out really well. And you can see that I have the paperback-- Excuse me, this is double-sided basting tape added to this area. And that's going to make life a lot easier for pinning. Now on this next sample I pressed up 1/2" on the end on each end. So you'll cut four strips that are 5" by the width of the ribbon. And then simply place the end of the-- It's pretty sticky. The end of the ribbon in this area and I pre-pressed this press along the area. And then fold back the ribbon fold it back for 5". There, or almost 5". And boy, that double-sided tape really helps. Then after you have just basted that into place it's not going to gum up your ribbon. It really isn't going to. Then do the clear stitching attach that ribbon to the strap. And you can see it there. Okay. So we have both ends would be made in this manner. And then get a D-ring or an O-ring, or whatever type you'd like to use. And here I have marked up 1" from each end. So we'll just slip this on here at 1". And then clip. And I do a lot of clipping, whether you use sewing clips as I'm doing, or hair clips. It doesn't really matter. After making the same adjustments at each end of the straps so four times and if you have that 1" stitched up pressed up, excuse me. Then you're going to sew along that edge. Just sew that down securely again, using the clear thread. It will make life so much easier for you. Now, we need to cover the ribbon on the inside. And that's simply going to happen by measuring. I'll set my gauge for 2". I guessed pretty good 2" from the fold and then I would fold these edges together. So your strap is double in this area which will make it so much easier. And then sew from the 2" from one end to 2" from the other end. Here's a close up of that. And I'd sew a little slowly but you see half your foot is on the fabric, half is off. We'll just sew, bar tacking or securing the stitch at each end. And here we go. Here's what the strap looks like. And it has the ribbon accent in the front and it's narrow so that you can-- when carrying it it's easy to carry. Now, sewing it onto the bag is next. And keep in mind that when you're making a bag or a tote that the handle placement is critical. No matter the size, the handle placement is almost the same width just because of ease of working with it. So I have marked from my template on my pattern small little areas where the handle is placed. And they're really little there but you can possibly see that. And then you'd place the folded area 2" down from the top, 2" down. And here, again, I do some clipping. Then sew. Sew across the top fold. There's a lot of layers here so now I change to a larger needle perhaps a 90 or 100 size needle and sew, again, with clear thread along that area. Here's our close-up of that already stitched and very securely put on. Easy to do. You may want to even do this before you sew the side seams. The choice is yours. I mentioned earlier that sewing handbags is a frequently requested topic. Specifically, how to add a zipper to a pattern that doesn't include one. The Market Tote addresses that need. It's big, roomy and most importantly secure with a recessed zipper closure. Here's how to modify a bag pattern to easily include a zipper. I have thought of many ways or tried to think of may ways to include a zipper. But this, I think, is the best way. And the zipper pattern is taken from the lower section of the template that I've been working with. And you'll be surprised how easily this will be to put in. Not a difficult zipper technique. If you've never tried putting in a zipper not to worry. It's basically topstitching. So I'll give you that hint but first we have to make the pattern. This works especially well with a pattern that has a corner that's already cut out. On my templates, or these templates the pattern seam allowance is 1'4". So I've overlapped the patterns so that their overlapped 1/2". It gives you, in essence taking away the 1/4" seam allowance. And here's a piece of paper under there to create the pattern. The first thing that you do is measure 2" from the top or from the lower edge of the pattern. And then we're just going to trace the bottom of it the corner, and then 2" up the side. And when you cut that out, which, tah-dah! I have. You can see that I've marked the zipper opening I just wrote, zipper opening. This will become the top of the recessed zipper pattern and then here's the side seam. Now if you're wondering how this is going to work it's kind of like doing that corner that I showed you earlier but putting in a zipper first. Cut out two pattern pieces and then add interfacing just because I'm working with cotton fabric. You just need to get it-- This is too light weight. It wouldn't work very well. So add interfacing to these areas. And then we're going to work with the zipper. I used a 16" long zipper. And cut the zipper exactly 16". Now if you're working with a longer zipper just bar tack or zigzag over the teeth at the bottom. Open the pull a little bit and then zigzag across the top the same amount so that it's secure on both ends. And then we're going to cut two rectangles cut 2" by 3" place the tab down and place the rectangles on each end and wrap it around. If you watched our series earlier or I should say, last year on rectangles and squares we covered the zipper ends in this manner. And you're going to wrap it around firmly, securely. And then stitch 3/4" from each end. So this is 3/4". Then on this end I just clipped off the extra seam allowances so that we have fabric at the end of each zipper which will make it easier to sew into the seam. There we go. It's still 16" long or maybe just a little bit longer but you'll see what happens next. Then the two pattern pieces the bottom zipper opening you'll press under 1/2". Press under 1/2" on both sides. And then place the zipper down and you can see we have some basting tape or you could, oh you could just pin it down if you'd like. And just overlap the fabric onto the zipper tape. And you can see that fabric that was added at the top? Well, that will make it so much easier to sew into the seam rather than having to sew through the zipper coils. You'll notice that we have about 1/2" allowed of that zipper but that automatically is just about what you get. And then you topstitch this all the way down. Okay, so that's pretty simple just to stitch that. Then we're going to do some side seams sewing. And then I've met the side seams together stitched it and then sew that corner once again. There you go, that's all there is to it. So that you get the pattern piece that looks like the bottom of the bag with the exception that it has the zipper inside. So it's like sewing that bottom of the bag but putting in a zipper first. And the zipper has that end position or that end with the fabric in that area. Now, we're going to put it into a bag. I have another bag color fabric. And I have-- This is the one you saw earlier in the program where the lining has been tucked in. And then after the lining has been tucked in you place the recessed zipper section and you would pin or clip it in as well. And machine bast all the way around the top. In the second program of this series I'm going to show you how to finish the top of the bags placing on a binding, an easy binding for bags. But right now, we're just going to pin and machine baste it into place. And how about that for an easy way of getting a recessed zipper?
zip
Tah-dah. Now, for the handles. The handles are cut 13" long just like we worked with earlier today with those designer handles. And we add ribbon or trim to the handles. And then I've pressed up to the right side 1/2". And if we go to our little sample up here-- Not our little sample, but our market bag sample you'll see that I just place the handle at a 45 degree angle. I've marked a 45 degree angle and just tucked it in just so I could get this 45 degree angle at the handle placed at the same strap marking. This will allow me to just grab my tote bag take it to the farmer's market fill it up with goodies and bring it home. A simple way of adding a clutch bag detail to a big tote. I'm certain that many of you have been to a quilt show and have admired the sea of finely crafted quilts. In every show that I've attended the Best of Show quilt has always been displayed front and center. Ever wonder how judges choose the best of the best? I caught up with one of the judges at the Quilt Expo in Madison who explains the process. We're here at the Quilt Expo in Madison, Wisconsin to show you the Best of Show quilt. To share how a quilt is judged why this quilt was chosen as Best of Show is Carol Butzke an authorized quilt appraiser and judge. Welcome. Thank you, I'm glad to be here. And I'm glad to be part of the judging team for this show which has gotten, certainly national/international acclaim with the quilts that we're seeing here every year. I am AQS certified quilted textile appraiser. And the hat I was wearing yesterday during the judging was that of a National Quilting Association certified judge. And this was the Best of Show that we've chosen. And it's amazing, by Mary Bovia from Greenwood, Indiana. And it's called Once Upon a Time. And it is a storybook. You can see that the whole structure of the quilt is based on an open storybook with the bottom part there where the book is open and laid open. And it's a fantasy which we can all relate to, the unicorns and the castles, etc. And she's done an amazing job both in style and in design but also in her workmanship which is pristine. It's needle turn applique for the most part. The mane on the unicorn the body, the flowers all turned under, hand stitched. It's phenomenal workmanship. And then there is satin stitching traditional applique. Carol, point out some of the things that tell our viewers what is so striking about this quilt. It's the layer of detailing. Each item that she has gone to she has taken to the nth degree of looking at detail. This attention to detail is so wonderful. We have a variety of fabrics including a very raised fabric here that is used for those particular flowers we have overlays of netting for the little fairies' wings. We have a gnome down there which represents her husband. We have a lot of metallic work a metallic satin stitch around the flowers which is exceedingly difficult to execute. But this is her own drawing, her own work. The tiny, tiny stippling that's done on the borders or in each area is phenomenal. It's minute.
laughing
I couldn't possibly begin to do this type of quilting, so I just admire it. And I do too, I think it's phenomenal. And it's most enjoyable to be able to enjoy this and be able to have people to enjoy her work. Now, you know, it's called Once Upon a Time and her selection of fabrics really carries through the theme. It does indeed and she picked a lot of fabrics that were representational the walkway to the castle, the castle itself the flowers, the shading of the flowers. Some of them are three-dimensional in that the petals are pre-folded as we talked about the gossamer wings on the little fairy. So everything was taken into context of what she needed to go do and what she needed to find to be able to get the right thing to explain what she was doing in her composition. When we talk about quilts some are bed quilts some are wall quilts. And this certainly is an art quilt and it's not your grandmother's type of quilting. No, it's not but that's what's so exciting about quilting because it's constantly moving forward. And now we're looking into the modern quilts and that whole movement is gaining momentum. But the wonderful things, just even in this show the variety of things that are here. What people are doing with fabric what they are doing with different styles just blows one's mind. If you're interested in seeing what's new in quilting where you may want to go forward my suggestion and our suggestion to you is go to a quilt show because you will be inspired you will pick up some tidbits. I'd never be able to quilt like Mary Bovia but I am inspired by her work of art and her selection of fabrics. And I'm sure you are too, Carol. Absolutely, and you always learn something new when you look at the pieces. Very well put. Well, thank you for being our guest thank you for being a judge. And you have an admirable position but a difficult position, I'd say. Indeed. Okay, well thank you, Carol, thank you for being my guest. Special thanks to Carol Butzke for giving us insight into Mary Bovia's quilt, Once Upon a Time. It's an amazing quilt. Well, remember that you can re-watch this episode and four seasons of Sewing With Nancy programs online at nancyzieman.com. At that site you'll also be able to follow my blog and connect with me on other social media platforms. Next time on Sewing With Nancy you'll learn more of "My Favorite Handbag Sewing Techniques." I hope you've enjoyed this program and will join me next time. Bye for now. Nancy has written a fully illustrated book that can be used to create the designer handbag techniques featured in this two-part series. The book is $14.99 plus shipping and handling. To order the book, call 1-800-336-8373
or visit our website at
sewingwithnancy.com/2901. Order Item Number BK2901 "Nancy's Favorite Handbag Techniques" Credit card orders only. To pay by check or money order call the number on the screen for details. Visit Nancy's website at nancyzieman.com to see additional episodes, Nancy's blog, and more. Sewing with Nancy TV's longest-airing sewing and quilting program with Nancy Zieman has been brought to you by Baby Lock; Madeira Threads; Koala Studios; Clover; Amazing Designs and Klass Needles. Closed captioning funding provided by Pellon. Sewing with Nancy is a co-production of Nancy Zieman Productions and Wisconsin Public Television.
The latest from Nancy's blog


Search Sewing with Nancy Episodes

Donate to sign up. Activate and sign in to Passport. It's that easy to help PBS Wisconsin serve your community through media that educates, inspires, and entertains.
Make your membership gift today
Only for new users: Activate Passport using your code or email address
Already a member?
Look up my account
Need some help? Go to FAQ or visit PBS Passport Help
Need help accessing PBS Wisconsin anywhere?

Online Access | Platform & Device Access | Cable or Satellite Access | Over-The-Air Access
Visit Access Guide
Need help accessing PBS Wisconsin anywhere?
Visit Our
Live TV Access Guide
Online AccessPlatform & Device Access
Cable or Satellite Access
Over-The-Air Access
Visit Access Guide


Follow Us