 Passport


Cabin Fever Quilts - Part 2
12/07/15 | 27m 2s | Rating: TV-G
Discover tricks of modern quilting inspired by the traditional Log Cabin block. You might think that Log Cabin quilt blocks are very predictable—red center block with dark fabric strips added to one side and light strips added to the other. Nancy and guest Natalia Bonner, a modern quilt designer help you discover that with an unconventional approach the expected turns imaginative!
Copy and Paste the Following Code to Embed this Video:
Cabin Fever Quilts - Part 2
You might think that log cabin quilt blocks are very predictable. Red center blocks, with dark fabric strips added to one side and light strips to the other. Well, not necessarily. Welcome Natalia Bonner back for our second episode, who's a quilt designer. She takes an unconventional approach to the traditional log cabin design. We have some other great ideas for our viewers. It's good to be back, Nancy. We'll start today by creating the "Dappled Quilt." This intricate design of intersecting squares starts with a very simple log cabin quarter block. We'd like to show you the tricks of modern quilting, and soon, you, too, will have cabin fever. "Cabin Fever Quilts", that's what's coming up next on Sewing with Nancy. Sewing with Nancy, TV's longest-airing sewing and quilting program with Nancy Zieman
is made possible by
Baby Lock, a complete line of sewing, quilting, and embroidery machines and sergers. Baby Lock for the love of sewing. Madeira, specializing in embroidery, quilting, and special effect threads; because creativity is never black and white.
Koala Studios
fine sewing furniture, custom built in America.
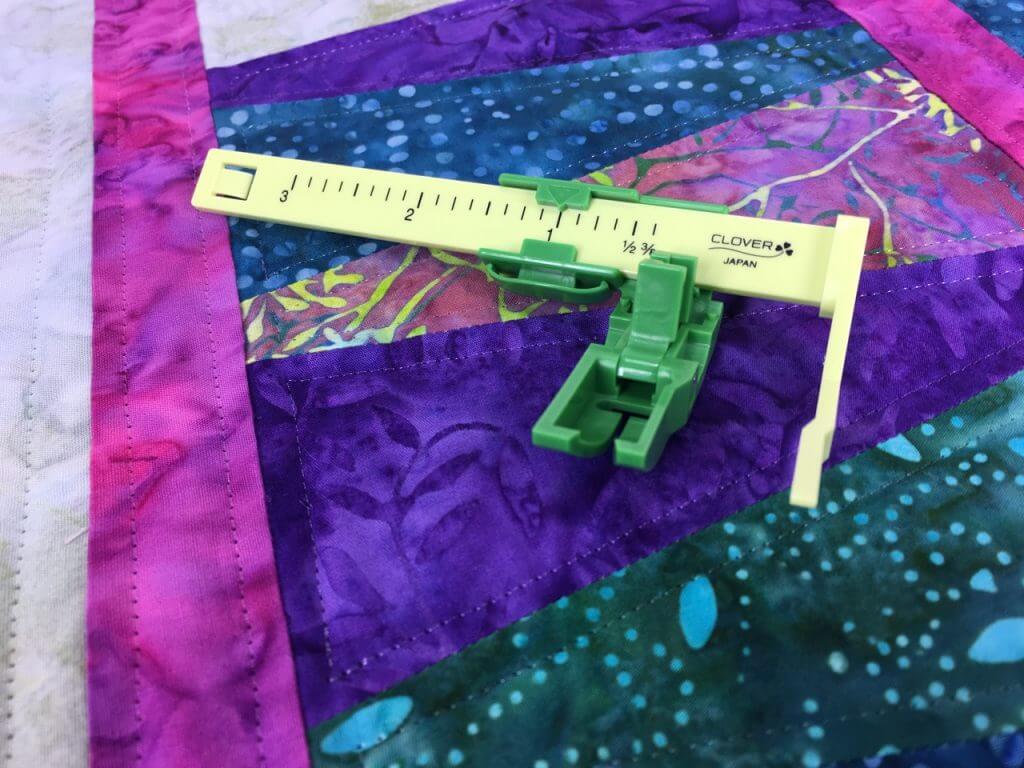
Clover
making a difference in sewing, quilting, crafting, and needle arts for over 30 years. Amazing Designs and Klass Needles. During the second episode of "Cabin Fever Quilts," we'll be showing you the quarter log cabin, a fourth of it. And, believe it or not, this is the log cabin size. At first, I couldn't see it when Natalia showed me this great design called "Dappled" made with dapple grays and taupe fabrics. You use the scraps of fabric for this, Natalia. And here is a block of a contrasting-- just to show you where the block is. So you can see the quarter of a log cabin, and notice you have much different sizes of logs. We do. With this one, we start with 2 1/2" squares and strips, but then for the background, the white fabric, we're using 4 1/2" and 10 1/2" pieces. And the final logs that frame the block are, again, 2 1/2". The first thing that Natalia's going to show you about piecing, and all the quilts in this program will be pieced in the same manner, will be to start in the center and meet the two squares together, the two, in this instance, 2 1/2" squares, and then, she'll chain-piece two pieces. And we'll show you how you create the quarter block. So, we'll place our fabrics together, right sides together. Use a 1/4" seam allowance, and we'll just chain piece. So at this point, we'll go through and sew all of our 2 1/2" squares, light and dark, together. And Natalia has moved the needle of the machine so that she has a scant, just a little bit less than a 1/4" seam. I do. I seem to sew just a scant 1/4". As long as you're consistent, it doesn't matter at all.
The key is
to be consistent. Yes, that is. As long as I know that's what I always sew, then that's great.
iron steam hisses
The key is
For these blocks, I'll also press towards the dark just because I'm using such a dark and light fabric. Press flat to set the seam, then press open, seam allowance toward the darker piece of fabric. So, I'll take these, and I'll add the second log to the side. We don't use pins usually for this. If you feel more comfortable doing that, you certainly may, but just match it up, and for these short seams, you can go pinless. If your blocks end up being a little bit less than 12 1/2", you can trim them up. Just wait until you get all of your blocks made, and then, square them up at the end so they're all the same size. And you notice that when she chain pieces, sometimes she's sewing on air, and that's just fine with almost any sewing machine. It works really well.
sewing machine snips thread
The key is
And then you just clip the threads between the two pieces, and you can do some pressing.
iron steam hisses
The key is
Pressing, I think, Natalia, is about as important as sewing. I do. When you're making these types of log cabin blocks, there's a lot more pressing. You have to press in between every single step, but it's worth it in the long run to make sure you've done them, made your blocks, correctly. I have to say, you press better than I do, so you probably end up with better results.
both laugh
The key is
And now, we'll go to the wider 4 1/2" widths. So, with these ones, it seems like an awkward piece, but... it fits right on there perfectly. And you'll also find out, if you watch the first episode, as well as this episode, that all of the blocks, the finished size will be 12". And that's a good-sized block to work with. It is. It's a really standard size, and cutting, makes easy cutting, piecing. Just really easy sizes to work with. It's very therapeutic just to keep on stitching all the layers together. Going around on the quarter block. I'll just-- as Natalia will keep on sewing-- I'll just show you this final, the finished block. You can see Natalia just added this one section of the larger, wider width, and then, the next one that would be added, you can see the long seam, and then, on the opposite side, we'd go, again, with a 2 1/2" strips. And then, the finishing it off, we have the final so that there are two, four, six, seven pieces to make this large 12" block. Now, we'll show you how this dappled block will be laid out, and the designs will intersect together. Here's another look of the finished block. The piece block, I should say, with six logs added to the center square. And on the quilt behind us, Natalia, it's set on point. It is. So, to set it on point, you turn it 45 degrees on the angle. And let's look at what that unique combination produces because, as you saw, here is a block, and then, another block on this side. And notice this intersection, how they weave together. There's another motif created in this corner where four sections come together. So, it really looks difficult, but it's not at all. It does. That's what I love about this quilt. So, we're going to put two of the center blocks together, and then, Natalia, show us how we continue to build this quilt. We will lay our blocks out. For this point, we're going to lay our entire quilt out. The side blocks and everything, we're going to lay out. You don't have to make this in a bed size. You can make a lap or a baby size. That's fine, too. And you can kind of see how it's all coming together. But, since it's on point, we have some voided space. We do. And don't have you make half blocks. I'm going to have you make whole blocks, and then we're going to cut them almost in half. Almost in half. And here's an almost in half block, that's on the side. There are blocks like that along the top and the lower edge. And here we... have a block, and you need to position it first. You do. Make sure you lay everything out before you do any cutting. So, here's where the block would go. You can see it has to be, the block has to have the gray corner. And let's just put the cutting board up here. And we say it's almost in half because it's going to be a generous half. So, we're going to lay our ruler on here. We're going to line it up 1/4" to the right side of the piece that we want to keep. So, in this block, we want to keep the larger gray size. And then, 1/4" at the tip. And I'll let you do the honors, Natalia. So, we've got it laid out. Now, we're just going to rotary cut. Now, you're going to save the less-than-half sizes, and you can make a pillow. And here's a display shot of the pillows and position. They really look great. They are. And they're a great way to use those excess pieces. And then, you can see, this would be pieced in this section. This would be a row that would be sewn together, another row, and that's how it goes together. You could also create this block in the reverse. You could. Here's a great example of it done in the reverse. I've used the prints here where I've used the white in the other blocks, and it would create a lot of really cool contrast. So, with this dapple design, you have great flexibility. The iconic Greek key design is modified in a log cabin quilt. This time entitled, "Cabin Keys." Picture this striking quilt on a little boy's bed. Imagine him spending hours and hours driving his cars along the stripes. The graphic design is so handsome that it would also appeal to toddlers, tweens, or even grown guys. And it appeals to me, Natalia. This is a very clever design, and I would never guess that this is a modification of a log cabin block. You wouldn't. The block really disappears in this quilt. I had a really difficult time finding the block, and if you are having the same issue, let me show you where it is. So, we'll just lay this block over the design that's already there. There we go. And, presto, there's the block. There it is. And then, you can see the mirror image of it is placed-- We'll just rotate it. It's placed over here. And then, it just continues to flip and flop to make this design. Wow. It's a great modification of a log cabin. We just finished with the block that had six logs added to a center square. And this particular design has eight logs-- It does....added to the design. We'll show you how it comes together. So you started with the traditional width. We did. I like to use 2 1/2" widths. I think they're very standard, easy to cut. So, we start in the center with a white fabric and a print. Sew the 2 1/2". Then, we'll add a 2 1/2" by 4 1/2" strip to the side. Just keep building upon that. We'll add a 4 1/2" square. Then we'll add a 4 1/2" by 8 1/2" strip. Then we're going to go back to 2 1/2", 2 1/2" by 8 1/2" strip with our print. Then we'll add another 2 1/2" by 10 1/2" print. Once you take the seam allowances, it gets a smaller. Yes, it will fit a little better. All fit. Then we're going to go back to our farthest logs. And we're going to go white, a 10 1/2" and a 12 1/2" strip. And when that's done, we have some to show you and to lay out. And I'm going to let Natalia do this because she's much better at it than I am. I think the layout for this quilt is where the fun happens. It really brings the pattern to life. If you can see how it's connecting. We're actually going to turn this one that way. Okay. And then, we'll add one more over here just to give you a fill of how the pattern goes together. And you can see the cabin key is created around and around, and if we look back at the quilt again, you can see Natalia's quilting. She did free motion. A very geometric shape. It is. I wanted to keep this quilt a masculine fill. Just those fun, modern straight lines. So it has this straight line, kind of, intersecting machine quilting. To be modern, you didn't add the borders. You certainly could, but there aren't borders. You just bound the edges, and... That's right....with the accent colors. So, the "Cabin Keys," a simple variation with striking results. Believe it or not, the next log cabin variation, called "Nonchalant," is made with one easy block design. The effective use of color is what gives this quilt drama. Choose two colors, plus a background color, then switch the colors around. We'll show you the quilting magic. When you look at this quilt, you think there are a lot of pieces, a lot of difficulty, but two designs-- or two blocks, I should say-- one design You're right. And, Natalia, you're going to put yours up first to show where it is. And then, you've used the gray and the mustard, plus the background color. Uh-huh. On this block, you switched the order. I did. And this is really what creates the drama in this quilt is the placement of the fabrics. The juxtaposition of the fabrics plus the interior sashing strips. Which we haven't worked at all with during this program. So, the piecing is the same. Now, if you kind of dissect this, or look at how the block is put together, it starts off as four quarter log cabins. That's right. We'll make these just like the other blocks we've made. We start in the center and just build upon making four, like Nancy said, the quarter blocks, but this time we're going to add strips in between to create, essentially, an inner sashing. And you don't add sashing strips but you can add inner sashing. Yes.
both laughing
The key is
The quilt appears to have sashing, but sometimes it's just easier to work in smaller units rather than putting great big rows through your machine. You can see that ends up as a 12 1/2" block, or 12" finished, but 12 1/2" block, and then the other one would be made by switching the color order. Now, we didn't give you the size of the strips because they're not traditional. We've been using 1 1/2", 2", 2 1/2" throughout this series, but give the news. Yes. So, for this one, because I wanted to create the standard finish size, you're going to cut a little bit different. So, we're actually going to cut our strips 1 7/8". Now, cutting 1/8" isn't as bad as you think. Usually it's in 1/2" or 1/4", but you have a tip. I do. So, we'll come over here and cut our fabrics, but because we don't have that standard 1/2", 1" line, we're going to turn our ruler over and we're going to use blue painter's tape and we're going to tape it right on the back side. We're actually going to tape two layers so that we have a little bit of a ledge to butt our fabrics right up to. So, place two layers on the back side, turn your ruler back over. Butt that right up against the side of your fabric, and you'll be ready to cut. That way, as you're cutting this, you don't have to worry about finding that 1/8" because the tape or whatever product you'd like to use, as you have that ledge and you have that 1 7/8". If you wanted to make the blocks bigger, you can make them 2". There's no reason why you couldn't do this, but here you can see the juxtaposition of color. The use of drama with solid colors makes this quilt very "Nonchalant." It does. Once you've given yourself permission to change the traditional, there's no stopping the creative options. In this quilt, "Peaches and Cream," Natalia started with quarter log blocks and added snowball corners. Intrigued? Well, here's how. I always find it fascinating when looking at Natalia, and your mom's quilt, I must mention that you designed these with your mom. Yes. Kathleen. Yes. And when you put these together, it's hard to see the log cabin block, but we've saved the most intriguing for the last because here's your block. Yeah, the secondary pattern that's created here is really what your eye is drawn to, but... And here's the log portion of it, but then the snowball corners make the difference. So, walking step by step through this, it's very similar to what we've been working with today. It is. We start with 3 1/2" squares, sew them together, then we'll add a 3 1/2" log, creating this unit, continue on adding 3 1/2" logs. And that doesn't look too much different than our last quilt design. It doesn't. But then, you're going to add some white along the sides. We are. So, along each of these sides... we are going to make......snowballs. Snowballs, the traditional term of making a half-square triangle by sewing squares together. So we're going to draw a line from corner to corner, and make sure we start on the inside on both of these blocks and draw to the outside corner. And after drawing, I'm going to show you that you just stitch along that line, right on that line on both of the blocks. And when you do that, this is what it looks like. And, Natalia, I'm going to cut a 1/4" seam allowance along here, and you've already cut yours. I have, and now I will press it. We'll set our seam. Then press it towards our darker print. And I'll just finger press. And we have one remaining piece to do, one remaining stitching. So, after that, we'll take this, and we're going to sew a turquoise square right onto the end of that. Just on to one of them. Just on to one of them. So that, this side would be stitched, and then, you'd add... the longer length. And when the block is all stitched, this is the design. "Peaches and Cream" came from... It actually came from the fabrics in the quilt. So, great way to finish. Lovely designs. Thanks for sharing these with us. Thank you, Nancy. And I hope you'll make a "Cabin Fever Quilt." Sewing costumes is not just for Halloween. Our Nancy's Corner guests create very specific costumes to wear at anime conventions. Please welcome Mallory Johnson and her sister Erin Johnson to Sewing With Nancy. Good to see you here.
Good to see you. Erin
Good of you to have us. Anime costumes are made from Japanese animated characters. Mallory, do you want to give a little summary of what type of sewing you do? A lot of sewing is just based on costuming. Personally, myself, I like to make designs from things that aren't necessarily like full gown dresses. I'll take something like a shirt, or something that's a lot smaller, and expand it, and add details and such, like that. It's also taking the outfits, and just making them real things, as well. And, Erin, you go to conventions? Yeah. So, tell me a little bit about the conventions. Well, at conventions they usually have, like, big halls where you can buy things that are related to anime, like video games and stuff. And then they have hallways for artists to display their art. If you want to buy some, you can. You get to walk around in your costumes and see other people in costume. Aha! Hence the costumes. Yeah. Your friend CeCe is modeling our first costume. And, Mallory, you helped design this. Yep. It's actually based on a ferret, kind-of, object.
Nancy laughs
Good to see you. Erin
We worked with the design a couple of different ways, and we incorporated different aspects of the character from the show. And this character is named? It's "Kyubey." "Kyubey," okay. And it has a very interesting cape. Yes, it does. We wanted to do something a little bit more challenging, but we wanted to have fun with it. So, the inside of the cape is all hand-painted by CeCe, and it has lights inside of the cape, as well, underneath each hand-painted thing. Very clever. Now, Erin, the garment that you're-- The costume that you're wearing is by the character "Rin." Yeah. And, again, you did not use easy fabrics to work with. No...no. It was basically a huge raincoat.
Nancy laughs
Good to see you. Erin
And laminated fabrics, because I think our viewers should know that Mallory and Erin have been sewing for three years. Yeah. And they have no fear. That's what I think is so wonderful. So, when you created this, you don't use a pattern. No. So, explain what you do because I use patterns.
Erin laughs
Good to see you. Erin
Usually, what I do is I take, like, I take something that I know that I've worn, like an article of clothing from my closet, and then I use it kind of as a pattern. I cut out a rough shape, and then as I go on, I detail it, and make it the shape I want. Amazing! And even the boots. Yeah, even the boots. The boots are amazing. Now, Mallory, the next costume we're going to see is one called "Max." "Maxi," yes. Maxi, excuse me. And you look very serious in this one. Yes. I drafted it like Erin did. I drafted it out of old pieces of clothing that I cut apart to use as patterns for the future.
And then there's actually three pieces
there's an inside sweater, there's a vest, and then there's the outside coat, as well. And boots to match. Yes, they're actually just salvaged boots that I got from Goodwill or Savers, but I just painted over them with leather painting. Very creative. Just really fun to work with. And then we have a very goddess-looking outfit.
Erin
Mm-hmm, yep, that's goddess Monaco. She's completely made out of satin, which was quite a journey. But the wings are made out of foam core, and there's lights on the third tier of the skirt. I think the "journey", that's a very good way of describing what you two are doing with sewing because you sew costumes for-- Erin, you said you made how many this summer? Just this summer I've made five, and it's mostly been in the month of August 'cause I had to go to summer camps.
Nancy laughs
Erin
Well, pressure is always good, if you can sew under pressure. When you're sewing, I asked for some of your greatest challenges, and I was pleased with your response because I wasn't expecting that. I was expecting it in fabric, but one of you greatest challenges, Mallory, is?
Just balancing out
time versus expense versus what I can do and what I can't do. Especially as I go into college as a freshman, I need to balance what I can get done in a certain amount of time. I may want to do something very large and, "Oh, my gosh, it's so beautiful," but I might not have the time or money for it. So, I can settle for something I'd like just as much, as a much smaller thing. You're a very wise seamstress at a very young age. And, Erin, do you have anything to add to that? Why you do this? I do it because it's, like, a way to express my love for something because, like, I personally love anime and video games, and I love the character designs and dressing up as them. And it just gives me a huge self-esteem boost, and it just makes me feel amazing. Well, I am impressed with what you two can do with very limited experience. I shouldn't say-- Three years is a long time, but compared to me, you're really... For as long as I've been sewing, I'm impressed. And, thank you for sharing your wonderful, expressive costumes with us. Thank you so much for having us. You're welcome. Thank you for joining us, as well, on this two-part series of "Cabin Fever Quilts." A special thanks to my guests, Natalia Bonner, and also to Erin and Mallory. Go to NancyZieman.com to find more about Nancy's Corner interviews and to watch any show, anytime. Natalia Bonner and Kathleen Whiting have written the book "Cabin Fever," which is used as the reference for the modern log cabin designs featured in this two-part series. It's $19.99 plus shipping and handling. To order the book, call 800-336-8373 or visit our website at SewingwithNancy.com/2917 Order item number CT11102 "Cabin Fever" book. Credit card orders only. To pay by check or money order, call the number on the screen for details. Visit Nancy's website at NancyZieman.com to see additional episodes, Nancy's blog, and more. Sewing with Nancy TV's longest-airing sewing and quilting program with Nancy Zieman
has been brought to you by
Baby Lock; Madeira Threads; Koala Studios; Clover; Amazing Designs and Klass Needles. Closed captioning funding provided by Pellon. Sewing with Nancy is a co-production of Nancy Zieman Productions and Wisconsin Public Television.
The latest from Nancy's blog


Search Sewing with Nancy Episodes

Donate to sign up. Activate and sign in to Passport. It's that easy to help PBS Wisconsin serve your community through media that educates, inspires, and entertains.
Make your membership gift today
Only for new users: Activate Passport using your code or email address
Already a member?
Look up my account
Need some help? Go to FAQ or visit PBS Passport Help
Need help accessing PBS Wisconsin anywhere?

Online Access | Platform & Device Access | Cable or Satellite Access | Over-The-Air Access
Visit Access Guide
Need help accessing PBS Wisconsin anywhere?
Visit Our
Live TV Access Guide
Online AccessPlatform & Device Access
Cable or Satellite Access
Over-The-Air Access
Visit Access Guide


Follow Us