 Passport


Quilt with an Embroidery Machine -Part 1 Encore Presentation
01/22/18 | 26m 47s | Rating: TV-G
See how to turn your embroidery machine into a quilting machine with Nancy and guest, Eileen Roche, embroidery specialist. Nancy and Eileen show how the traditional way of quilting can be revolutionized, letting the computerized machine do the tricky stitching. Learn four of the eight embroidery lessons.
Copy and Paste the Following Code to Embed this Video:
Quilt with an Embroidery Machine -Part 1 Encore Presentation
The art of quilting often combines techniques. Traditional quilts are frequently appliqud, then they're pieced, and finally, all the layers are quilted together. If you have an embroidery machine, you can streamline the processes with the touch of a button. It's the brainchild of my friend and embroidery expert Eileen Roche. What I like about this quilting technique, Eileen, is that it looks at quilting differently than the traditional way. It is a revolutionized technique. And if you have an embroidery machine, you also have a quilting machine. So we'll start with a simple table topper, which features what, at first glance, is a complicated appliqu. You'll soon see that the process is perfect for the novice quilter. "Quilt with an Embroidery Machine," that's what's coming up next on Sewing with Nancy.
gentle instrumental music
female announcer
Sewing with Nancy, TV's longest-airing sewing and quilting program with Nancy Zieman,
is made possible by
Baby Lock, a complete line of sewing, quilting, and embroidery machines and sergers.
Baby Lock
For the love of sewing. Madeira, specializing in embroidery, quilting, and special effect threads, because creativity is never black and white. Koala Studios, fine sewing furniture custom-built in America. Clover, making a difference in sewing, quilting, crafting, and needle arts for over 90 years. Fuller Brush vacuums, dedicated to ke eping homes clean. Amazing Designs and Klass Needles. During this first segment, we're going to work with appliqu, quilting, and sometimes piecing this whole table topper with-- almost the entire thing with the embroidery machine. It's a reversed technique. It really is. Normally, you appliqu, then piece, and then quilt. In this instance, we're going to quilt first, then appliqu, and then piece. Now, this appliqu is not your traditional, run-of-the-mill appliqu. No, it's raw-edge appliqu. So all of these are raw edges, but because we'll be using a special fusible web, it's not going to ravel. Right. And it's closely-stitched, and we're gonna put everything in hoops. Now, again, you have to have an embroidery machine, but there are three different sizes of embroideries that you can work with. We have a 6" block, a 7" block, and an 8" block. So you can choose whatever you'd like. And it kind of depends upon what size hoops that you have with your embroidery machine. So this is a 6" x 10" which many embroidery machines come with. And, of course, you know, you're not gonna fill a 6" x 10" but that's your 6" block, and that would be the size hoop that you would use. Or maybe you have a 6" x 6" hoop. Of course, that would be appropriate also. And then the larger blocks would call for a bigger hoop, like a 7" x 12" or an 8" x 8". So not those small ones but the average-size blocks. Now, they're-- you're gonna sew all three layers at one time-- or embroider all three layers at one time. And we're gonna give you a sneak peek of what's going to come. But we have a backing fabric... A batting, like a quilt would have, and then the top fabric and then the appliqu. And this is what it's going to look like. We're not gonna give you all the steps right now, but after some trimming, then, da-da, it ends up like this. I call this a very rewarding technique. When you take it out of the hoop and it looks like this-- ugh! You might not be too excited about it, but after the trimming, that's when the beauty really appears. We're gonna talk about thread color and so forth when we're stitching this, but, you know, working with a solid color on the front is a good thing. And working with a print fabric on the back is also wise. And I like your little saying that you have about fabrics. Well, print fabrics conceal, and solids reveal. So on the back of any embroidery design, you're gonna have some tie-offs; that's just inevitable. And if you want to hide them, then use a busy print on the back, and it'll camouflage those tie-offs. And on the front, you'll reveal the stitching because it's a solid. Right. Now, as an embroiderer, we use contrasting threads. And I love to use black to outline my appliqus. But many traditional quilters would maybe go with a tone-on-tone. And then for the appliqu fabrics, solids work well or something that has a little texture to it. Not texture-- a visual texture... Mm-hmm. What you see here. So that's easy to work with. Now, we need to cut the fabric crosswise strips, but, you know, in quilting, sometimes you cut 2 1/2" crosswise strips or 3" crosswise strips. Well, this is-- these crosswise strips are going to be larger than the hoop. Right, and so you will cut your fabric the width of the fabric, and then measure your hoop width, and you want to make sure that your quilt sandwich is about 2" wider.
So we have all these three layers
back, top, and front. And you want to just hoop that quickly? Sure, sure. And there's no right or wrong. Just right side up, insert that inner ring, and finger-press down, and you are hooped. Best to do this on a nice, flat surface. We'll do the next one in a flat magnetic hoop. And I'll just put this underneath for now. Mm-hmm, and then you could also use a magnetic hoop that, uh, we'll be using interchangeably-- the standard hoop and the magnetic. So whatever you have at home, that's what you can use. Sure, so that's a flat metal bottom. We just place our quilt sandwich on top. I position the top right there, and that snaps into place. And I can fine-tune my fabric placement because it's flat. Sure, and the magnet is not going to harm your sewing machine. No, absolutely not. Not at all. So we have the fabric prepared. We've decided what we're going to be using for the appliqu, and then it's time to do the stitching. We're quilting with an embroidery machine, so obviously, I have and Eileen has the quilting-- the embroidery unit attached to the machine. And we have the hoops, respective hoops, attached into the embroidery unit, and as far as needles go, we're quilting, so we put in a quilting needle and embroidery thread both in the bobbin and the needle thread itself. So we're gonna be stitching through all three layers. Now, Eileen, you've transferred the design into your machine, and you'll be ready to sew in just a few minutes. That's right, and on the screen, you can see that the embroidery design is there, and it tells us there are four colors. Although we're gonna stitch every color in black, the machine will still stop after each one so that we can add our appliqu fabrics. So it's simple as, lower the presser foot and press go, and it starts to stitch. So a lot of quilting with an embroidery machine is the preparation, because right now, we just watch... We do just watch. And admire. But in nine minutes, you're going to have a completely finished block, both appliqud and quilted. That's pretty fast. So as we mentioned earlier, it goes-- the stitching that's going-- that we're gonna show you goes through all three layers. But there may be times that you don't want to go through all layers. Yeah, sometimes you want the back of the quilt block or table topper to be clean, and so then you would just hoop the top fabric and batting. So this is a sample we're going to be working with in just a-- a little bit later in the program to show you how to piece the units together. I'm not gonna show you that just yet. But here, you can see that, instead of using two-- three layers of fabric,
we've just used two
the top and the back batting. And the backing will be applied later so that it's clean in the back, so you can use just two layers of fabric, but using that solid color on the back-- or, not solid-- print color on the back is really quite convenient. It is. Either way is fine. Whatever your preference is. So as this is stitching, you'll notice I am using the black thread, and that's contrasting with my base gray fabric. These color choices have been selected to really let the stitches and the embroidery pop, to let them be the hero. And this is just a running stitch. Yes, so we don't need any stabilizer like we normally would in embroidery. In fact, like the garment I'm wearing most certainly is traditional embroidery, and it has stabilizer in it. But when you're quilting with your embroidery machine, you just need batting. So you got to think differently than what we normally do. And we're just gonna let this stitch as it finishes the stippling, and then it's gonna do an echo stitch, so we'll come back as it's completing this first go-around. It's just about finished this echo quilting. And this echo quilting is a bean stitch, so that means the needle penetrates at point A, goes on to B, back to A, on to B, and then continues on. So that's an echo and a really nice outline. It's a heavy stitch, because it's three stitches in one area. Right, and so now I'm ready to add my first layer of appliqu fabric, and I have prepared it with a fusible web on the wrong side, so I'll just go ahead and remove that protective paper. And then I just place this down. I want to make sure that my appliqu piece is bigger than my outline. That's all I have to worry about. Mm-hmm. Finger-press it in place. And press start. Now it's going to travel around the embroidery appliqu area, and it'll tack it down. Again, this is another bean stitch, so it gives it a nice, strong hold. It's like a triple straight stitch on your sewing machine. It goes back and forth, back and forth, and it gets that heavy stitch. So normally, if you're appliquing, at this point, you would have cut out a shape and then zigzag it on. Well, in this instance, we're working with a flat fabric and then trimming to size after the stitching, which is quite clever, Eileen. Well, it really is quite a time-saver. And we'll just jump back to that fusible web that we talked about. The kind that we're using is not tacky, because if we used a tacky, you can't trim later on, so make sure you get one that just is a smooth finish, and you'll have better results. And we're not gonna press until much later, because... That would be your block. Yeah, we'd end up with a quite bit different-- different shape. Now, color... We add color with the appliqus. So I like to select fabrics that contrast in value. So if I have a dark gray, my first appliqu color is gonna be light, as in this real light green, and then my next one will be the reverse; it'll be a dark value. And I just go light, dark, light, dark, or, you know, dark, light, dark, light. So that one is complete. And believe it or not, I just leave it as is, all that excess fabric hanging off. And I'll remove the protective paper from the fusible web on the next appliqu, layer that into position, just finger-smooth it, and press Go. Now we'll have some decorative elements that are added to the interior of the flower. And we'll let this stitch a little bit, and then we'll come back and put our last piece on, I think. So it's just kind of fun to watch it do the work while we enjoy the results. So we'll let this stitch and come back when the appliqu is almost completed. Well, now you have the second appliqu already stitched. And you can see it's getting character, and then the final appliqu for this design is just the circle. The flower's center, yeah. So easy. But you put down this rectangle to fit the circle. So in nine minutes, you have a completed block. And it's already quilted. Yeah, it's quilted, it's appliqud, but it doesn't look too attractive just yet. You're gonna be stitching, to make this table topper, four of the design that Eileen has, and you can use different color combinations, as we have in this example, and then there's another option that-- it's included in the book that accompanies today's program-- this embroidered design with curved edges, that you could create four of those. Now, you have a long crosswise strip, and you can advance the fabric. Why don't you show that again? 'Cause that's pretty cool. So I just finished the block, and I lift that magnetic top frame and slide it up over the head of the machine and store it off to the side so that I can manipulate and advance my fabric. Now, what I want to make sure is, I want to leave at least 1 1/2" between the bottom of the first block and the top of the second block. So I'll pull that fabric up till I can feel that metal frame underneath. And then I just lift this back in position, make sure it's aligned at the edges. I can fine-tune my fabric. And lower the presser foot, and I'm ready to start my next block. I need to make four of that design. And if you had a standard hoop, as I have here, then you would just remove the hoop from the machine and reposition it-- again, leaving yourself at least 1 1/2" from the space-- from the first stitching. If you leave more, which-- I made this sample, I left a little bit too much-- you can use that extra fabric for sashing. So not to worry. Now, it doesn't look too attractive right now, Eileen.
laughs
we've just used two
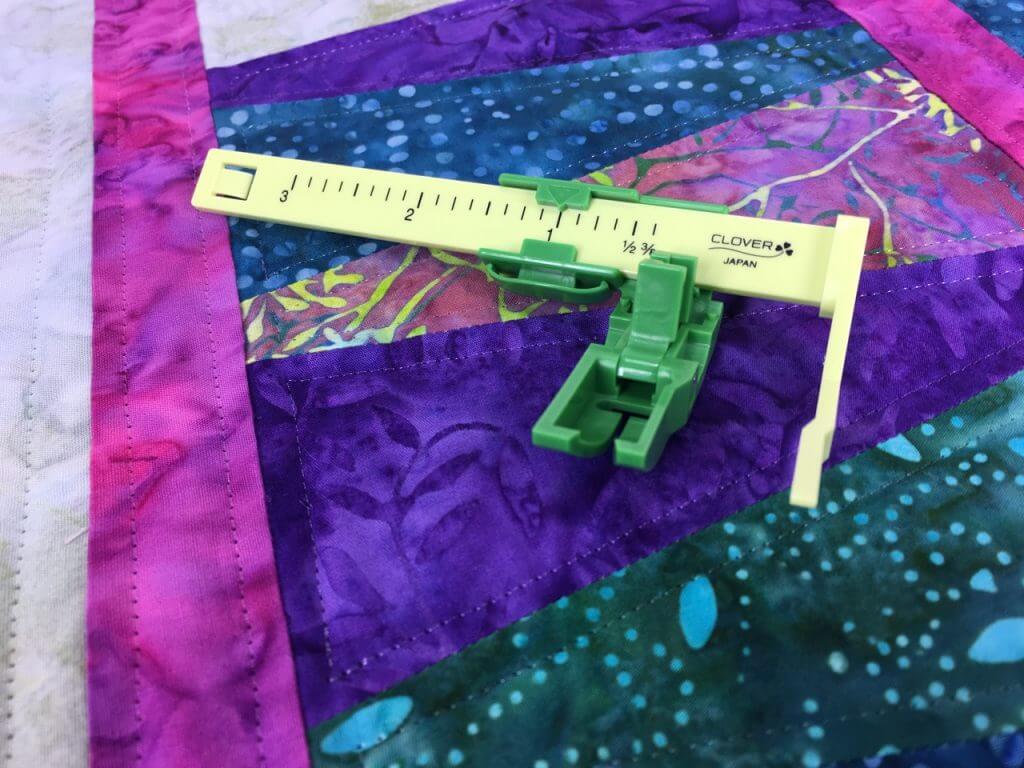
Not at all. And in fact, when I make these types of projects, I'm often, you know, worried that I made the wrong decision with fabrics, with thread selection, until you finish trimming-- just what you're doing now-- and the big reveal occurs, and I find that to be very rewarding. It-- this is good TV time-- trimming, you know? You're listening to the news... Yep. And you have it in your lap, and you just finish trimming. And these scraps, Nancy-- if I can interrupt-- Oh, sure. I like to keep these scraps in a baggie because they have the fusible web on them. Oh, sure. And they're great for other small appliqu projects or any kind of confetti work that you might do. The fusible's already on the back. And when you'll be trimming, you will not be trimming to a camera; you'll be trimming so you can look at it a little bit. You can hold up the fabric; you can bevel the scissors, which I'm doing right now, holding it parallel with the fabric so that you can have the trimming. And then, after you've done all the trimming-- we'll just advance to this finished flower-- you do the pressing. Press so that those edges fuse down, and you're not going to have raveling. Beautiful for a table topper, for a pillow, for a small quilt, or a large quilt. Regardless of the size, all the sewing and embroidery is done in the same way. At the top of the show, Eileen cut crosswise strips of fabric-- top fabric, batting, and backing fabric-- just a little bit wider than the hoop. And you'll be able to embroider and appliqu and stipple approximately-- not approximately-- you'll be able to stitch four different blocks on that crosswise strip. Then it's time to cut them apart, allowing 1/2" seam allowance all the way around. Now, Eileen, usually we have 1/4" seam allowances in quilting but not now. A 1/2" seam allowance is much more forgiving, and it gives you a wider sashing. And here, you can see that I have the ruler aligned to the outer stitching, and just cut with 1/2", trimming so that that 1/2"-- regardless if you have a 6" or 7" or 8" square, they're all going to have 1/2" seam allowances. And now you're ready to do the stitching to piece them together, which is usually the last step. Right, and this is the reversible piecing technique. So my quilt block is trimmed to 1/2" seam allowance. I take my front sashing, or top sashing, and place that right sides together with the front of my block. I then take the back sashing and place that right sides together with the back of the block. And it's really important that they're 2". Yes, 2" because we're using a 1/2" seam allowance. And I have my 1/2" seam allowance gauge attached to the machine, and I'm just gonna start stitching, and I'm stitching through all layers-- the sashing and the front, sashing and the back, and the quilt sandwich itself. You just want to make sure that you have all the edges aligned, and then, go ahead and stitch right down the seam. It's gonna be amazing, but those seams will kiss together, they'll just meet with that 1/2" seam and the 2" sashing strip. And then go to the ironing board and press the seam. And then press open only the front sashing. So you'll see that it's just the front sashing, and on the back, my back sashing is still behind the first block. And then we take block B, or block number two, and we add that to the front sashing only, aligning the raw edges. We also want to make sure that the edges of the block are aligned because we're making a long row. Mm-hmm. And then, 1/2" seam allowance again. And this time, I'm stitching through the quilt block and the front sashing only. And this is fast, and we're gonna do this to connect every block into a long row. Mm-hmm. Sew and press and sew again. Sew and press. Yeah, doesn't take too long. And I like to press from the front, first, and then flip it over, and then you'll see that your seam allowances meet right in the middle. And then I take the iron and press over the back sashing. And now I'll flip this around a little bit, and I fold under a scant 1/2" because the idea is to catch that fold in the stitch-in-the-ditch stitching on the front of the block. So I'll use a couple pins right here to pin it in place. And then I'll flip it over and re-pin and then remove these so that I don't actually stitch on the pins. And this pinning just takes a little bit of time. Now, you'll notice the color of our front sashing matches the quilt block. You don't have to do that; you most certainly can add color, and then it becomes a different design element of the quilt itself. But when you use the very same, you find that it-- the quilt appears to be a whole-cloth quilt, and, you know, it's pretty impressive. People think that's pretty neat. Yeah, okay, so I'm going to move my needle over. Now, when you stitch in the ditch, you don't use black thread; you would use matching thread. But for our instance here on TV, it's just fine. And this is going to capture all the layers. And you would take your time and fold that properly. And there's-- you'll have a reversible-- will be finished on both sides. Right. So let's take a look. Pretty good. I caught-- you know. I caught most of it, so I could do a better job, if I didn't have my seam gauge in place, and all of this would be tacked down. Now, I often add a decorative stitch down the middle, like a pretty serpentine stitch on some of my samples, just to add a little bit more flair to the project itself. On this stipple design, down the sashing, you can see the serpentine stitch, which adds some needed stitching and interest. Now, remember, if you did not want to stitch through all three layers of fabric-- rather, just doing the batting and the top, as in this sample-- after only adding the sashing to the front, then you could cover the backing and stitch in the ditch to complete your quilt. Do you have a quilt treasure hidden away that's showing its age with frayed binding or fabric? During the Quilt Expo in Madison, Wisconsin, I interviewed a quilt restorer in order to share with you some of the techniques of preserving lightly tattered quilts. I hope you'll enjoy. With me today is Sandy Schweitzer, who is an AQS-certified judge, a quilt historian, and most importantly, Sandy, a quilt repairer. You save quilts. Right. Thank you for being with us and sharing some ideas on how, if you have quilts at home that are not in the pristine shape, how to make them better and preserve them. Give them new life. Give them new life. And the first quilt that we are sharing is something that you found and was-- you were surprised to find. Mm-hmm, I was. It's a double wedding ring crib quilt top from the 1930s. And then it's newly quilted, so it's a multigenerational quilt. And the most important thing that-- people may find a quilt top in their attic or at an antique shop and wondering how they should finish it. They can go ahead. Yes, yes. It's not going to ruin it. Many people ask me, "Well, if I quilt it, will I destroy the value?" And, no, you won't. But you need to document things. Put a label on what you did. So this is, as I said, a multigenerational quilt, and then it indicates that information. And where-- you know, the "unknown," the maker, but, of course-- Right. You've made it a little bit better. So that's really important that you work with-- when you're making a quilt top and a quilt to document. Yes. Now, I have a quilt at home comparable to this. Oh, really? Yes, I do. That has worn-out areas, and-- and this crazy quilt, just a little table topper... Or a doll quilt, yeah. A doll quilt, of course. With beautiful fabrics in it, but on this quilt, the binding gave way or deteriorated. And... You'll see that it was covered-- this is interesting. Tell us how you prevented this binding from raveling further. Well, you take illusion bridal tulle, which you can get in any fabric shop. Fabric store, mm-hmm. And you enclose it, and you do a running stitch, and then you just-- Tack it down. Take-- and then you just trim it off, uh, around both sides. And it-- that bridal illusion-- not netting, but bridal illusion, is very lightweight. And very fine. Very fine. And even if some fabrics have just kind of-- or the stitching has deteriorated, you just go over it. Well, this would be a patch, and-- that the fabric had deteriorated. Actually, this is gone, since I-- Uh-huh. Sure. And so you would take fabric and not-- this is a quilt from, like, 1900, so I wouldn't use fabric from then, because this is what happens to it. Yeah, yeah, right. But you can make it look like it belongs. And-- exactly. And then you turn it under up to the embroidery. 'Cause you don't want to have to... Redo that. Right. And then, of course, label it. Yes. Now, Sandy, I know this quilt that they're looking at now is a Grandmother's Garden, and that quilt-- I've seen many of them in the unfinished state. Yes, and-- The quilt top done but not-- And it's hand-pieced. It's from 1930s. And it's a scrappy quilt, and I had it longarm machine quilted because I wanted to show people that you can have it either hand quilted or machine quilted. And it's beautiful, you-- Yeah, it is great. And you can have multigenerational. You can have multi-technique. And it's okay. Yes, absolutely. Well, Sandy, thank you for being our guest. It's been enjoyable. It's been a pleasure. Thank you. And we'll talk to you again soon. Okay, thank you. Thanks again to Sandy Schweitzer for sharing her knowledge on quilt repair. If you'd like to re-watch this episode or past Sewing with Nancy programs, you can watch online at NancyZieman.com. You'll find a wealth of sewing, quilting, and embroidery programs there for you to enjoy and learn at your convenience. While you're there, why don't you sign up to receive my weekly blog posts? Or join me on Facebook and other social media platforms. Eileen Roche will be back next time for a second look at "Quilt with an Embroidery Machine." Thanks for joining me. Bye for now. Learn tips and techniques in spired by free motion quilting in Eileen's book, Quilt with an Embroidery Machine in 8 Easy Lessons. Included is a multi-format CD with more than 20 quilting designs for 6" x 10" and larger hoops. It's $29.99, plus shipping and handling. To order, call 80 0-336-8373 or visit our website at se wingwithnancy.com/3025. Order item number BK00127 Quilt with an Embroidery Machine in 8 Easy Lessons. Credit card orders only.
announcer
Visit Nancy's website at NancyZieman.com to see additional episodes, Nancy's blog, and more. Sewing with Nancy, TV's longest-airing sewing and quilting program with Nancy Zieman,
has been brought to you by
Baby Lock, Madeira Threads, Koala Studios, Clover, Fuller Brush vacuums, Amazing Designs and Klass Needles. Closed captioning funding provided by Riley Blake Designs. Sewing With Nancy is a coproduction of Nancy Zieman Productions and Wisconsin Public Television.
The latest from Nancy's blog


Search Sewing with Nancy Episodes

Donate to sign up. Activate and sign in to Passport. It's that easy to help PBS Wisconsin serve your community through media that educates, inspires, and entertains.
Make your membership gift today
Only for new users: Activate Passport using your code or email address
Already a member?
Look up my account
Need some help? Go to FAQ or visit PBS Passport Help
Need help accessing PBS Wisconsin anywhere?

Online Access | Platform & Device Access | Cable or Satellite Access | Over-The-Air Access
Visit Access Guide
Need help accessing PBS Wisconsin anywhere?
Visit Our
Live TV Access Guide
Online AccessPlatform & Device Access
Cable or Satellite Access
Over-The-Air Access
Visit Access Guide


Follow Us