


PBS Wisconsin Passport
Watch this video with
PBS Wisconsin Passport
Become a member of PBS Wisconsin, support your local community, and get extended access to PBS shows, films, and specials, like this one.
E19 | Suburban Victorian | Everything Old is New Again
04/09/26 | 23m 42s | Rating: TV-G
In Needham, Kevin O'Connor checks on a transformed Victorian with new floors, a reimagined dining room, and a 130-year-old China cabinet relocated into a new wall. Bold wallpaper and trim redefine the powder room, Heath Eastman fine-tunes primary bath lighting, ducts get a thorough post-reno cleaning, and Tom Silva restores the original front door in preparation for new mortise hardware.
Copy and Paste the Following Code to Embed this Video:
E19 | Suburban Victorian | Everything Old is New Again
Kevin: Today on "This Old House"... Charlie: We found a new home for this 130-year-old china cabinet.
So what we want to do is dry fit the doors before we put our trim on, and then we're stuck where it is.
Tom: And we'll get this old door ready for some new hardware.
[ Whirring ] Man: Ahh.
That's it.
Kevin: Hey, there, and welcome back to our project here in Needham, Massachusetts, where we are down to the finishes on our late-1800s Victorian.
You may recall there was a 600-square-foot addition on the back of the house, 200 of it being on the first floor here for a powder room and a mudroom, which we'll see in a little while, as well as a deck that we can now access from these beautiful sliders.
That opens up onto the main event, which is a completely reconfigured first floor.
The centerpiece is this beautiful new kitchen.
You can see that the custom kitchen cabinet install is still under way.
And then right in the center, this massive island.
The homeowners have chosen a quartz countertop for the island.
Very practical, great for a busy family of five.
And then that phases into this wide-open floor plan.
a new living room right here with the bay windows, and a brand-new gas fireplace over here.
-Mauro, how are you?
– Mauro: How are you doing?
Kevin: Doing all right.
So gas fireplace vents directly to the outside.
You can see the pipe over there.
And, Mauro, we've got ourselves a new beautiful wooden mantel that you're tuning up for us.
Mauro: Got a little bit of work to do.
I love the design of this fireplace mantel.
All I have to do -- fill up all the nail holes.
And after that, we're gonna hit with a 220-grit sandpaper and then put a coat of primer and two finish coats of paint.
Kevin: And the top color is gonna be?
Mauro: The same as the trim.
Kevin: Oh, very nice.
So that light gray is gonna be a nice offset to this stone surround right here.
This is leathered granite -- same countertop material that we're using in the butler's pantry behind the kitchen right there.
And, Mauro, I saw the cabinets in there, as well.
-Those look terrific.
– Mauro: They look awesome.
We paint them down the basement and we brought them up here.
It looks amazing.
– Kevin: You're happy.
– Mauro: I'm super-happy.
Kevin: I love it.
All right.
So you can see a couple stairs right here going up to a landing, and then the second floor.
This is taped off because the flooring guys have finished the old Doug fir up there.
They've put down a clear coat of oil finish.
And then when that sets up, they'll bring their efforts down here to the first floor and do the same thing to our new floors down here.
This is white oak.
And that's gonna get a clear coat finish, as well.
As you push to the front of the house, you can see that we've got a new cased opening right here, a nice breaking point between the back and the front.
And in here, this is gonna be the dining room.
You'll recall that the homeowners wanted to save the old built-ins.
They needed to be modified a little bit.
There was some HVAC ductwork here, so that has been boxed out.
And then these were continued up with the trim to the ceiling.
Mauro's guys have taken the rest of the shelves out, brought them downstairs to the paint station.
They're all getting a primer coat, two topcoats.
Another modification here in the dining room is the old china cabinet, Charlie.
Original to the house, so that thing's 100-plus years old.
Charlie: That's right.
It was in the old dining room.
We disassembled it, stored it in the basement, and now it's time to reinstall it in the new dining room.
Kevin: Okay, so bottom went in as a single piece right here.
-And you've got a drawing.
– Charlie: That's right.
We are gonna make a modification.
You can see here in the picture the old one had all the way to the ceiling with this big cavity up above.
– Kevin: Right.
Charlie: And Liz does not like that and she wants us to eliminate it.
Kevin: So just going to this top piece of trim right here?
– Charlie: That's right.
So... -Kevin: Okay.
So that's in and that's on the back side of the fireplace in the living room.
Charlie: Right.
And all the existing shelves -- You can't tell from this picture -- were really just against the plaster.
So we decided to make a wood box.
And that way, the old shelves will get into the new box.
Kevin: So this is the only new thing.
All that stuff is old, original, gonna be reused.
Charlie: That's right.
And I'm ready to install this if you want to give me a hand.
Kevin: Absolutely.
Let me get my belt on.
And we'll help you get it in there.
Charlie: All right.
I'm just gonna protect the top when we slide the box on.
Then we'll just slide it out afterwards.
All right.
Let's grab this side.
You're gonna spin around to my side.
Put -- We have to put it at an angle.
– Kevin: Want me to go in first?
– Charlie: Yep.
We put that temporary handle on there to help maneuver it, too.
All right, so let's just slide it back up.
Hold the handle there.
It's gonna go right in front of that cleat.
We want to pull it forward.
– Kevin: Nice.
– Charlie: All right.
Looks good.
Kevin: All right.
Just a little tighter, Charlie.
A little tighter.
Coming at an angle.
Charlie: Good.
So, one of the shelves here.
Kevin: So one of three?
Charlie: Yeah.
So you can tell this is the top of the shelf because this piece of wood right here is for plates to lean up against the back of the cabinet, and they won't slide out.
And this little notch right here is for our center support.
So once we install the shelves, the shelves don't sag over time.
And you can see right here where there's a stain missing.
That's where it goes.
Kevin: Oh, okay.
Charlie: So we're gonna take this, put it in the back.
And we're just gonna mark and I mark for the top shelf, the cleat.
This one here, center one, and the bottom one.
We'll rip down our cleats, we'll level them in place and fasten them.
All right.
Cut the cleats.
I'm gonna take them out of the same board, and then I can rip them all down.
They'll all be cut to length.
All right.
Time to install the cleats.
Good.
Here.
Good.
There we go.
All right, we just have to trim these a little bit because they actually weren't square.
Because they were against the old plaster wall.
Perfect.
All right, that looks good.
We're not gonna nail it into place now, because all that has to come out for Mauro to paint the box.
And even the slight sagginess, most likely we're gonna have to live with it.
Kevin: 130 years of character.
You get what you get, right?
Charlie: I agree.
Now let's put the door frame jambs in place, and you can see where they go because of the staining that was there.
Kevin: Yeah.
Okay.
Right about there.
Charlie: And our opening is cut bigger.
So we're gonna fill each side in with some 2-bys to make our shimming less.
Kevin: So pad out the opening?
Charlie: Yeah, on both sides.
Kevin: Check it out.
Charlie: So now we still have to shim it in where it goes.
Kevin: It's nice though.
It's only about 1/8" of room, which is good.
Charlie: Yeah, I'm about a 1/4" here, but the top of the frame isn't gonna change because that's the way it was put together.
And this is the width of where our doors will be when opened and closed.
So we want to do is we're gonna probably tack these with a couple of trim screws and then dry fit the doors.
I think it'd be a good idea before we put our trim on, and then we're stuck where it is.
Kevin: Okay.
-How's that, Charlie?
– Charlie: All right.
This is our center line of our frame right there.
All right, let's give it a shot.
Look at that.
Our cabinet is shorter than it was before, so we're gonna cut the trim on the old marks right up here.
Kevin: Because the China cabinet is gonna be stained and natural, you've got some old growth Southern yellow pine... -Charlie: Looked perfect.
– Kevin: ...for the top head case there.
Okay, Charlie.
So got to cut a piece of Southern pine for the crown right there to match.
Charlie: Yeah, and Mauro's gonna paint the box to match the wall color also.
And then we'll clean up the China cabinet by filling some holes in and then refinishing it.
Kevin: It's a great project.
It's gonna look like it's been in this spot for the last 130 years.
Charlie: Well, it is, it's just in a different location.
– Kevin: Nice job.
– Charlie: Thanks for your help.
Kevin: As mentioned, the floors upstairs have been sanded and refinished, and over the last couple of days, the crew came down here and did the same for us with the first floor.
Now, upstairs, most of the wood was original, but down here this is all new, beautiful white oak rift and quartered.
And check out that finish.
Sanded, finished in place.
Looks terrific.
Completing the wood floor effect here on the first floor.
Everywhere except for right back here in the mudroom.
Jaclyn, how are you?
Nice to meet you.
– Jaclyn: Nice to meet you.
– Kevin: Our designer in residence.
Thanks for helping out.
Jaclyn: Yeah.
Kevin: So in the mudroom, you had a little bit of a hand with this.
Most of the millwork done was by our kitchen crew.
Mike and his team installed the cabinets here.
They also built us the benches.
So this is the red oak, same stain color that is used on the island.
They got the waterfall edge right here.
Nice thick dimensions.
But you had a hand in helping us pick the tile.
Jaclyn: Yep.
So Liz really wanted to do a brick or a limestone, natural stone.
– Kevin: Mm-hmm.
Jaclyn: But just with the amount of traffic coming through here, she has three boys, we ended up going with a large-format porcelain tile.
Kevin: So those natural materials, limestone or brick, aren't as durable.
Not just three boys, but hockey players and everything that comes with that.
– Jaclyn: Yep.
– Kevin: Very nice.
But you had also a big hand in the powder room design.
How did you get started on that?
Jaclyn: Yep.
So here you go.
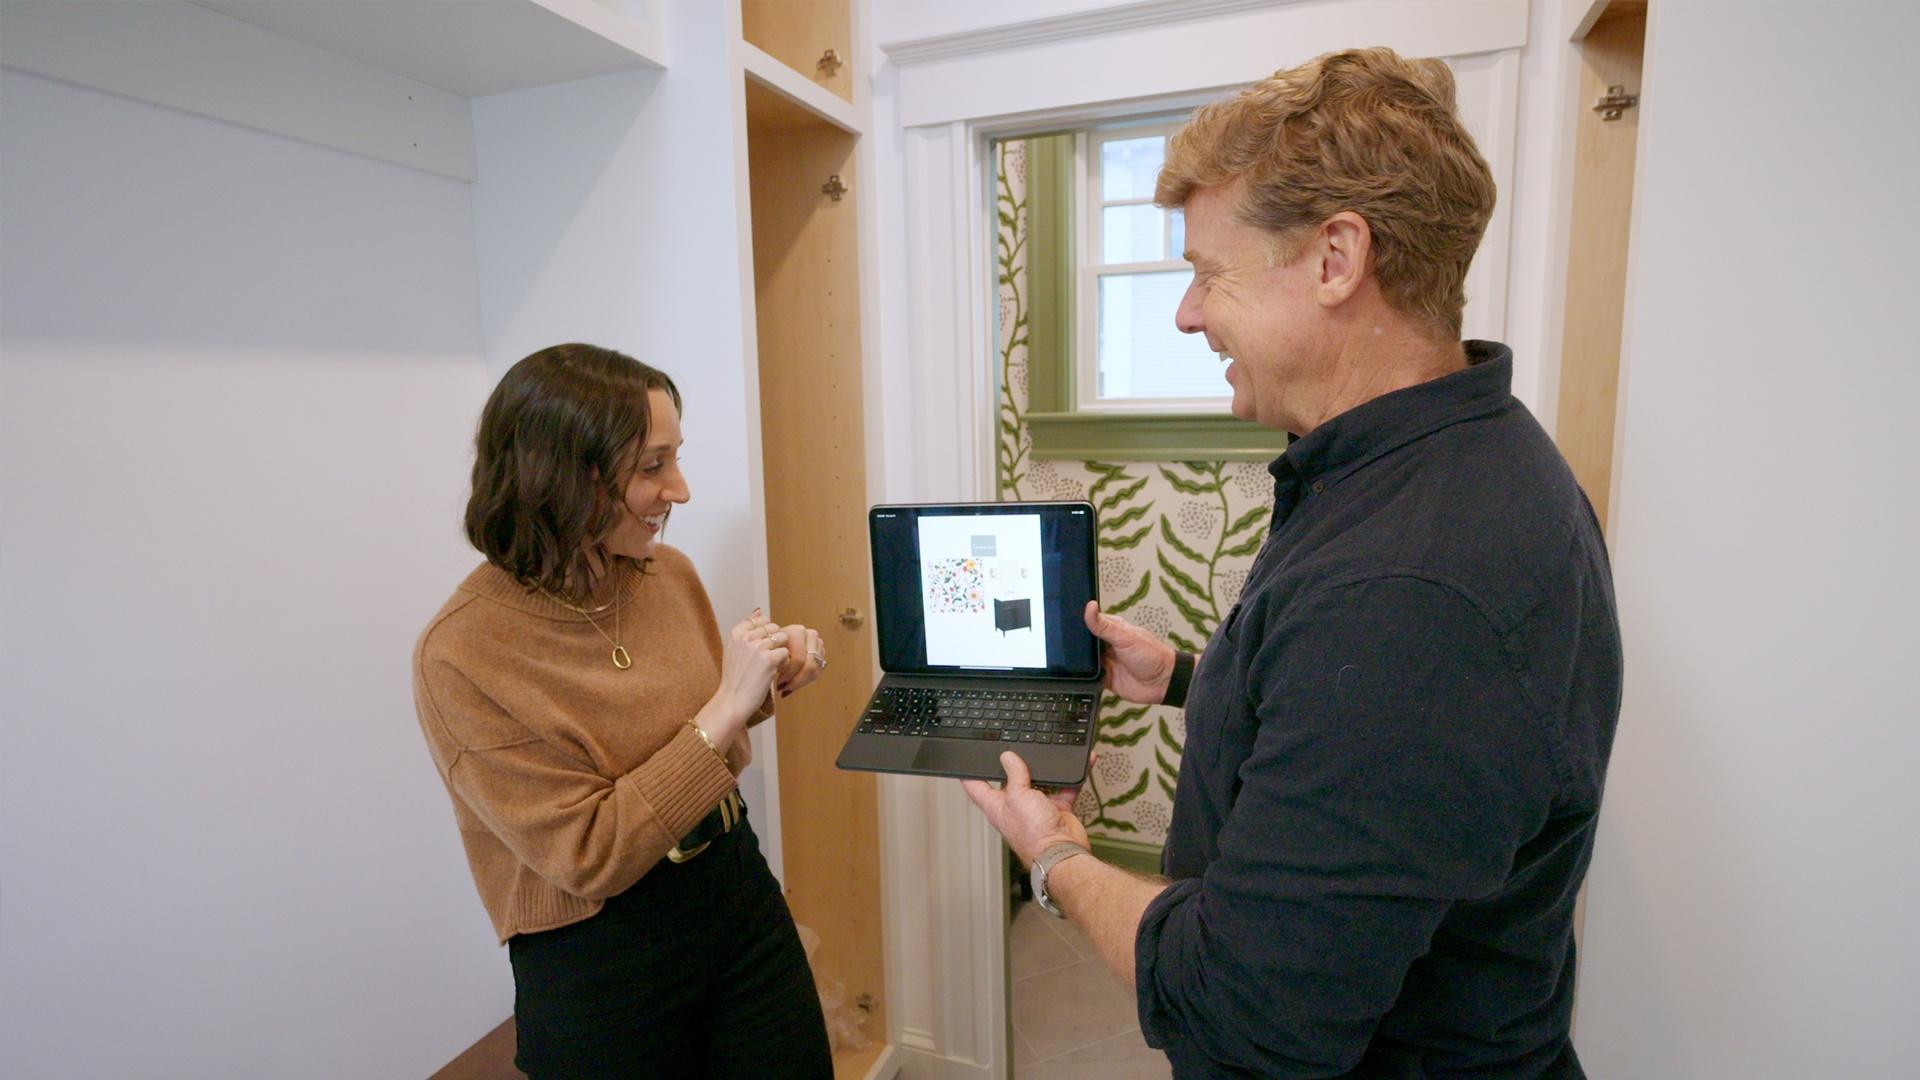
So I always start with the design board.
I pick a few wallpaper options.
In this case, Liz knew she wanted a darker vanity and she knew she wanted nature-inspired wallpaper.
This wallpaper, I brought in these light fixtures because they kind of remind me of a honeycomb shape, which ties in nicely to that big bee there in the center.
– Kevin: Big bee.
– Jaclyn: Big bee.
And then the bamboo mirror is a nice accent.
– For the next one -- -Kevin: So the bees didn't make it.
Jaclyn: The bees did not.
The bees were cut.
Kevin: Okay.
Jaclyn: And then this was the second option.
Strawberry Fields.
Liz really loves this wallpaper.
It just wasn't right for the bathroom.
So we actually ended up using it in the laundry room upstairs.
Kevin: So it lives to fight another day.
Jaclyn: Yep.
That's right.
And then this was the final one, this vine wallpaper.
And originally we were going to go with a lighter, more neutral color for the trim to fade into the background of the wallpaper.
But when Mauro put the samples up, we just -- It wasn't calling to Liz as she hoped it would.
And so he took the wallpaper.
He color matched the green.
We're going for a bolder effect in here.
And she really loves it.
Kevin: Yeah, because sometimes what you see on paper, or in this case, on a computer, is not actually what you want.
So seeing it up on the wall is most important.
So let's have a look.
So started with the wallpaper.
Jaclyn: It's bold.
It's taking a risk.
It's not overly busy.
It's not overwhelming.
Having the green in here really makes it pop.
Kevin: You can definitely see the black accent in the wallpaper picking up the vanity.
Jaclyn: So the black vanity and the black in the wallpaper really allowed us to go, you know, with a black lampshade.
For the faucet, if you're gonna invest in anything, I would say invest in your plumbing fixtures.
Polished nickel is a timeless finish.
It's a great baseline for mixing metals.
This is a burnished brass, and it ties in really well with the polished nickel.
And then we were able to also pull in this mirror, a burnished nickel.
Kevin: Right.
Yeah, I would say that's a very effective mix and match of materials, which is nice.
And are you happy with the results of the entire powder room?
Because, I mean, I'm colorblind.
-Are you happy with it?
– Jaclyn: Yeah, I'm really happy.
But most important is if Liz is happy and she is.
Kevin: That is the most important thing.
Well, thank you for this.
And I know we're gonna see you next week as we wrap up because you got one more project for us.
– Jaclyn: Yep.
– Kevin: Appreciate you.
– Jaclyn: Thank you.
– Kevin: Thank you.
The finishing touches for our bathrooms continue up here on the second floor, including in the primary bath where we have set the vanity and sinks, the medicine cabinets, and just this morning the glass door for our shower went in.
Heath, good progress in this room, huh?
Heath: Hey, Kevin.
Yeah, it's come a long way since last time you saw it.
Kevin: Yeah.
So last time you were here, it was what?
-Flooring?
– Heath: We were working on the heating in the flooring.
Yeah.
So since then, all that's been installed, tiles gone down, and we're moving on to the lights.
Kevin: When you say lights, so I see the sconce, I see marks.
Are you digging in for boxes that you've set?
Heath: You don't see any wires?
– Kevin: What's the deal?
– Heath: Great question.
We never know exactly what they're gonna pick for light, what the center is gonna be, what even the mirror is gonna be.
You know, these are finally installed.
So now we can find out where this wants to go.
So what we do is we actually come from the switch and we run a wire all the way around.
So we come up, do a couple of loops, come back down between the mirror, go above the mirrors, and back down the other side.
That way the homeowner has the choice to pick whatever they want, whatever number of fixtures.
We can put them on the sides, above -- makes it easy.
Kevin: And what do you do?
You just kind of hunt and peck and hope that you find them?
Heath: Not exactly.
So the other thing we do is after the rough is done and the insulation is done, we'll go ahead and walk through and take a video of every room of the house so you can see our wall there before all the blue board went up.
And that's the whole wall.
Kevin: And when I see it here, you know, it makes sense that you're gonna be able to find the stuff, right?
Because we know where the window is.
You got three studs.
You even have the switch and your receptacle box.
So that's not gonna be hard to find.
Heath: No.
We can see all of this.
So it's easy to find where our blocking and our wires are to add the lights.
Kevin: And the blocking, this is just 2 by what, 2x10?
-2x12?
– Heath: Exactly.
We put some 2x10s in there to give us a little wiggle room in case the box goes higher or lower.
Kevin: So I have no doubt with that photo you'll be able to find them.
But, like, why not just decide on center and then sort of live with it?
Heath: I'll show you.
So if we went with center of the mirror and we put that box center, feels kind of high.
Kevin: Well, yeah.
So center of fixture, but then the bulb is much higher.
Heath: Bulb is high, just doesn't look right once it's in place.
Here, if we do the entire fixture in the center of the mirror, this looks a little better, feels more comfortable, kind of where it should be.
Kevin: Gotcha.
All right, One more pushback, though.
I mean, we dig into old walls all the time and locate boxes by digging in.
– Heath: Absolutely.
– Kevin: So why not just do that?
Heath: We could.
So that's not uncommon.
More times than not, we'll do something like this.
An old work box.
You can take a hole saw, once we make our mark, cut this in and go ahead and just mount the fixture to this.
Kevin: Why not?
Heath: Well, you can see a lot of fixtures have flush fixture bars now.
If we have that and we put this box on there, guess what happens.
Holds the fixture off of the wall.
Kevin: So we will see that little blue lip right there.
Because this sits proud of the plaster.
Heath: Exactly.
And because we have that flush fixture bar, the canopy can't overlap that.
Kevin: So you never quite know what you're gonna get.
-So that might not work.
– Heath: Exactly.
Kevin: So if you don't use that, you do need blocking.
Heath: You do need blocking.
So we put in blocking 2x10s roughly where we think the light's gonna go.
Give ourselves a little wiggle room.
So we know center is usually a pretty good option, but we'll go above and below that as well.
So I don't know the fixture, but I do know what box is going in.
And I do know how thick this is gonna be.
So with that I can set the depth of the blocking.
And then when I go to cut this box in, I know this box will be flush with the plaster no matter where I put it.
And that'll sit properly.
Kevin: You know the depth of plaster.
Smart.
All right.
That's why you're the electrician.
Okay.
So do you need my help?
Sounds like you got it pretty much tackled.
Heath: No, I think I'm pretty good.
I think it's a one-person job, so I should be good for now.
Kevin: All right, I'll leave you to it, but thank you.
– Heath: All right, thanks.
– Kevin: And good luck.
Heath: All right, let's see how it fits.
All right.
That's just what we want.
I'm gonna strip them, cut it, slide the box into place.
So I'll make sure the spacing side to side is correct and my height is the same all the way across.
So I want the same distance off the mirror on the other side.
They look good.
I like these.
Charlie: At the end of any renovation, it is good practice to consider cleaning the ducts and furnace to remove dust, dirt, and construction debris.
The tech will inspect the ducts.
Then he will use a cable with a brush attachment.
He uses a handheld drill to power the spinning brush as he pushes the cable along and really can feel it as it travels down the duct.
The brush will spin clockwise as it travels through the duct to loosen the debris.
Then, as the tech pulls the cable back, the brush will spin counterclockwise to sweep the debris like a broom, ultimately pulling it back to a vacuum.
Before he moves on to the next step, he will repeat the process until there is nothing left to vacuum up.
Tom: Well, this is the original front door of the house.
It's Southern yellow pine.
Beautiful wood, but it had a little bit of issue.
The hardware was worn out and junk, so we had to take it off.
So the homeowner wants to use new hardware on the old door.
But the first thing I had to do is I had to put a Dutchman in to hide the holes on the outside and on the inside.
So we got some Southern yellow pine to match the species of wood that's on the door.
Then I cut the piece of wood down, fit it in... ...and sanded it and glued it in place... ...both outside and inside.
We can then cut this mortise right here for this lockset to sit into the side of the door, and then we can mount the new hardware to that, and they'll have a nice door that's really secure.
Now, I've got a tool right here that will sit on the side of the door.
And when I crank this, it's gonna take this router that's mounted on the side is gonna be on this base that's gonna pull the router in.
But as it pulls it in, it's gonna slide it down and on a slide and crank it.
It's gonna come like this and like this and like this and slowly work its way all the way in to the depth that I've set it at.
All right.
Now we'll just take it off.
I'll just clean this hole out, slide the lock mortise in there, and see how it fits.
I got to chisel out the back so this sits flush.
Perfect.
I'll do this with a smaller router.
So now I'm gonna cut out the mortise for the plate of the lockset with a templating bit or pattern bit.
A pattern bit has a bearing on the top.
The bearing rides around the perimeter of the inside of the template, making the cut of the mortise the exact size that I made the pattern.
I've set the bit height, the thickness of the finishing plate plus the thickness of the edge brass, plus the thickness of the templating guide, plus about 1/16 inch more for some play on the surface.
Now I'm gonna just follow around the perimeter with the bit.
Two holes, one for the thumb lock and then the other for the knob, so you can see where one hole came all the way through for the knob on this side and the knob on the other side.
The little thumb lock did not come through because it's only on the interior of the door.
Now I have to drill a hole right here for the key, and it should show you what it's gonna look like right there.
Okay, holes are all drilled.
The mortise is cut.
The door's ready for Mauro to come in, put a finish on it.
So in about a week, the homeowner will be getting a new set of keys to the old front door.
Charlie: And a week to go, but we're in really great shape.
– Tom: Yeah.
Charlie: So until then, I'm Charlie Silva.
Tom: And I'm Tom Silva for "This Old House" here in Needham, Massachusetts.
Charlie: That front door is gonna look great.
Tom: It's gonna look great.
And I'm really glad they're gonna reuse the old door.
Kevin: Next time on "This Old House"... Seven months ago, we met a family of five who dreamed of making their turn-of-the-century home lower maintenance and more efficient, while also opening up the floor plan to allow for more shared family space.
And thanks to some smart home plans and hard work, this house is proof that a few changes can make a big impact.
Oh, my goodness.
That's next time.
Search Episodes

Donate to sign up. Activate and sign in to Passport. It's that easy to help PBS Wisconsin serve your community through media that educates, inspires, and entertains.
Make your membership gift today
Only for new users: Activate Passport using your code or email address
Already a member?
Look up my account
Need some help? Go to FAQ or visit PBS Passport Help
Need help accessing PBS Wisconsin anywhere?

Online Access | Platform & Device Access | Cable or Satellite Access | Over-The-Air Access
Visit Access Guide
Need help accessing PBS Wisconsin anywhere?
Visit Our
Live TV Access Guide
Online AccessPlatform & Device Access
Cable or Satellite Access
Over-The-Air Access
Visit Access Guide


Follow Us